The World Beyond Wood

Kurt Hertzog on turning materials other than wood
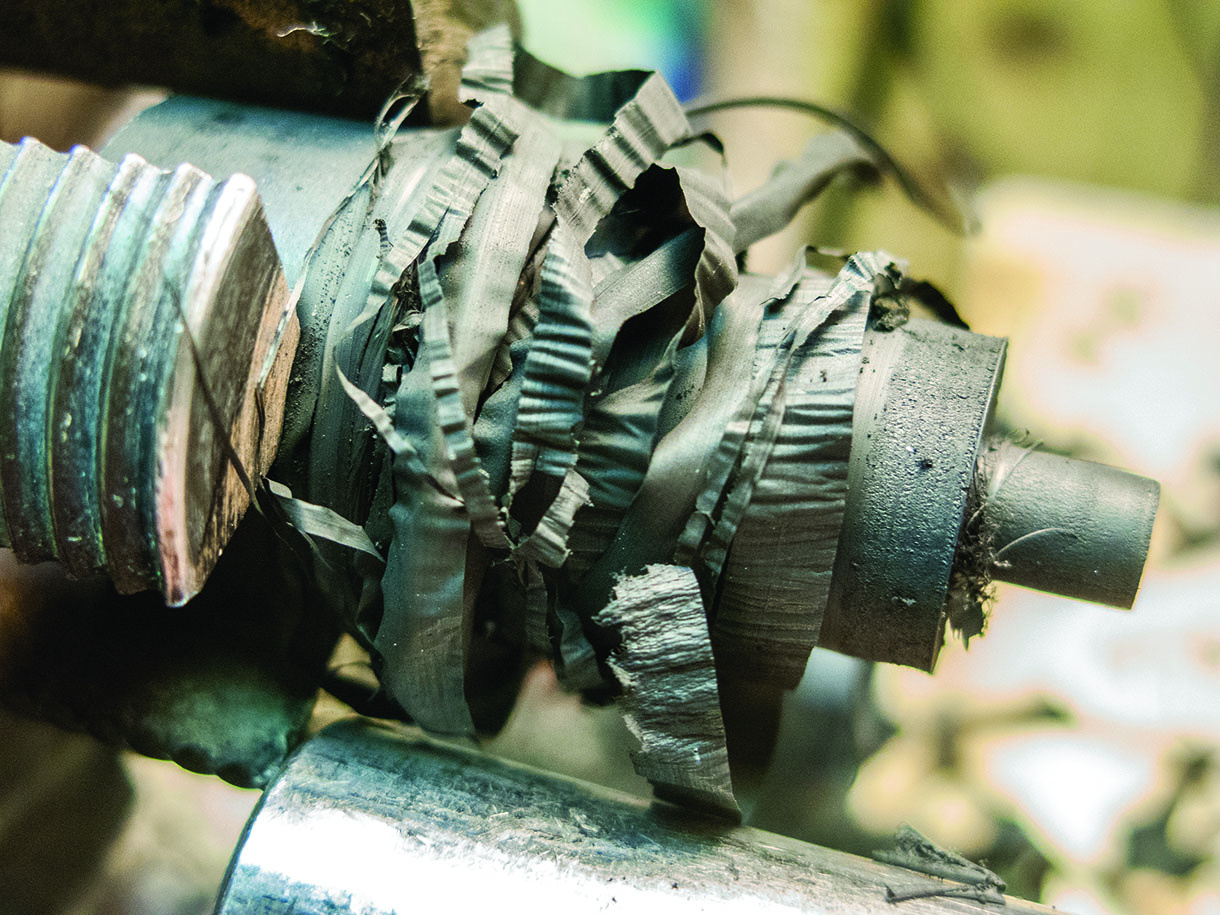
With more than 100,000 species of woods in the world, most turners shouldn’t have a need to look to other materials. The variety of characteristics and colourations these species present to the woodturning community should fulfil every real and perceived need. That said, however, there is a world of other materials that can easily be turned on your lathe with your existing woodturning tools and equipment. This month we’ll feature just a few of them and hopefully kickstart your exploration if you haven’t already ventured off the path of wood. Be aware, though, that this is only the tip of the iceberg. There are metals, plastics, bone, antler, stone and others galore. The selected items for presentation here are intended to be just a starter. Using them should need no additional tools or equipment beyond what is probably already in your workshop and kit. We’ll touch on just a few very readily available materials to get you going on your journey beyond wood. Safety In addition to the use of PPE for the standard woodturning safety including eye, face and breathing protection as needed, special considerations need to be taken. When turning metals, long shards of curled metal may be strung around the material or tools. The innate habit to brush off this debris presents very serious cut hazards. These curled bits of metal can be incredibly sharp creating very serious cut hazards with the simplest of contact. Always stop the machinery before attempting to remove any debris and especially when turning metals. Even with the lathe stopped or trying to remove debris curled around the tool, use caution to prevent being cut. A chip brush or a cut-proof carving glove to brush away any metal cutting debris is a wise idea.
What can you turn?
A better question would be ‘what can’t you turn’? As you think about alternatives to the traditional woods for turning, you’ll need to know what your tools can cut. With the commonly used high-speed steel tools, you’ll be able to cut just about anything that isn’t hardened. Your high-speed steel tools are the same cutting material that a machinist uses on a metal-cutting lathe. The only real difference is that his cutting tool is locked rigidly into a tool post and yours is hand controlled. Other than that, your high-speed cutters or carbide tools will work on materials that could be cut by a machinist. How can you tell for sure, especially with metals? Take a file and try to file the material. If it cuts with a file, it is soft enough to be turned on your wood lathe. If the file skates across the material without cutting it, it is a hardened material beyond your tool’s ability to cut it.
Tagua nuts
Tagua nuts are the seed of a tree similar to a palm but technically a different species. I’ve heard the name pronounced in many ways with the most common variations being ‘tag-goo-ah’, ‘tah-gwah’ and ‘tau-gew-ah’. I am not certain which of these, if any, is correct but one of them will convey your thoughts. Often called a palm nut, vegetable ivory, ivory nut, or faux ivory, it has been used for many years to create buttons and hand-carved items. It grows in the tropical rainforests of South America and is readily available through the craft marketing circles. Having become an alternative to animal ivory, the turning community has adopted it for small turnings and adornment where the appearance of ivory would be attractive. The biggest problem that tagua nuts present is that they are hollow. The internal cavity is often irregularly shaped and can be located anywhere. When turning regularly shaped lidded boxes or other similar items, this internal void can be troublesome. The nut can be mounted between centres to create a small tenon for mounting or have a sacrificial block attached with adhesive. The easiest way to do this is by sanding a flat and using that flat to attach your mounting block. Turning and sanding is a breeze. Both cutting and scraping tools will allow you to hollow and shape the tagua material to your desired shape. Sanding is exactly as you would do on a softer species of wood. The outer dark, hard shell can be cut away entirely or left partial depending on your end goal. The nut itself cuts like soap being soft and easily cut with sharp tools. My typical use is to slice the nut to provide accent pieces to be glued to my turning. This allows the ‘ivory accent’ to be integrated into drawer pulls, lidded box pulls, and finials for boxes and ornaments. I find that using two-part epoxy when adhering tagua nut material to other woods works best. You can also use hot melt glue to fasten things provided you’ll be using a light enough touch. The fun part of tagua turned material is the ability to accept dyes. Give any of your dyes a try. I find my Jacquard silk dyes work nicely.
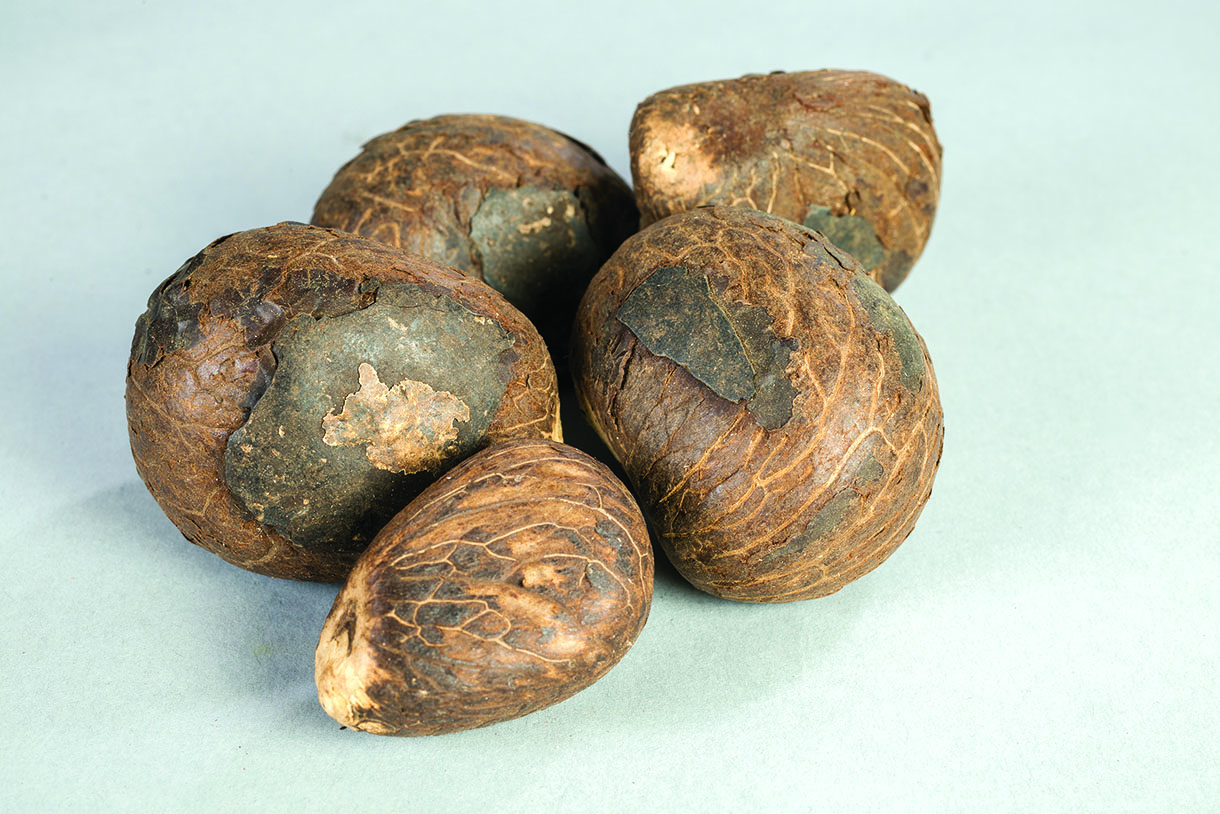
Tagua nuts are available in a variety of shapes, sizes and freshness. The internal colour seems to vary with age
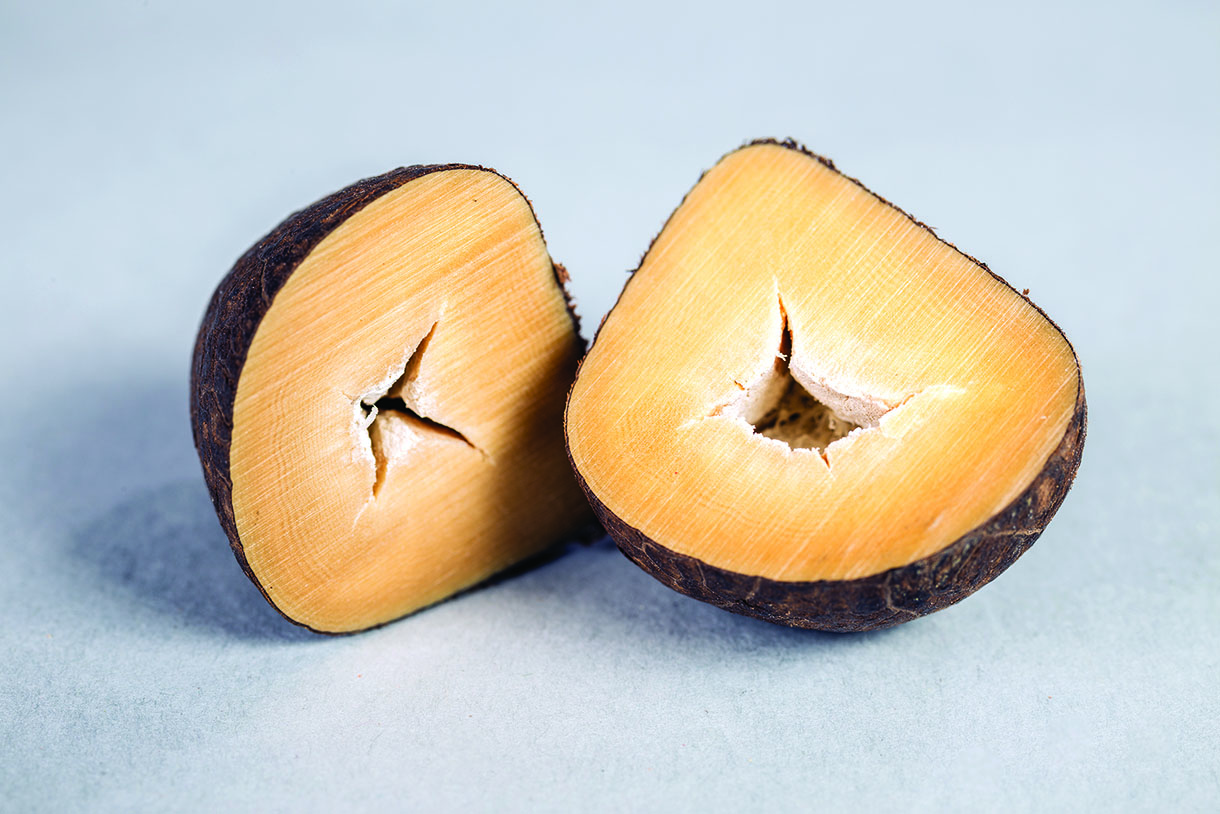
The nut’s internal void is irregular in shape and placement which can potentially present issues with turning projects
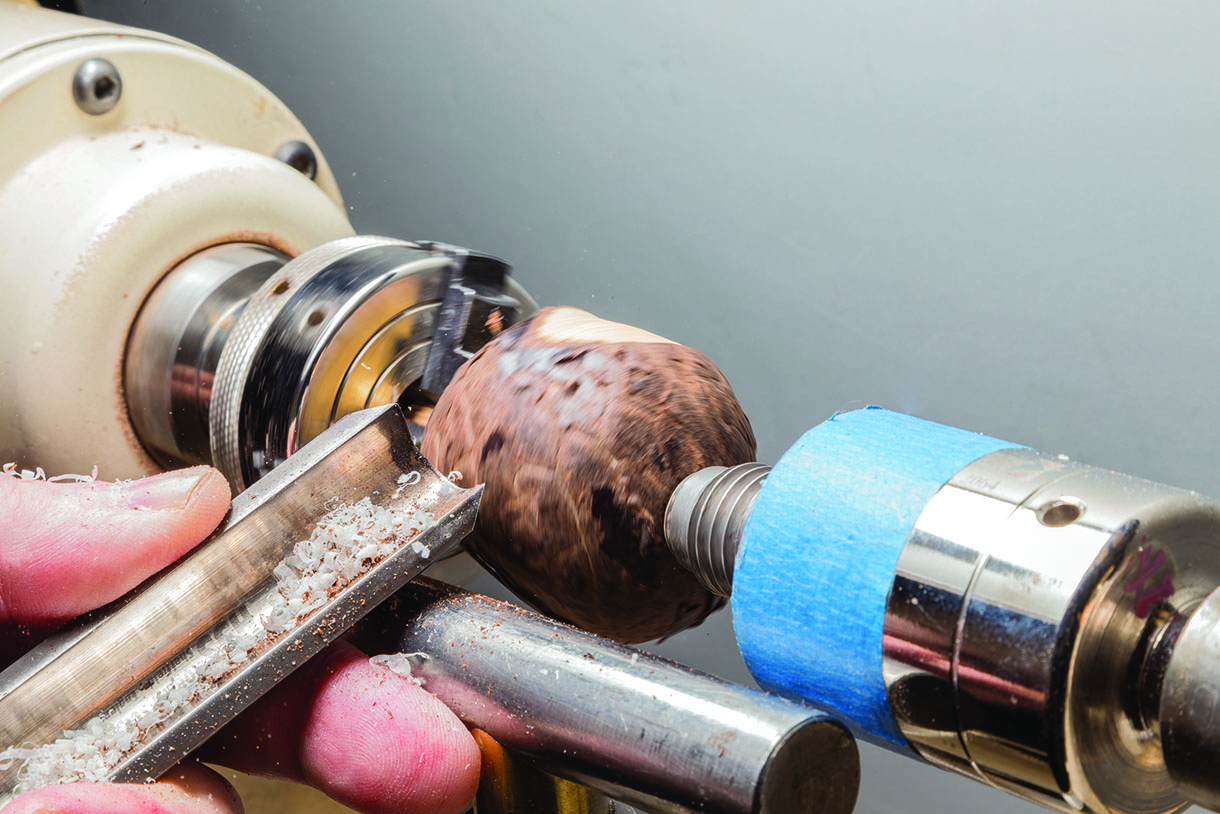
Tagua nuts cut very nicely with sharp tools and are sanded exactly as wood…
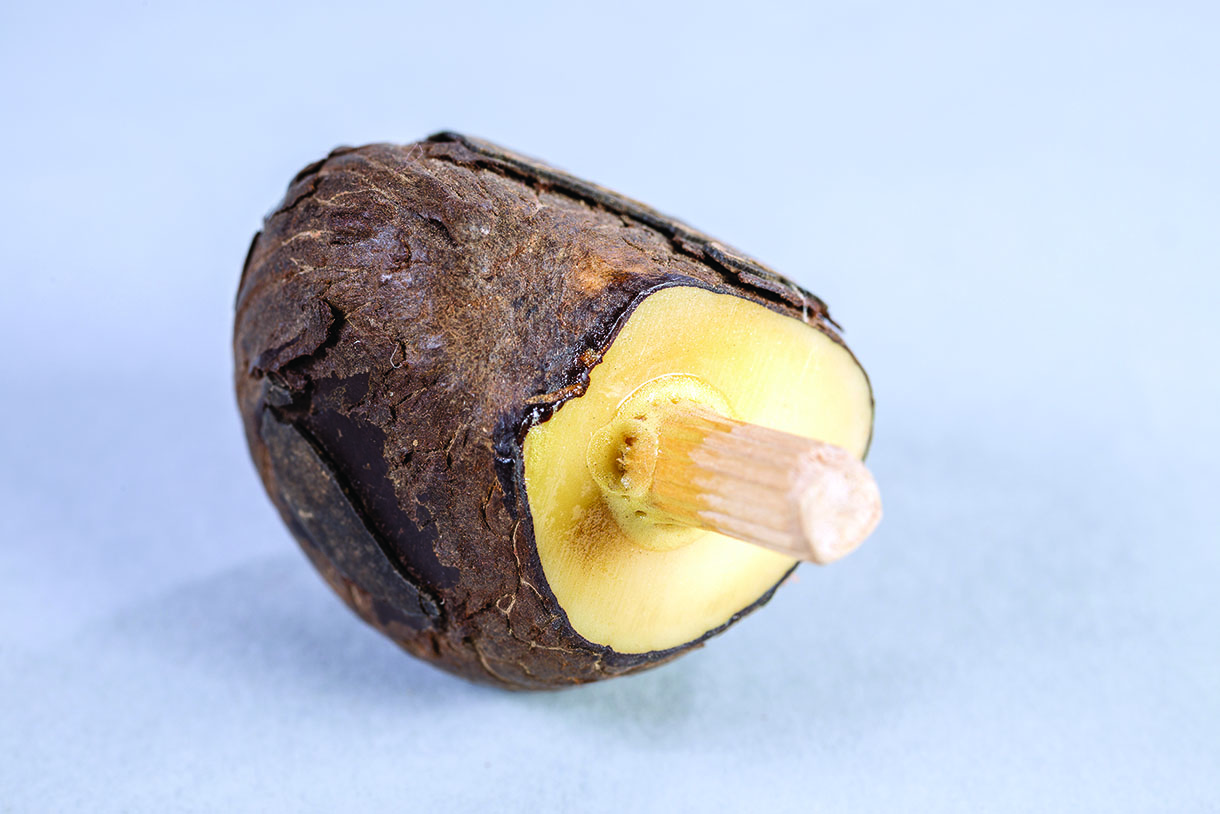
… they’re also easily mounted on a dowel, sanded flat with glue block, or a small turned tenon…

…and fun can be had colouring them. They take readily to dyeing with most art dye brands
Antler
Antler is a fun material to turn on your lathe. Depending on where you live, you may have access to naturally shed antler just by walking through the woods. The best time to find shed antlers in the wild is late winter to early spring. Grown on the members of the deer family, this bone material can range in size from quite small (roe deer) to incredibly large (elk and moose). For those who don’t have access to antler from the hunting community or naturally shed, a variety of antler is available for purchase on Ebay and other mail order outlets. Antler is often marketed as dog chew material.
The make-up of antler is nearly identical regardless of the species or size. The outer shell is hard and solid with the inner portions being porous in the thicker sections of the antler. This porosity can be a problem for the turner depending on their planned project. The two methods that I have had success with when the porous inner-antler material presents a problem are CA adhesive and stabilisation. To fill the pores, soak the area with thin cyanoacrylate adhesive, allowing it to wick in. If accelerator is needed, use it very sparingly to prevent the white foaming. Just mist a small amount of accelerator on the surface to allow the cross-linking process to kick off. As you continue to cut into the porous areas, you may need to repeat the CA treatment.
If you have the capability to do stabilisation, the exposed ends of a cut antler will allow that stabilising chemicals to be drawn in by vacuum and then heat processed to rigidity. The hard outer shell material will vary widely in wall thickness based on the species and antler size. Antler material is usable from any portion from the pedicle (base) to the crown tine (the very tip of the antler). The diameter, shape, and curvature comes into play. Stunning lidded boxes can be made from the pedicles of larger antlers. Don’t turn away the hard outside irregularities. They add character. Much like you’d match the top and bottom of a box, the same can be done with the antler material.
Pen makers are big users of antler material. Picking a straight area of the antler to cut and drill, the outer portion can be left intact providing a rustic look if desired. Turning away the outer casing may reach into the porous inner and need to be stiffened for turning and finishing.

Deer family antler, which is a fun material to turn, is available in a wide variety of sizes and shapes depending on the species
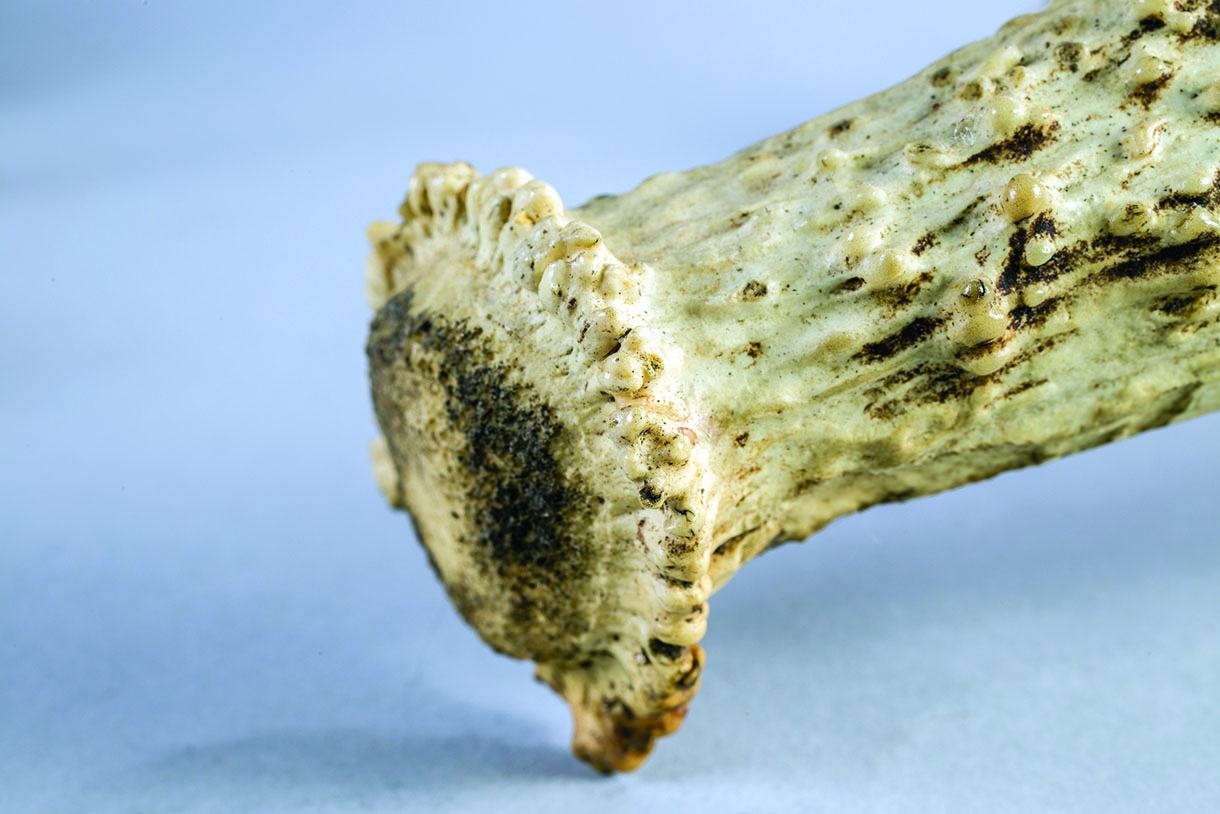
The antler pedicle or base is often turned to create a lidded box leaving the unique outer surfaces
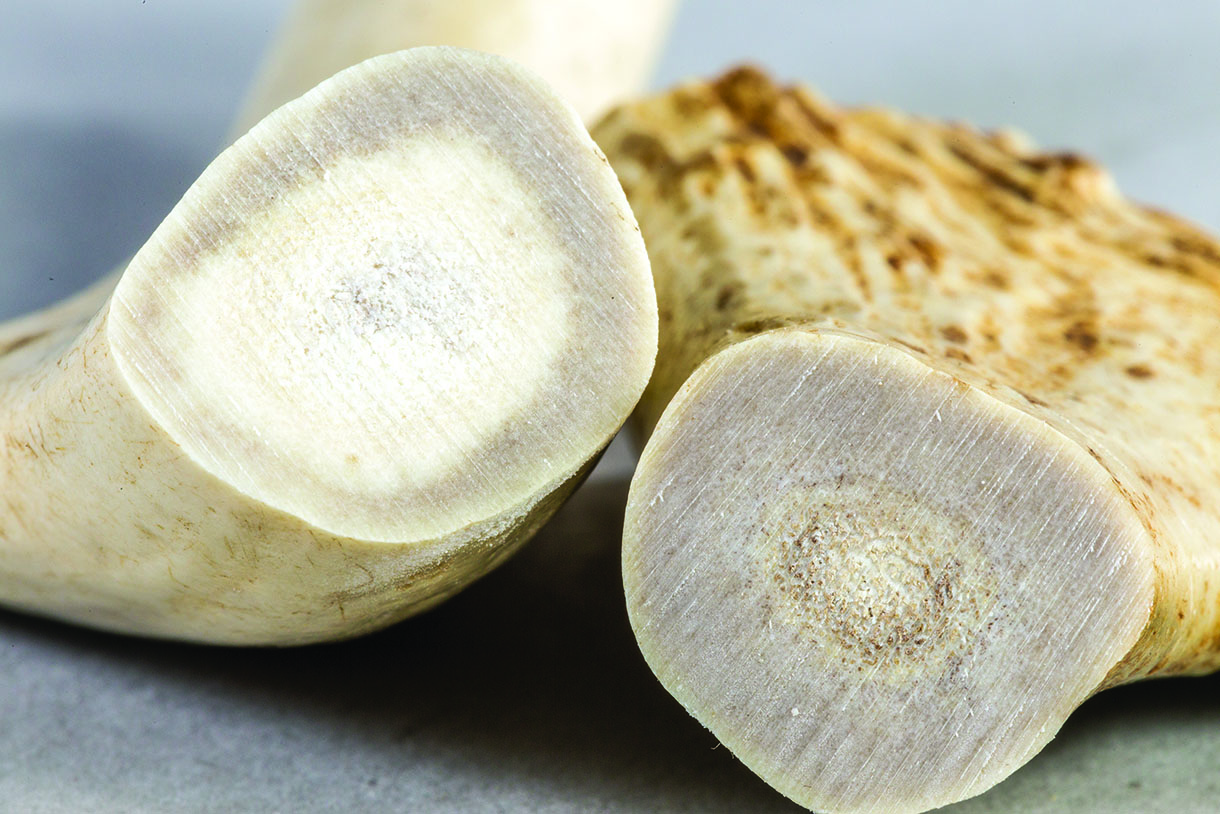
Antler has varying densities from the hard outer shell to the sometimes very porous inner portions
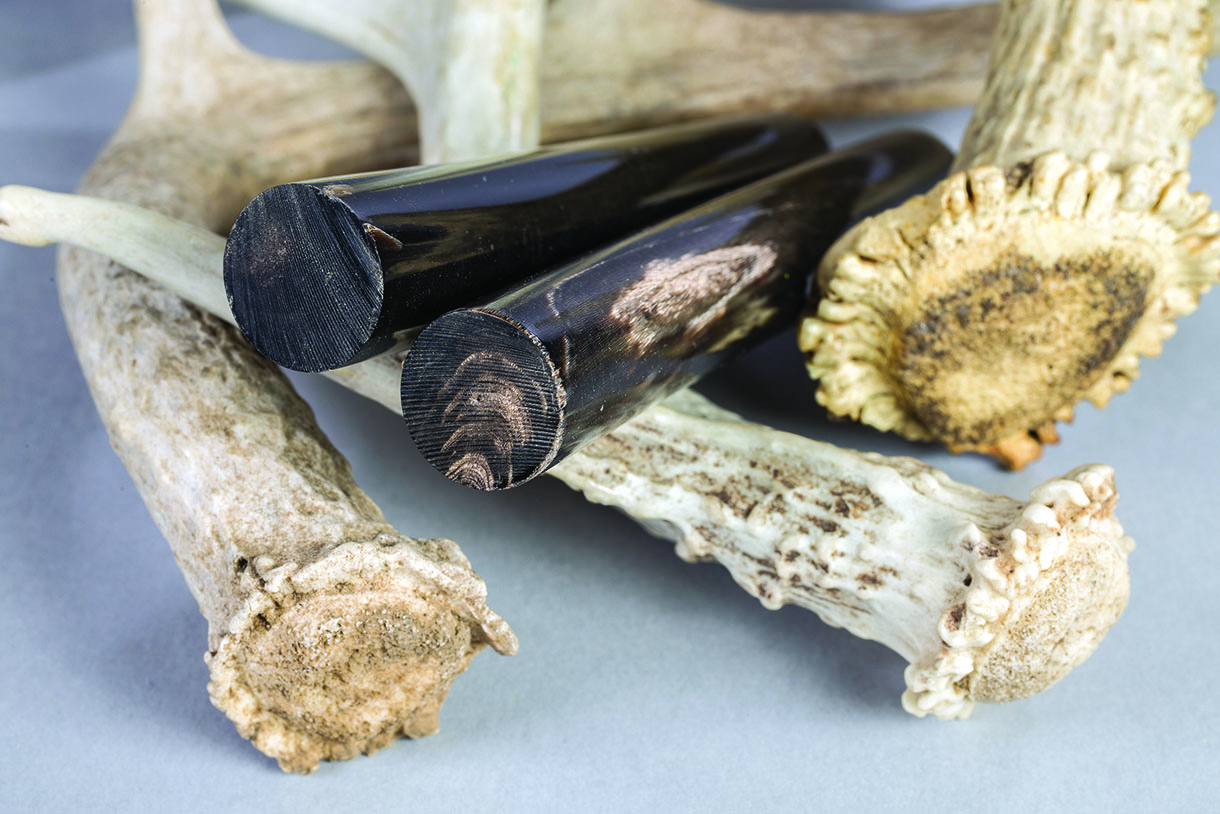
In addition to purchasing antler online, you can find sources for water buffalo horn
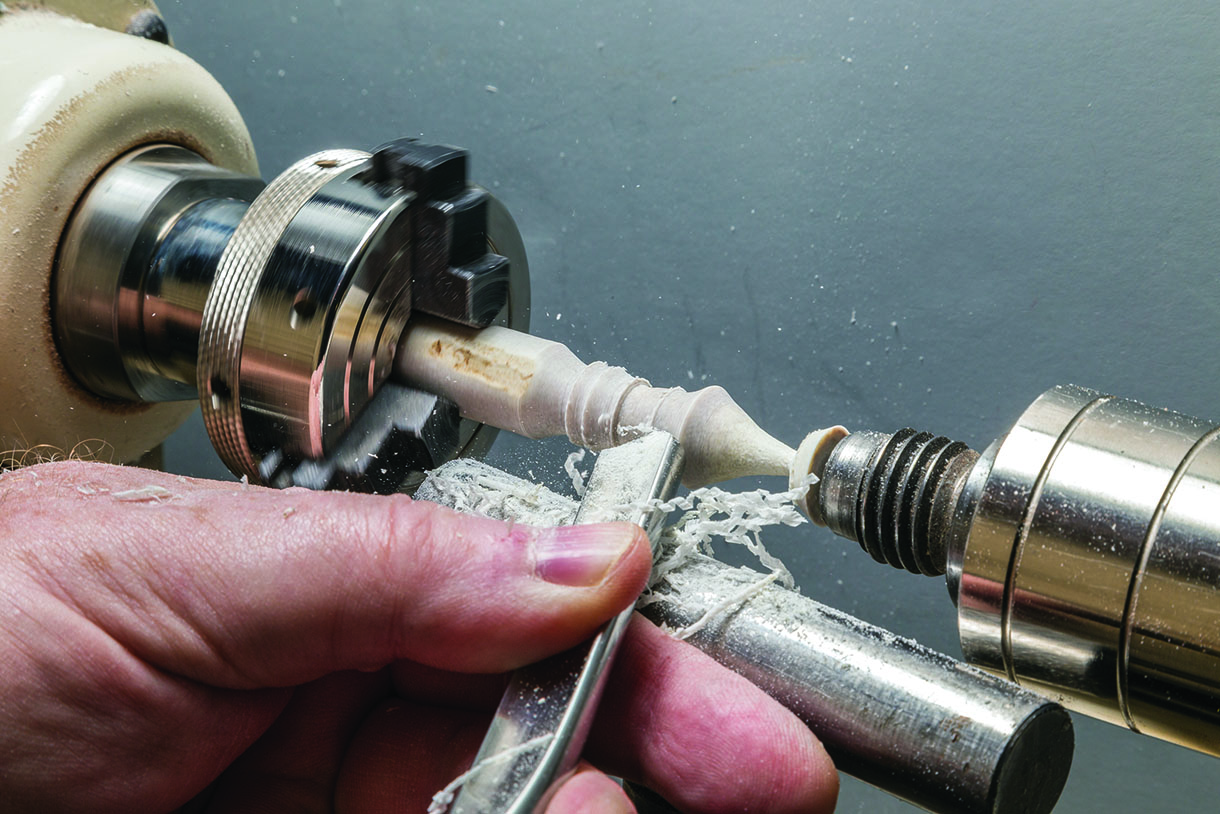
Antler turns and finishes quite nicely using standard woodturning tools and abrasives
Metals
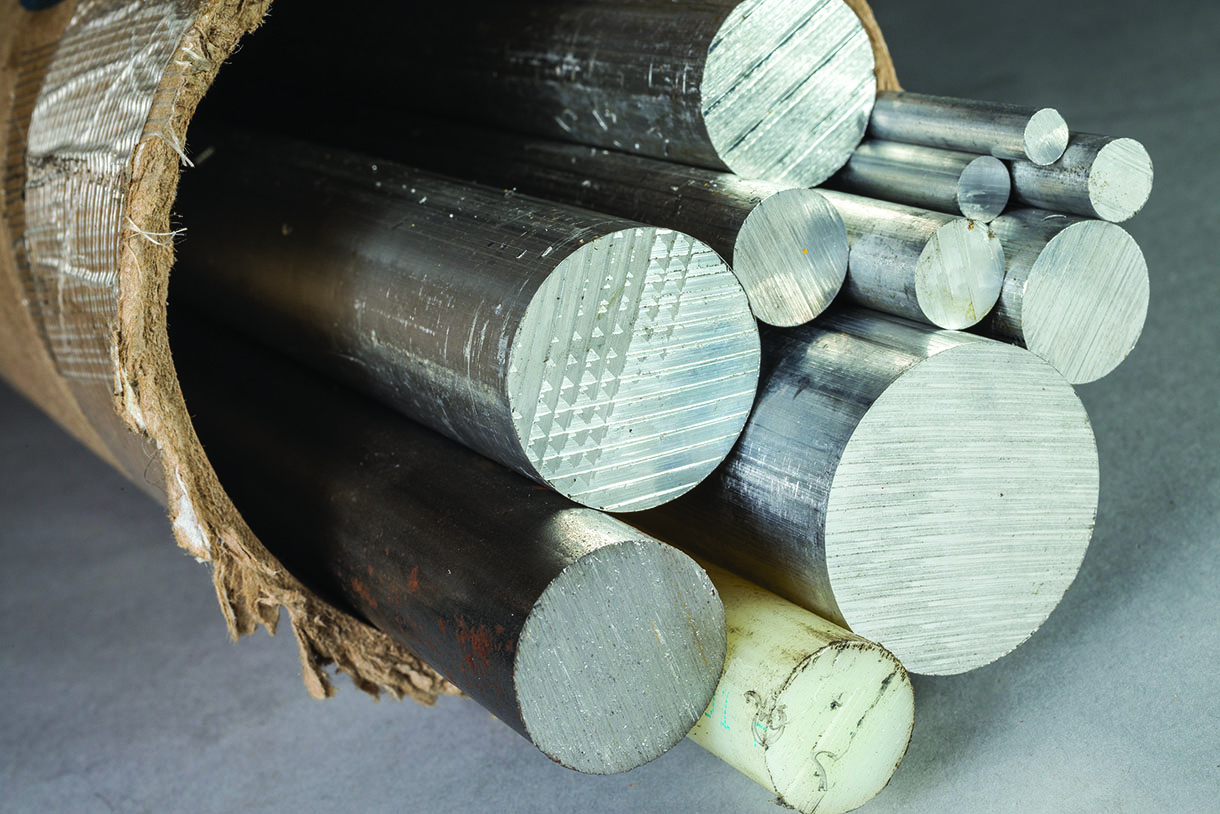
Virtually any metal that isn’t hardened can be turned on your lathe. This opens up steels, aluminium, brass, copper and any other metal soft enough to work with. After testing with your file as noted before, you can be assured your high-speed steel woodturning tools can be effective on these materials. Whether you are using metals as part of your turning project, or as fixturing for use in workholding, you can turn and drill these materials quite readily on your wood lathe. You won’t have the ridigity of the cutting tool that you would have on a metal lathe but you’ll have the freedom of shapes and movement that are difficult on a metal lathe. One of the beauties of dealing with metals is that you’ll often be starting with round stock. This has two immediate advantages. First, workholding is very simple and straightforward by using a chuck or a collet. Coming in standard diameters, a collet of the proper size will securely hold the stock for turning as well as being able to be precisely remounted should it need to be removed.
Perhaps a bigger advantage is that it starts out round, not requiring the effort to remove corners. It will be round and accurately sized as purchased. That doesn’t mean you may not work with block materials but more often than not you’ll have the advantage of starting with round stock. Unless you’re given the material, you’ll need to purchase it from an industrial supply house, but it is also available by mail order and on the internet. My suggestion would be to do a bit of research rather than just picking at random. The machinability of metals is based on their alloy and how it has been tailored.
Aluminium, for example, can be machined nicely, but it can also be a nightmare depending on which alloy you select. A conversation with your local supplier or careful research online will let you pick metals and their different alloys that are most workable for you. The proper selection will give you the most favourable experience. A wealth of information is readily available on the internet to help guide you in your selection. When purchasing metal bar stock, round or flat, it is usually sold in 3ft or 6ft lengths. You’ll need to cut it to the appropriate length for use in your application.
While a metal cutoff saw is a joy to which most won’t have access, an inexpensive hack saw with the fine toothed metal blade will work. It takes more effort but it’s very workable. While I’ve noted you can turn steels, I have two metal lathes so I do my steel fitting and adapter work on those. I use brass, aluminium and copper on my wood lathe to create finial, ferrule and pen parts. Turning by hand allows for shaping and curves that are very difficult to execute on the metal lathe.
Depending on your metal and the desired shape, you may find that scraping is superior to cutting. I can’t provide any specific recommendation other than trial and error. Speeds and feeds will vary on the alloy as will the tool best to be used. I’ve been cautious to select free machining alloys of aluminium and brass to make my turning process as easy as possible. When selecting your cutting tool, find a spot to test the performance of your cutting and scraping tools. I advise slow process. Because you’ll be controlling the tool, you won’t have the cutting control you would on a metal lathe. Too aggressive will be troublesome. You can use your standard woodturning abrasives to sand your metal turnings, especially if they are cloth-backed or wet/dry types, but if you intend to do much metal turning, you may wish to invest in emery cloth. Intended for metal work, you may appreciate it as an addition – or an alternative – to regular sandpaper abrasives.
If your town doesn’t have a metals supplier, there are online sources for metals and plastics
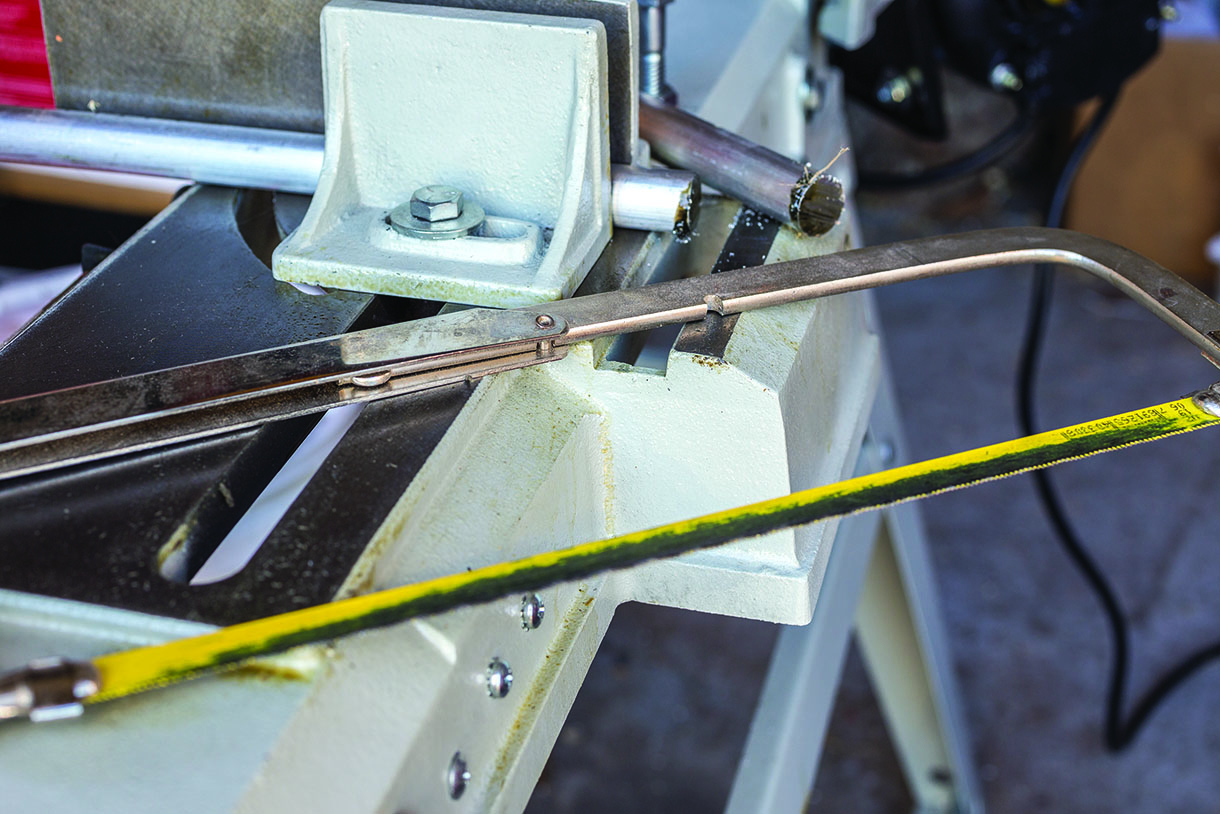
A cutoff saw is a nicety but a regular hacksaw with a fine-tooth metal blade will cut your metal stock
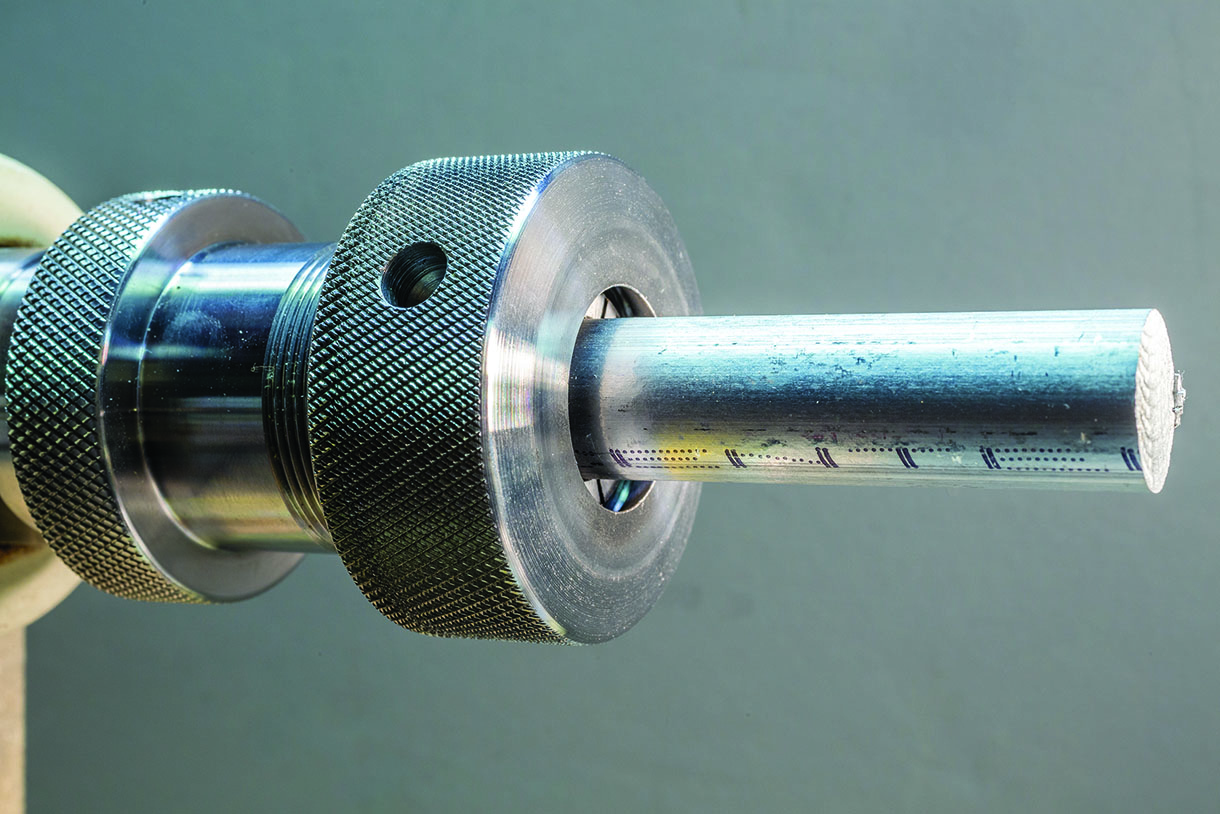
The beauty of metals in round stock is the ability to workhold and accurately remount in a chuck or collet
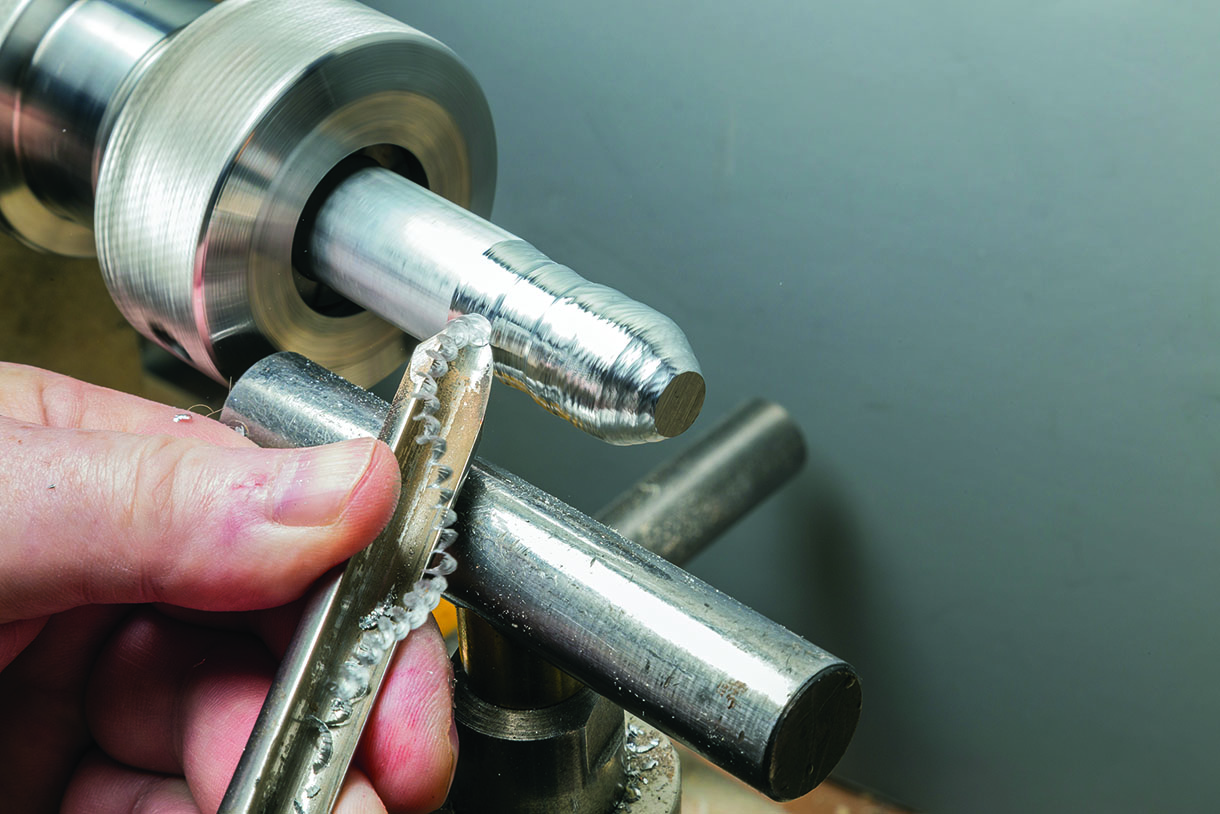
A sharp, properly presented tool will deal with brass, aluminums, bronze and soft steels (alloy depending)
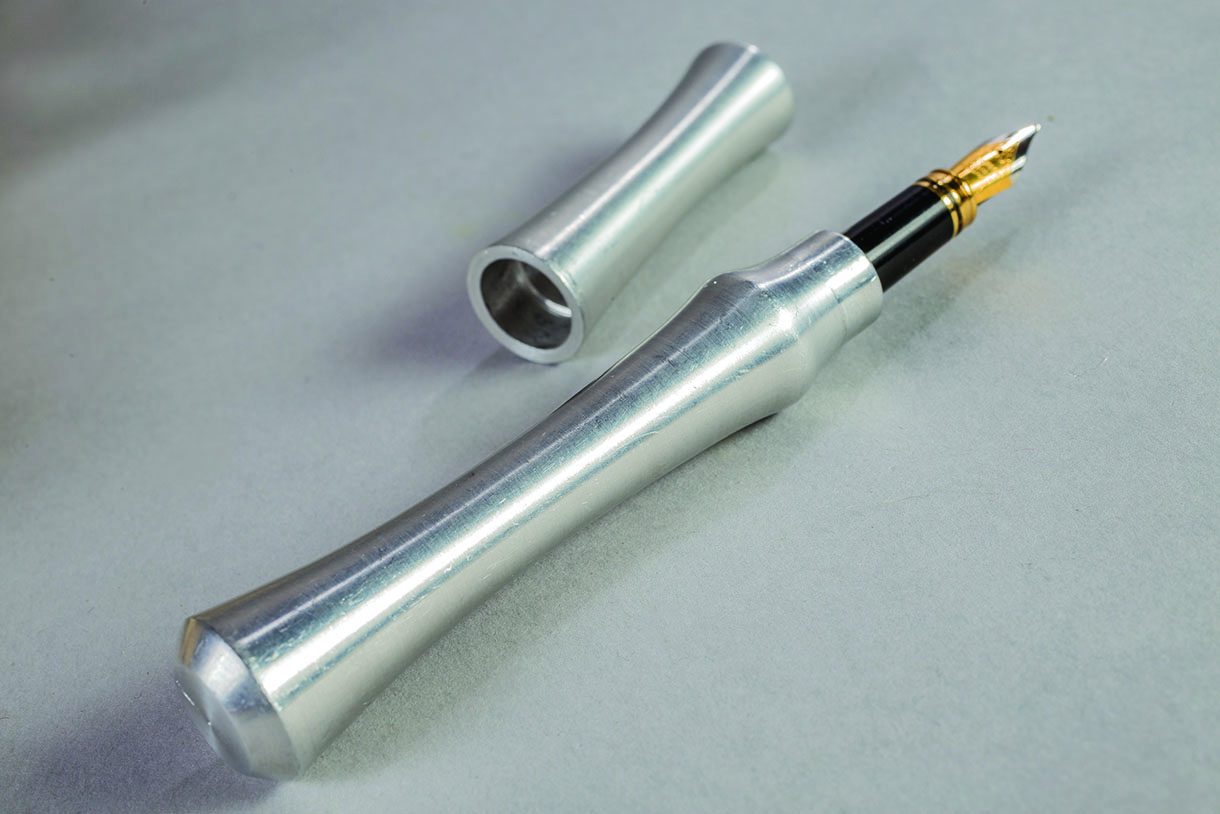
Seems like everyone should make at least one aluminum pen. Simple shapes work best with metals
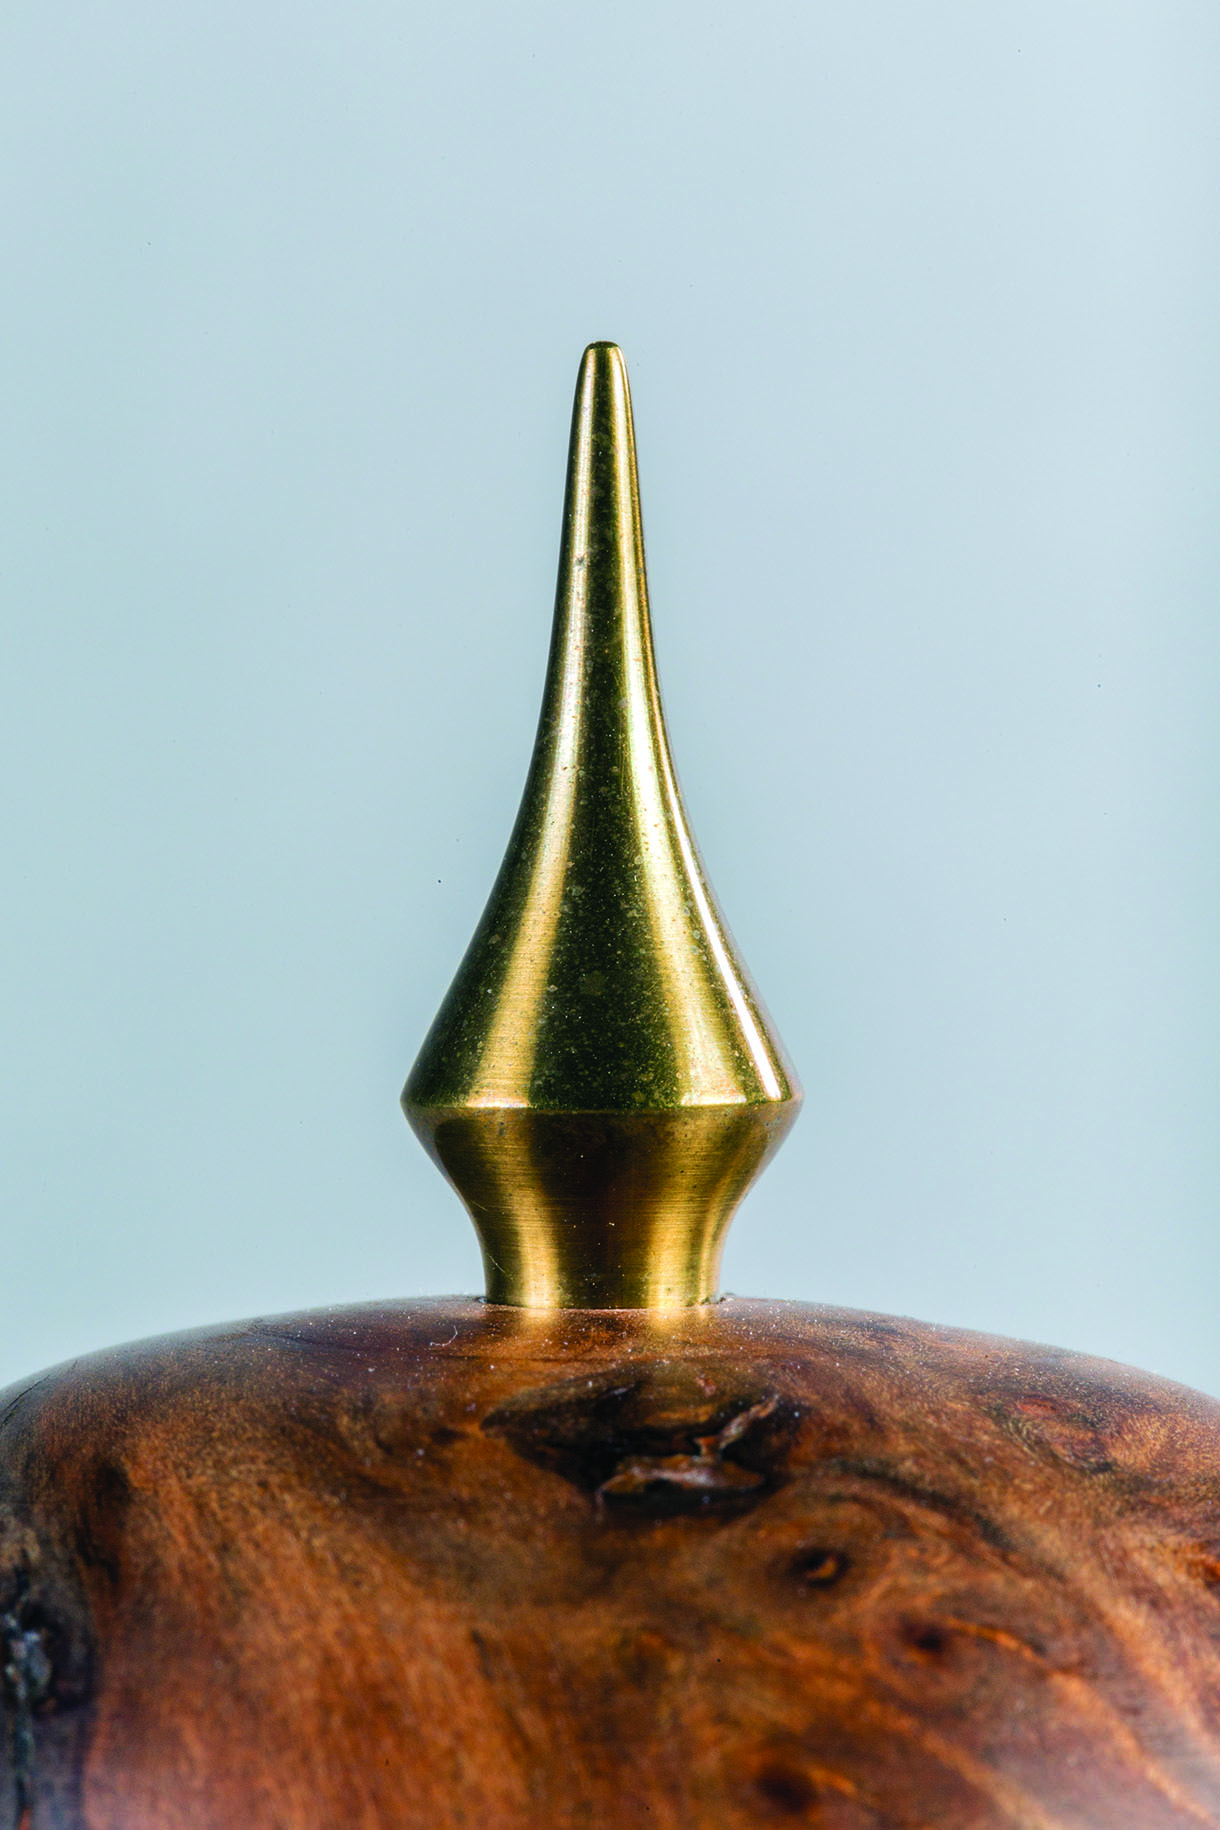
A brass pull on a green turned burl lidded box. The brass cuts but also scrapes well
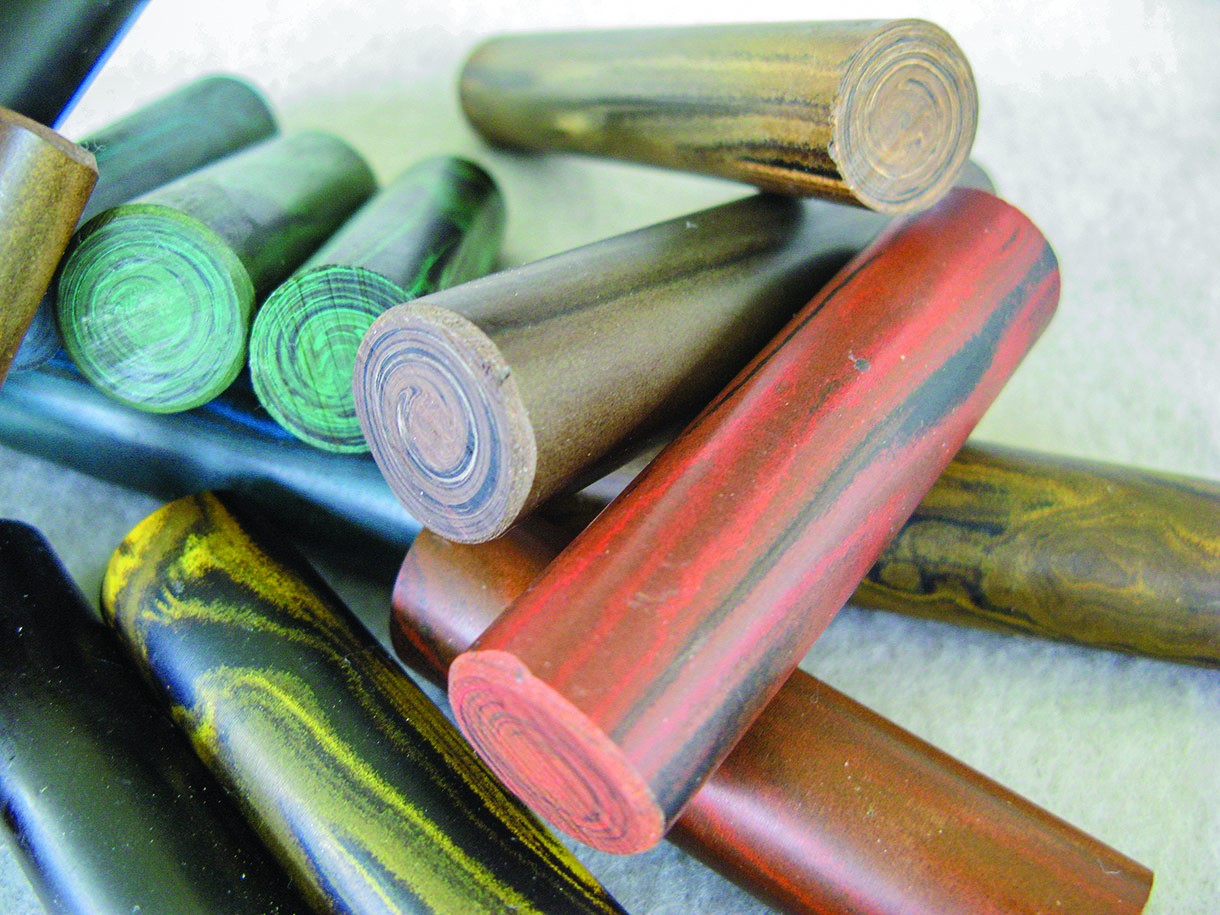
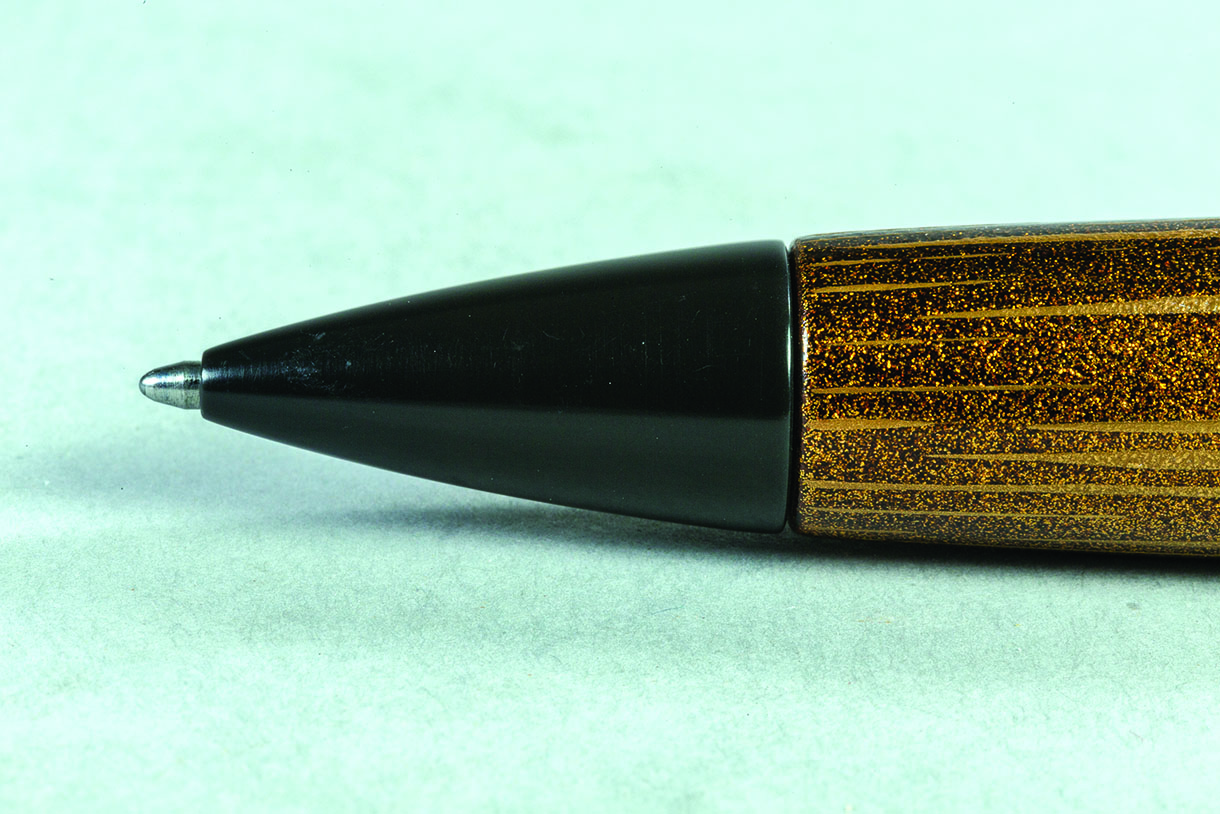
Ebonite
Unless you are involved with smoking pipes, sax or clarinet mouthpieces, or a pen aficionado, you may have never heard of ebonite. In the past, it was used for a variety of things including bowling balls. Long since replaced for many applications, ebonite has faded until recently. Fountain pens and nibs were made from ebonite for many years but some companies have moved on. The renewed interest in the collectable pen market has brought a bit of a rebirth for ebonite. There are now companies producing specifically for the pen turning market. Many of the high-end custom makers tout the use of ebonite in their products. If you have an interest, you can easily work ebonite just like you would work with plastic. It cuts, sands, threads, and polishes easily. For the pen purist, ebonite is the only way to go. The modern offerings to the retail pen turning market are a joy to work with although a bit pricey.
Ebonite doesn’t have to be reclaimed from old bowling balls. There are modern makers that are supplying it again
Ebonite doesn’t have to be reclaimed from old bowling balls. There are modern makers that are supplying it again

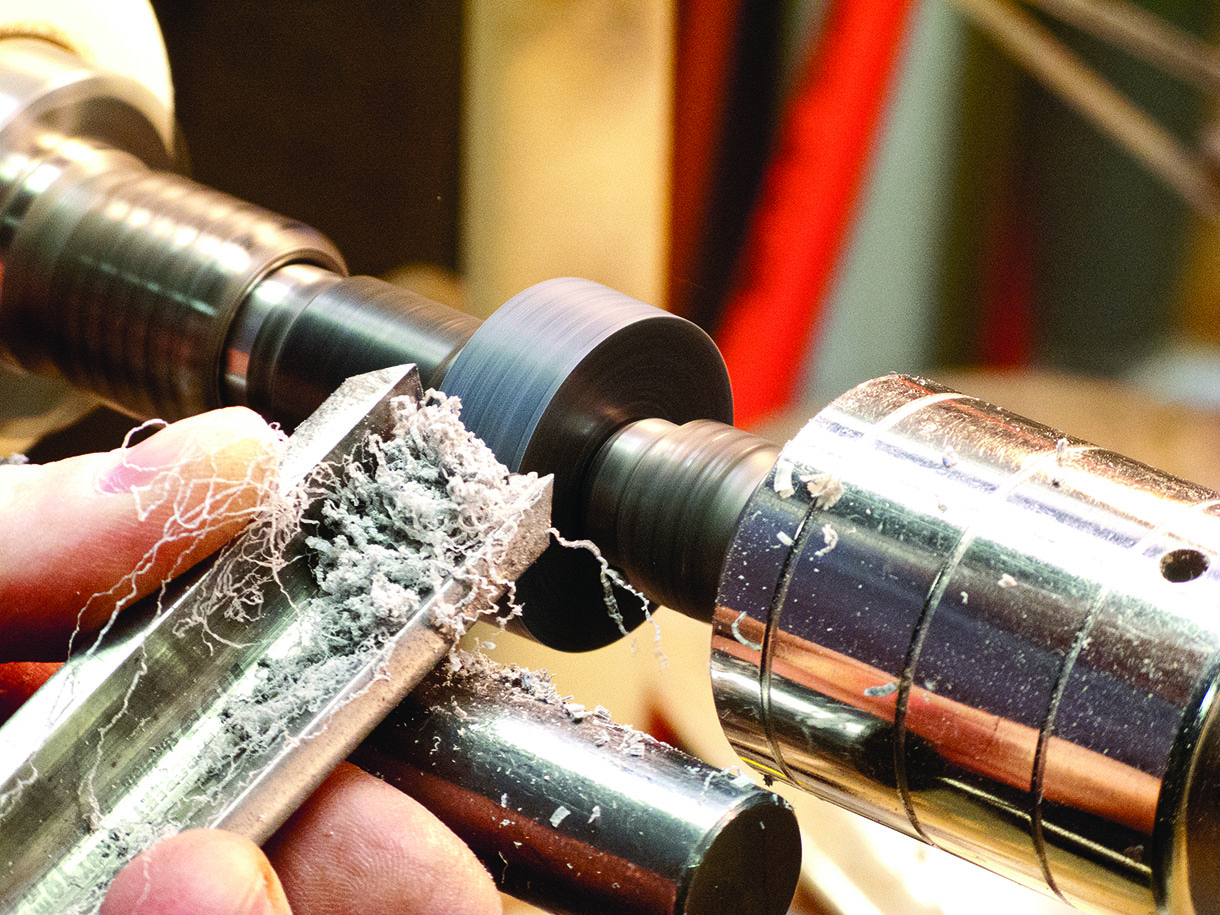
A test fit for a custom nib blank prior to separation for finish cuts and sanding
Final dry fit prior to finish sanding and then MicroMesh to get the ebonite to pop
Solid surface materials
Last but not least, I’ve included solid surface materials. There are a host of these made and offered under a variety of trade names. I’ll speak specifically of my experience with Corian by DuPont. Others may perform similarly but perhaps not exactly so be certain to do small-scale testing prior to committing to methods I offer here. I’ve touched on Corian in the past but want to delve a bit further into it here. Corian, a filled acrylic polymer, i.e. plastic, has been around since the 1960s. Primarily a countertop and shower-surround material, it has some very admirable qualities to the turner. It is very dense and turns nicely with sharp tools. Imagine a dense wood that has no grain orientation. As such, it cuts nicely in any direction as well as takes threads without the frailty that wooden threads often present. Because there is no grain, Corian can be turned extremely thin yet retain great strength. The term solid surface was selected to tout the colour continuity throughout the material. What you see on the surface is what you can expect throughout the material. Corian is only available in certain thicknesses. If thicker material is needed, you’ll need to create it yourself by bonding multiple pieces together. Whether the same colour or a different colour, you can easily fasten Corian to itself to create blanks of your desired colours and dimension. DuPont markets the adhesive for Corian used by the professionals but it is expensive and one-time mixing. My method for fastening Corian to Corian, while not advocated by DuPont, works well for my needs. I use medium viscosity CA adhesive to bond pieces. The pieces need to be flat and clean to provide a good bond. I flatten both surfaces using a sheet of abrasive on top of a very flat surface. A surface plate, band saw, or table saw cast iron top will work well. Once the surfaces are sanded flat as witnessed by a complete coverage of sanding dust, I clean both surfaces with denatured alcohol and refrain from touching the clean areas at all. Medium CA is spread entirely over one of the cleaned surfaces. This needs to be complete coverage since the clamping can’t be relied on to spread the adhesive. Once covered, the two surfaces are put together, quickly rubbed, and immediately clamped. I use spring clamps and cover as much of the available area with clamps as possible. No accelerator is needed or is used. After resting under clamp load for at least 24 hours, the assembly is ready for use. Should a stack of more than two be required, that assembly can be then processed to be bonded to another single piece or another two-piece assembly. The sanding, cleaning, spreading of adhesive, wetting and clamping of subsequent pieces is exactly the same. In the past, I have created stacks of eight pieces without difficulty. I use my method only for bonding together pieces that will never be used as structural components and I use caution with my speeds and feeds of assembled components. This common-sense approach is no different than one you should be using for assemblies of wood as well. Corian turns, drills and finishes marvellously. Being a plastic, it will cut well with sharp tools but you can also use a scraper. I find a scraper is the best tool for hollowing after drilling. Where Corian really excels is the finishing process. You can use the standard abrasives but will be able to impart a mirror finish by sanding far beyond the normal. After 400 grit, move to MicroMesh and proceed to that endpoint of 12,000. You can also use various plastic polishes if you wish. Buffing beyond that will also further improve the sheen. Over the years, I’ve used Corian for pens, funnels, lidded boxes, small platters, stemware bases and more.
Being a filled plastic, Corian cuts extremely well with woodturning tools
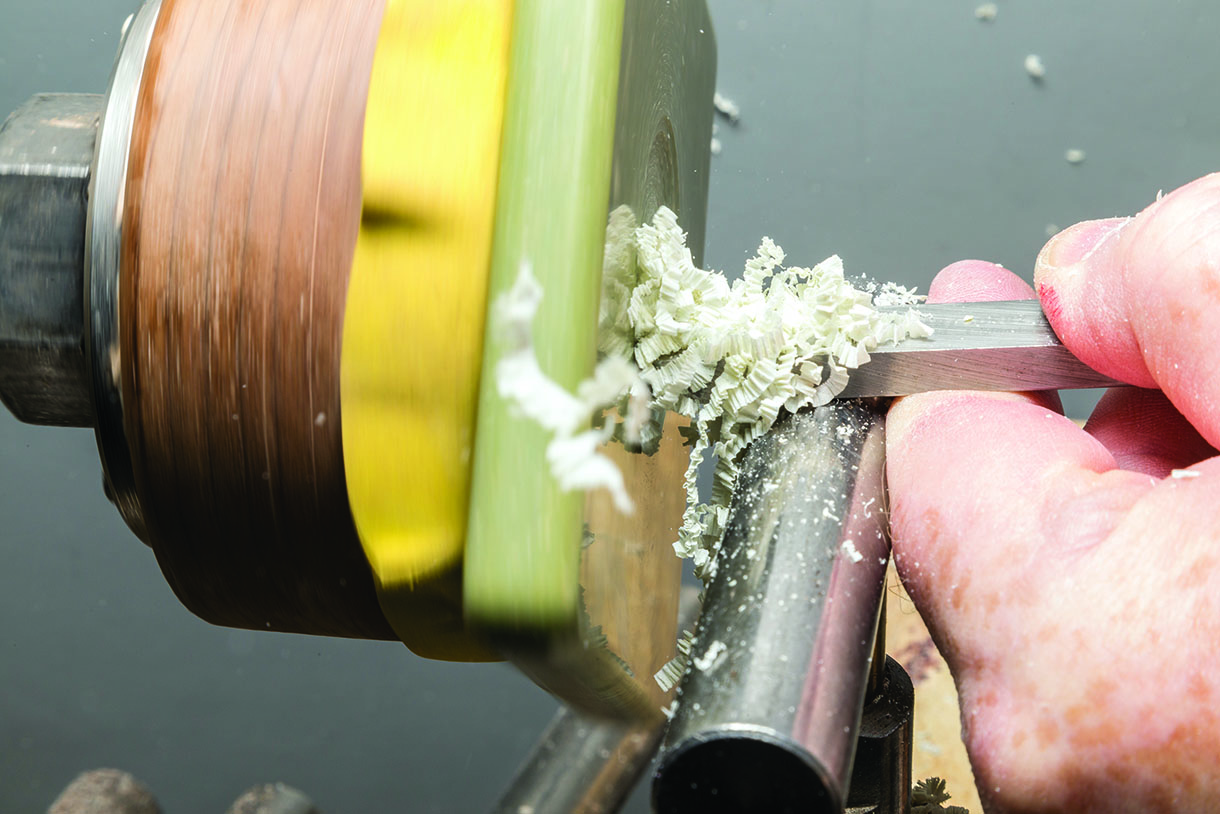
Hollowing and dishing tend to work better with a scraper. The aspect ratio of the material will have an impact on your choice
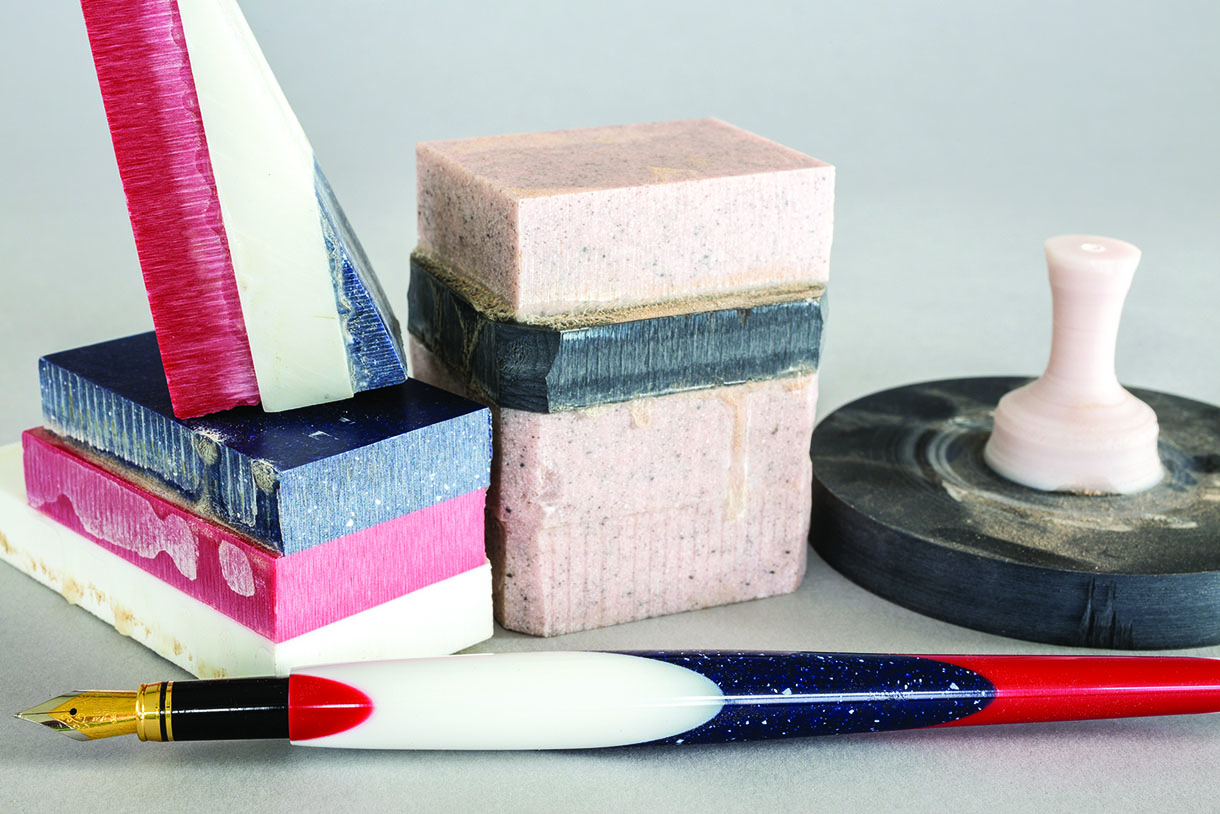
Gluing up the various colours or pieces allows for unavailable sizes and shapes. A good seam can be created
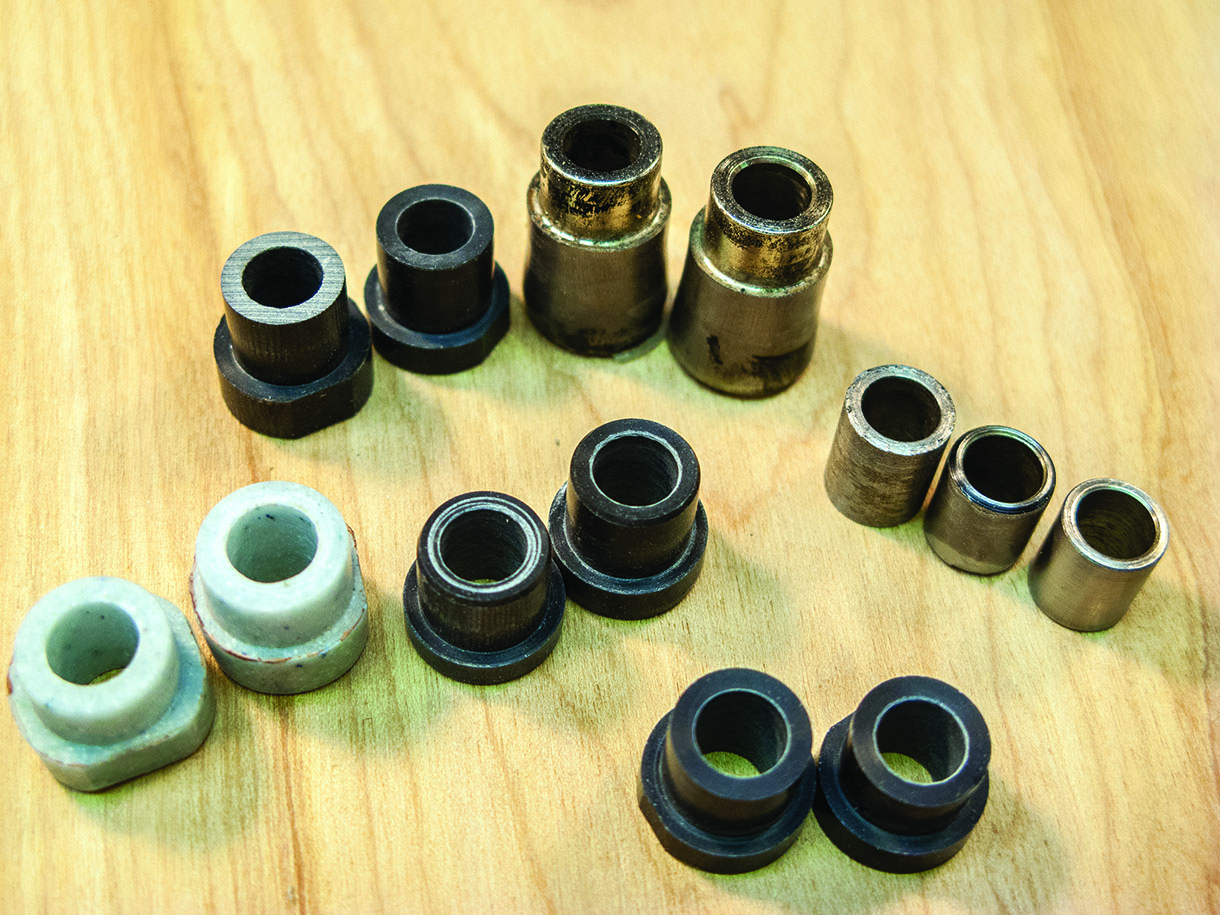
Don’t lose sight of jigs, fixtures, workmounting aids, bushings and more with your alternative materials
ConclusionsIf you haven’t ventured out of turning wood, you are missing much of the fun. View your wood lathe solely as something to hold and spin your material. With that done, you can present your tools to any material you can hold safely and your tools can cut. Don’t be bound by wood as your material. Other than hardened steel, chances are your high-speed woodturning tools will cut nearly anything. Another suggestion is not to be locked into the rut of believing all your turnings need to be a final product. You can use your lathe to create fittings, special adapters, shims, bushings, workholding aids and more. I’ve made chair caster parts for a very favourite office chair when replacement parts were no longer available. We have club members who turn frozen fruits and vegetables in addition to wood at demos for the public. Giving a member of the audience a nicely turned potato to go along with a wooden top certainly gets a laugh from the crowd. The point of this column wasn’t to give you all of the answers but really to get you asking the question ‘why not’? Try something different. Do it safely but experiment and have some fun!
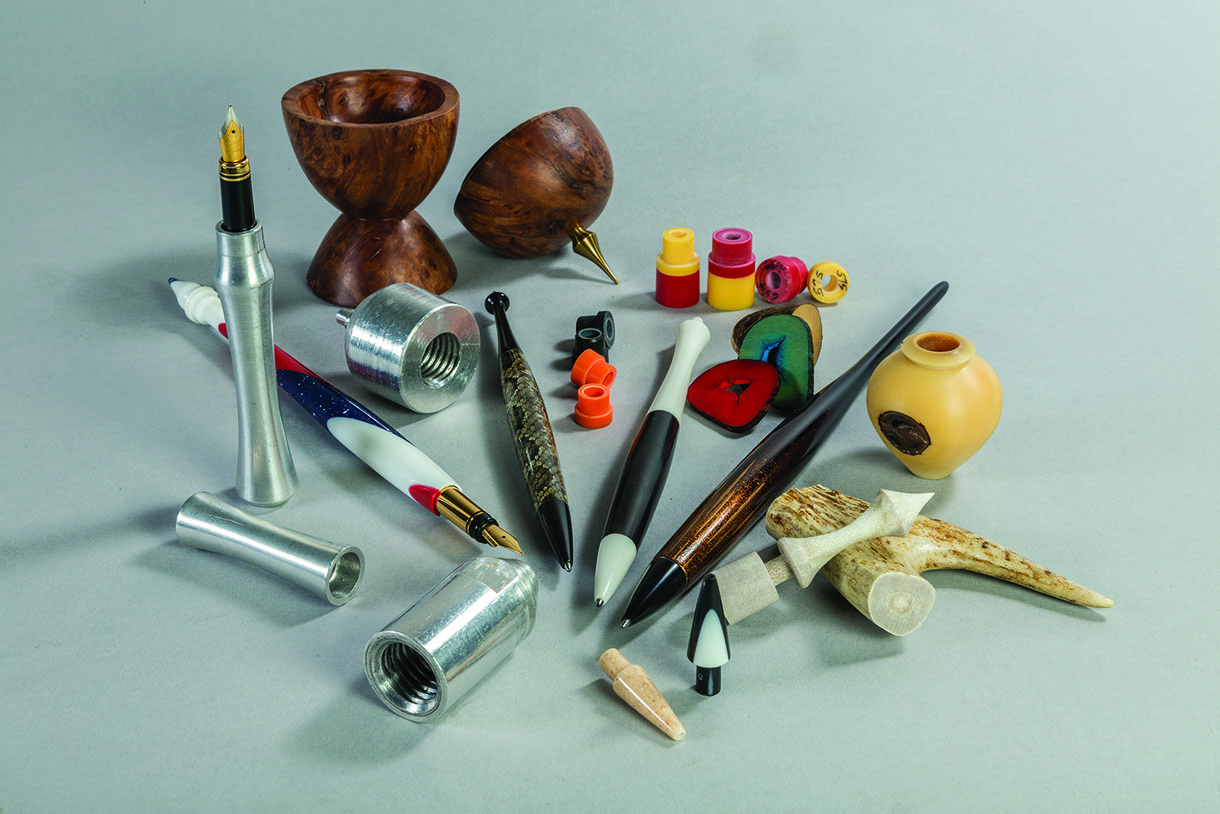
Turning tools and equipment are very versatile. Whether turnings, bushings, jigs, or workholding aids, explore the world beyond wood


