Freehand Routing
The term freehand is slightly misleading, suggesting holding the router with some means of guidance but not fixed in a router table. Overhand might be a more accurate way of putting it, but however you are using a router that isn’t table mounted, you need proper control over it if you are going to avoid getting a spoiled result. Here are some tips and tricks to help you steer clear of problems. One of the most basic is a router T-square either with or without a guidebush slot in the middle. It needs to be made with a fence exactly perpendicular to the board on top. The advantage of a slot is the router cannot deviate off course and is the right way to make plain or dovetail housings for carcass construction. If you do make dovetail housings you need to use a straight cutter first to relieve the strain on the dovetail cutter, which will follow afterwards.

One of the most basic is a router T-square either with or without a guidebush slot in the middle. It needs to be made with a fence exactly perpendicular to the board on top. The advantage of a slot is the router cannot deviate off course and is the right way to make plain or dovetail housings for carcass construction. If you do make dovetail housings you need to use a straight cutter first to relieve the strain on the dovetail cutter, which will follow afterwards
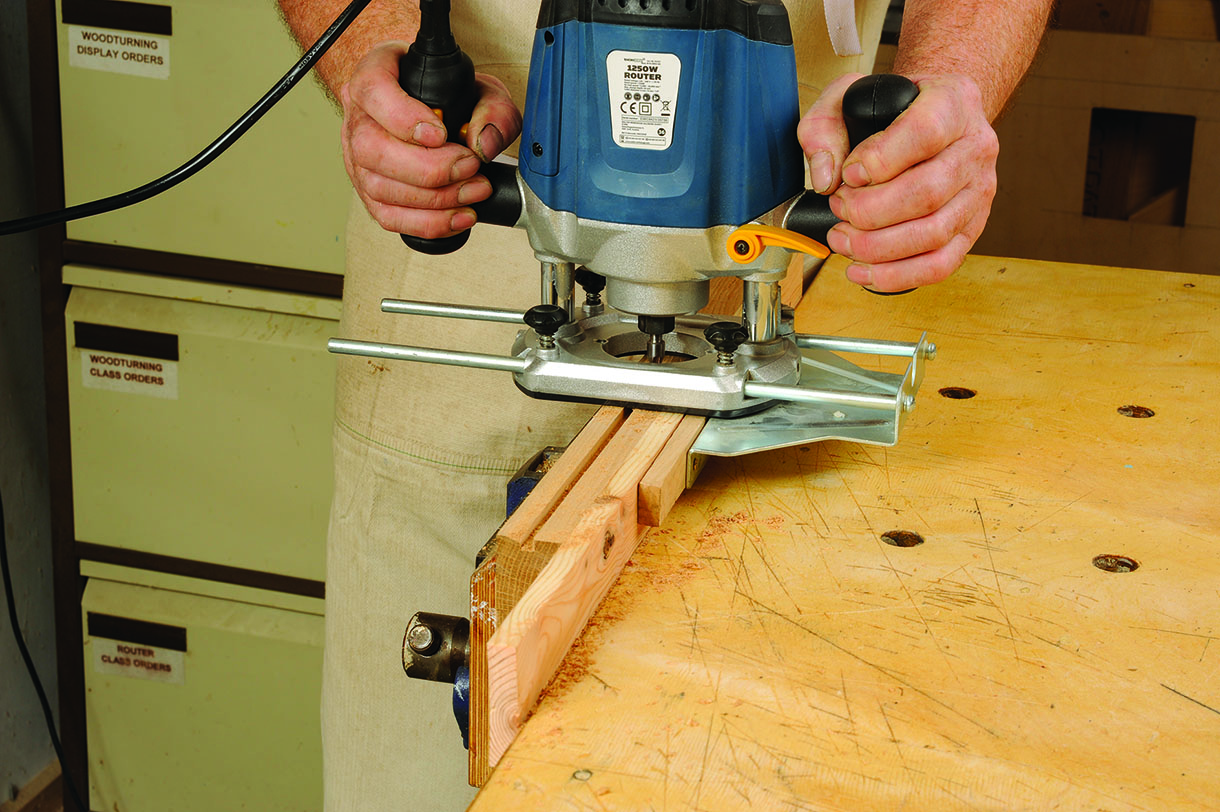
Routers always come with a straight fence, which is usually pretty basic and not necessarily well made or have any means of fine adjustment. The first thing to note is the importance of always machining into the waste area. Using double-sided carpet tape you can add a wooden sub-fence that extends the fence area and closes the gap in the middle for a much smoother dip-free result. You can make things even more predictable by clamping a board or batten alongside the workpiece and flush with its top surface. Now you instantly improve your chances of getting a good result. This still means the router can slide sideways with only one fence. You need to pull the router towards you with the cutter rotation feeding into the wood
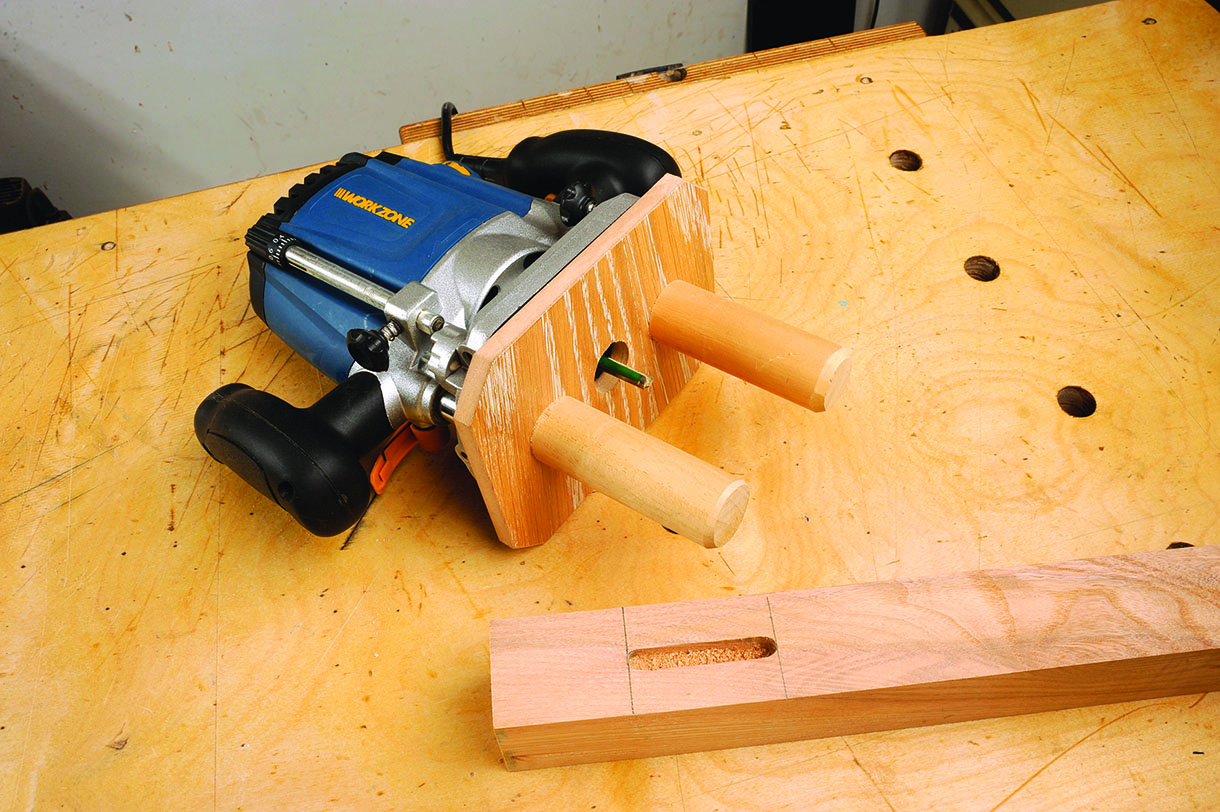
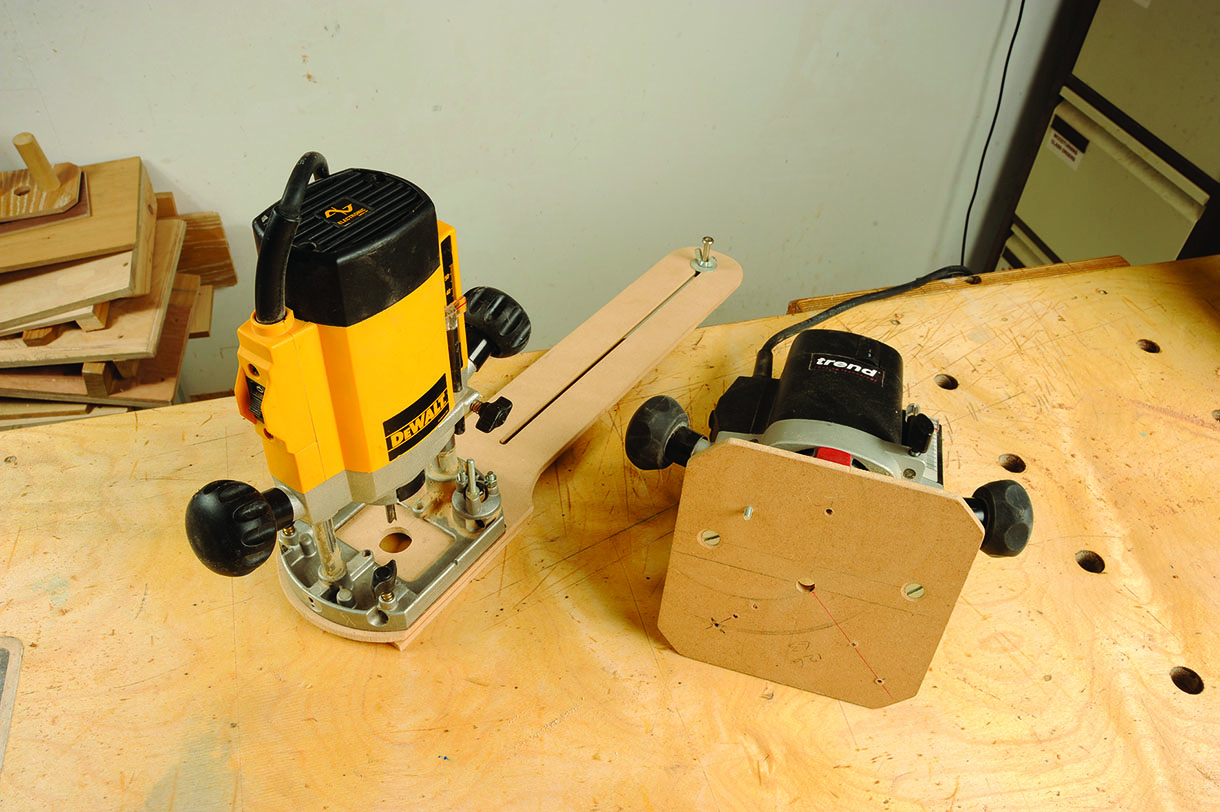
The first thing is whether you can fit a second fence for working on the edge of a workpiece, for instance when machining mortise joints. Unless you buy an expensive brand it is unlikely you can get another fence to fit. So a trick is to make up a simple jig to screw to the router base, which has two posts or dowels screwed into it. When you sit it over the workpiece and twist the router so the posts press against the workpiece, the cutter is automatically centred and will stay on course as long as you keep that twist pressure on
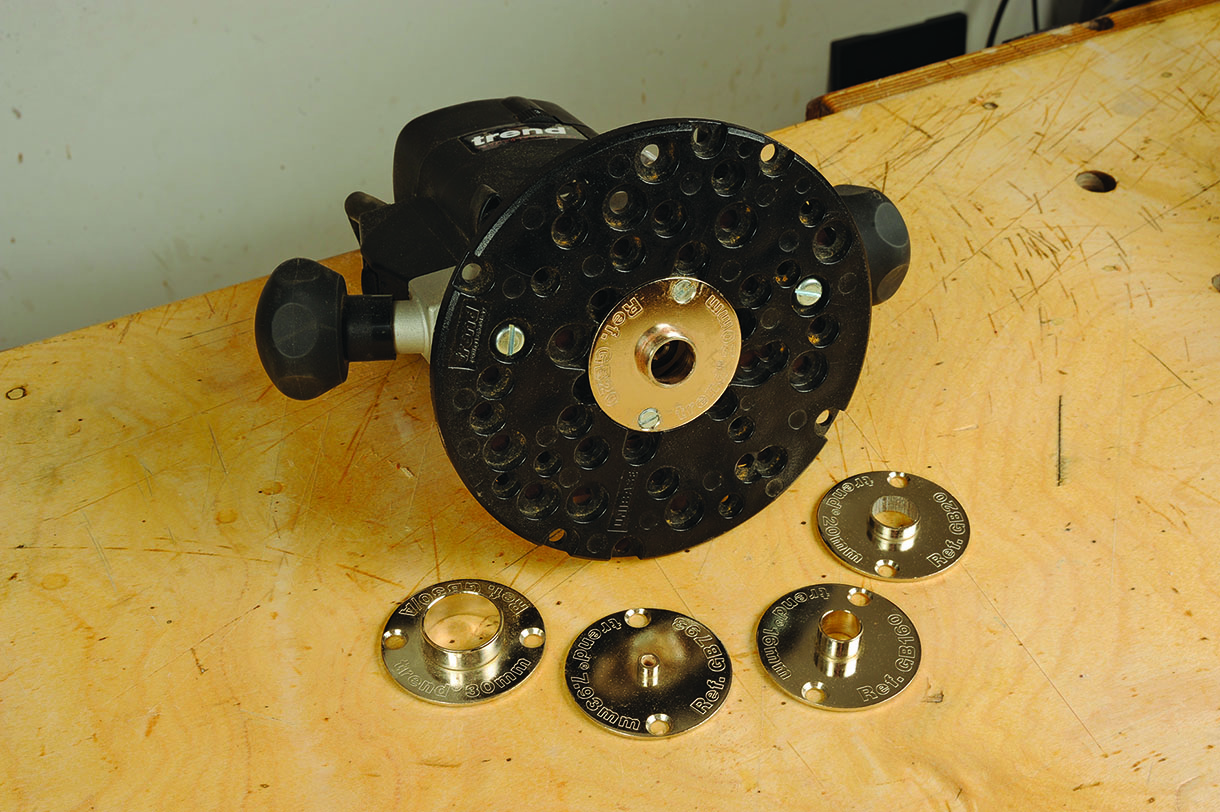
Bearing guided cutters give very precise control when used in a jig or template, so long as it was made accurately in the first place. Unfortunately, although routers invariably come with one guide bush there may not be any other sizes available to work with it. That can be a problem if you want to make certain size or radius shapes. Fortunately, a solution like the Trend Unibase and their vast range of guide bush sizes can get you out of trouble so long as your router model is compatible
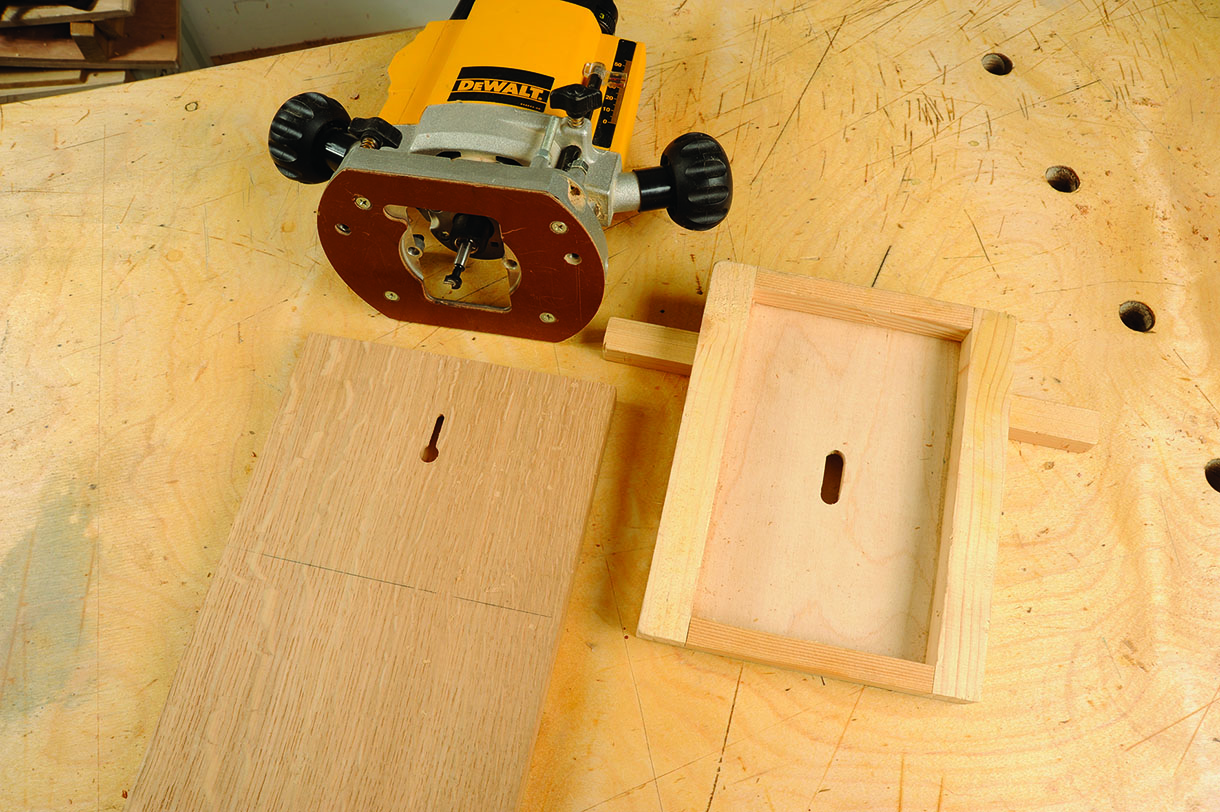
My favourite way of controlling the router movement, which I have not seen described anywhere else so it might just be unique to me, is the tray jig. It is what it says, a tray sized to fit the router base so the router can travel a set distance in the tray. The tray then needs small fillets underneath to locate it on the workpiece. It is a simple and excellent repetition machining device as the router cannot possibly wander
If you need to machine radii then you can use a trammel bar that often comes in a router kit, or you can make your own. Even better still if you need to create radii smaller than the router base you can make a simple inboard trammel that screws to the router base. You can reuse it by drilling a further hole with a small machine screw acting as the pivot point
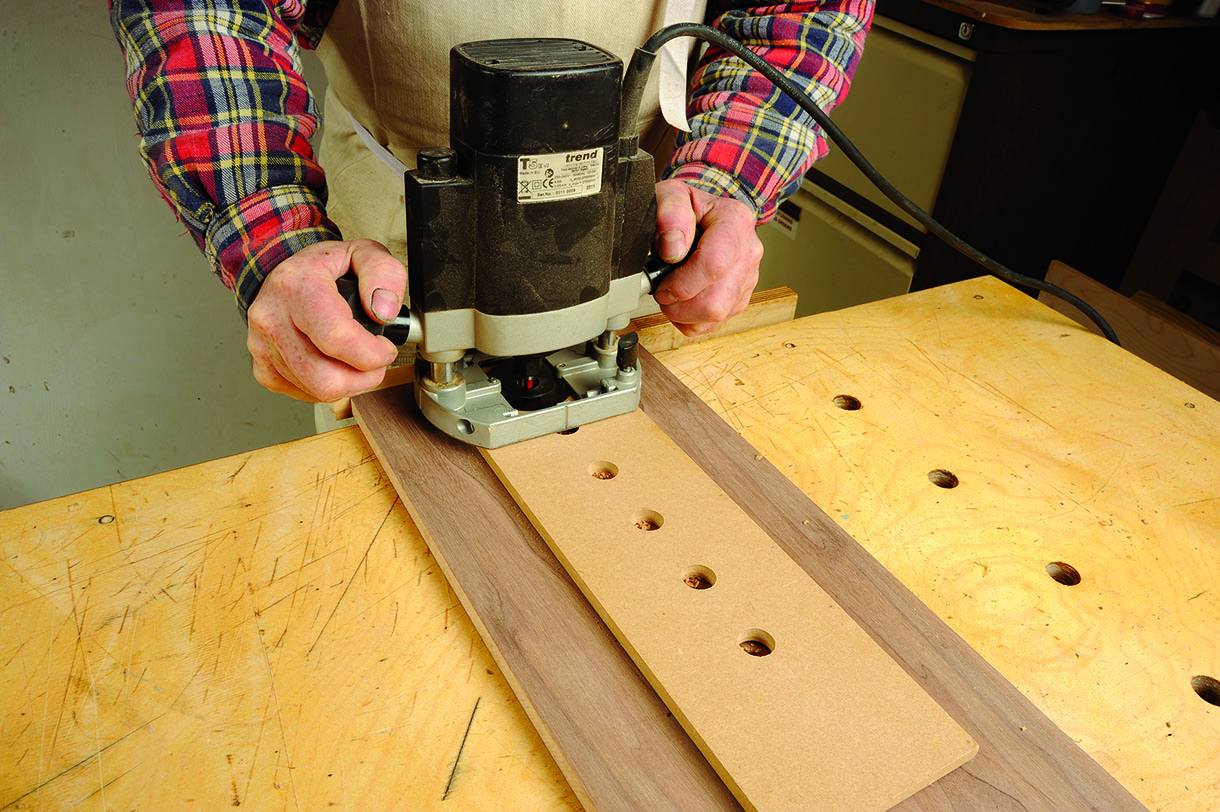
Although the router is not a drill it can do very accurate drilling of short depth holes. It is set perpendicular to the work surface and you can buy special drill and counterbore bits designed for high speed drilling. You can make a special jig drilling holes in it the exact size of your guide bush. A commonly supplied guide bush size is 16mm, which also matches with 16mm diameter router cutters and drill bits. It is particularly useful for drilling things like shelf stud holes or kitchen cabinet hinge holes. To make the jig precise you need to mark out carefully before drilling it and a pillar drill is a good way to achieve a line of accurately positioned jig holes. The use of jigs, templates and other controlling devices doesn’t stop there but I hope I have given you some ideas about how you can make your routing efforts more predictable and satisfying


