Garden Obelisk
Steve Bisco shows us how to make a trellis obelisk to create a focal point in the garden
Steve Bisco shows us how to make a trellis obelisk to create a focal point in the garden
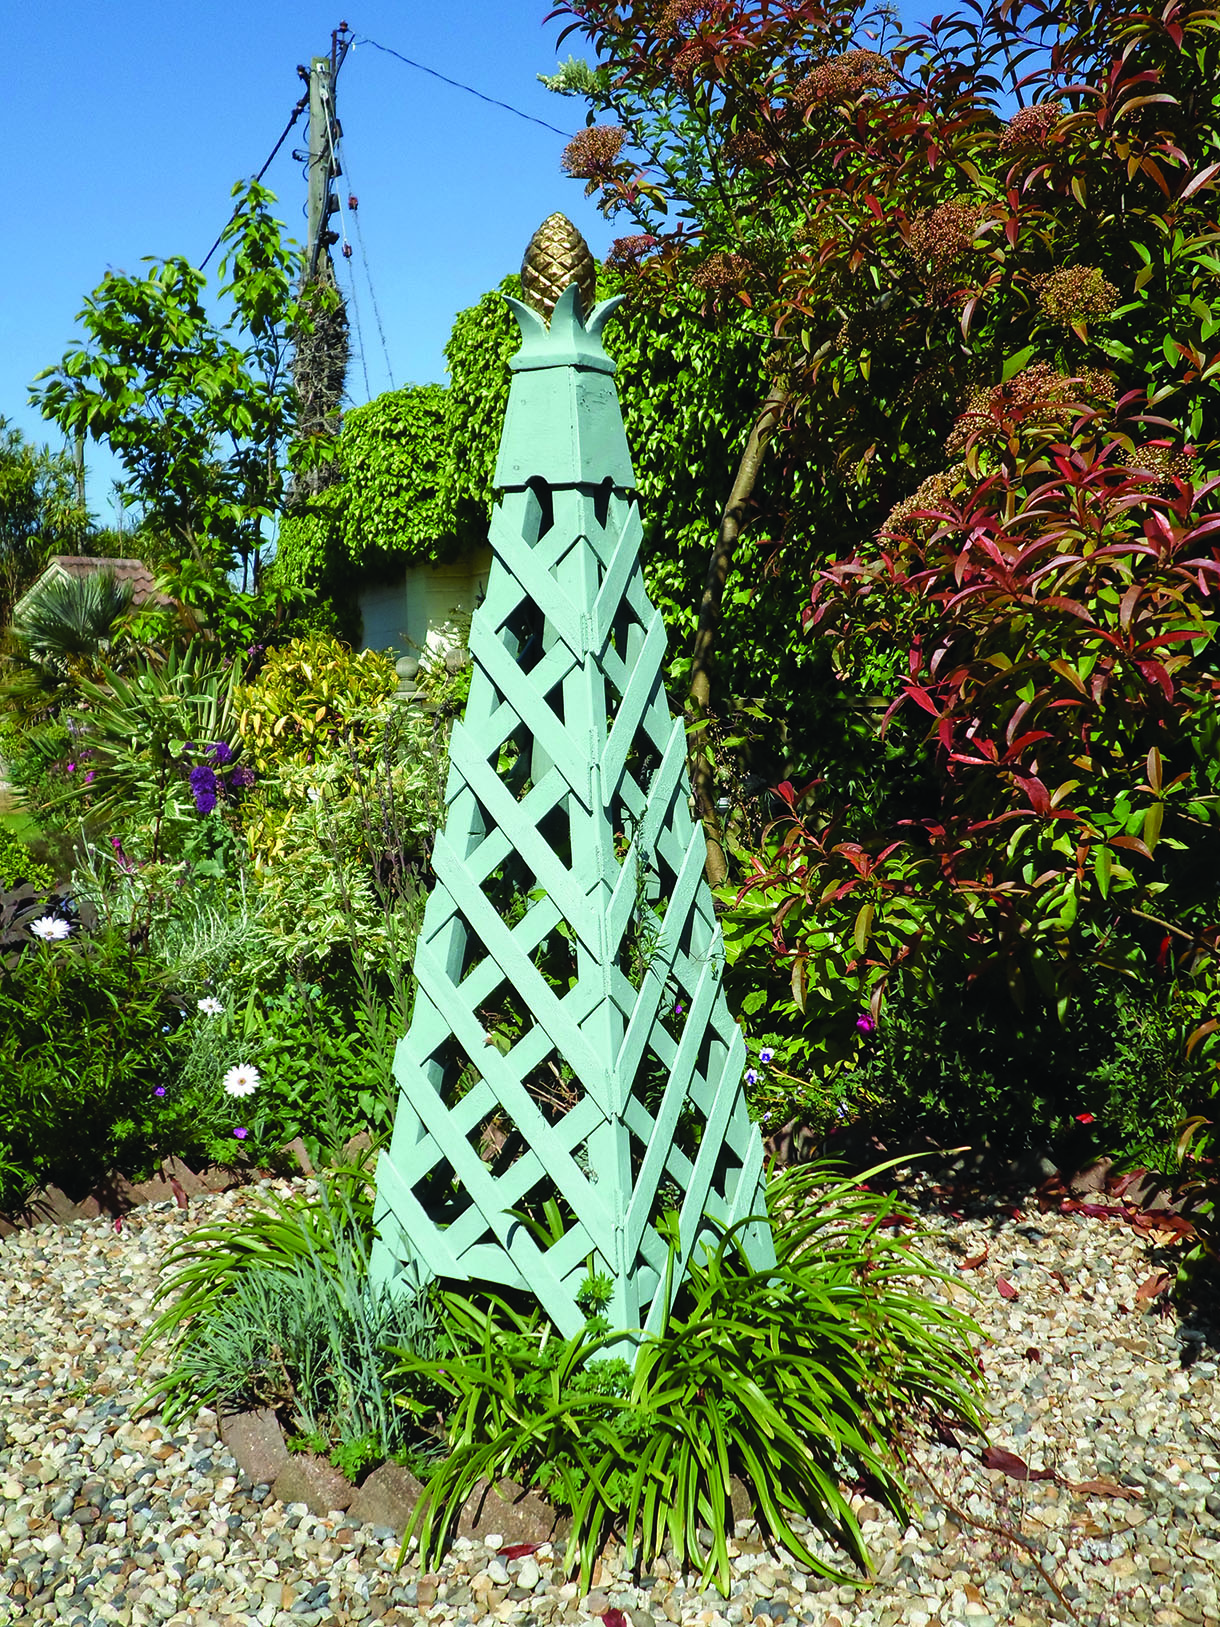
A garden needs a few focal points to lead your eye around, and some of these should be well above ground level. A tall obelisk with a shiny gold top is like an exclamation mark shouting ‘look over here!’ It can add some height among the shrubs and flowers, and give vines and roses something to climb up. This trellis obelisk is easy and cheap to make from studwork timber. You can, if you like, buy a round fence-post finial for the top, or you can apply your woodworking skills to making this simply carved pineapple finial using ordinary carpentry tools.
Key figures
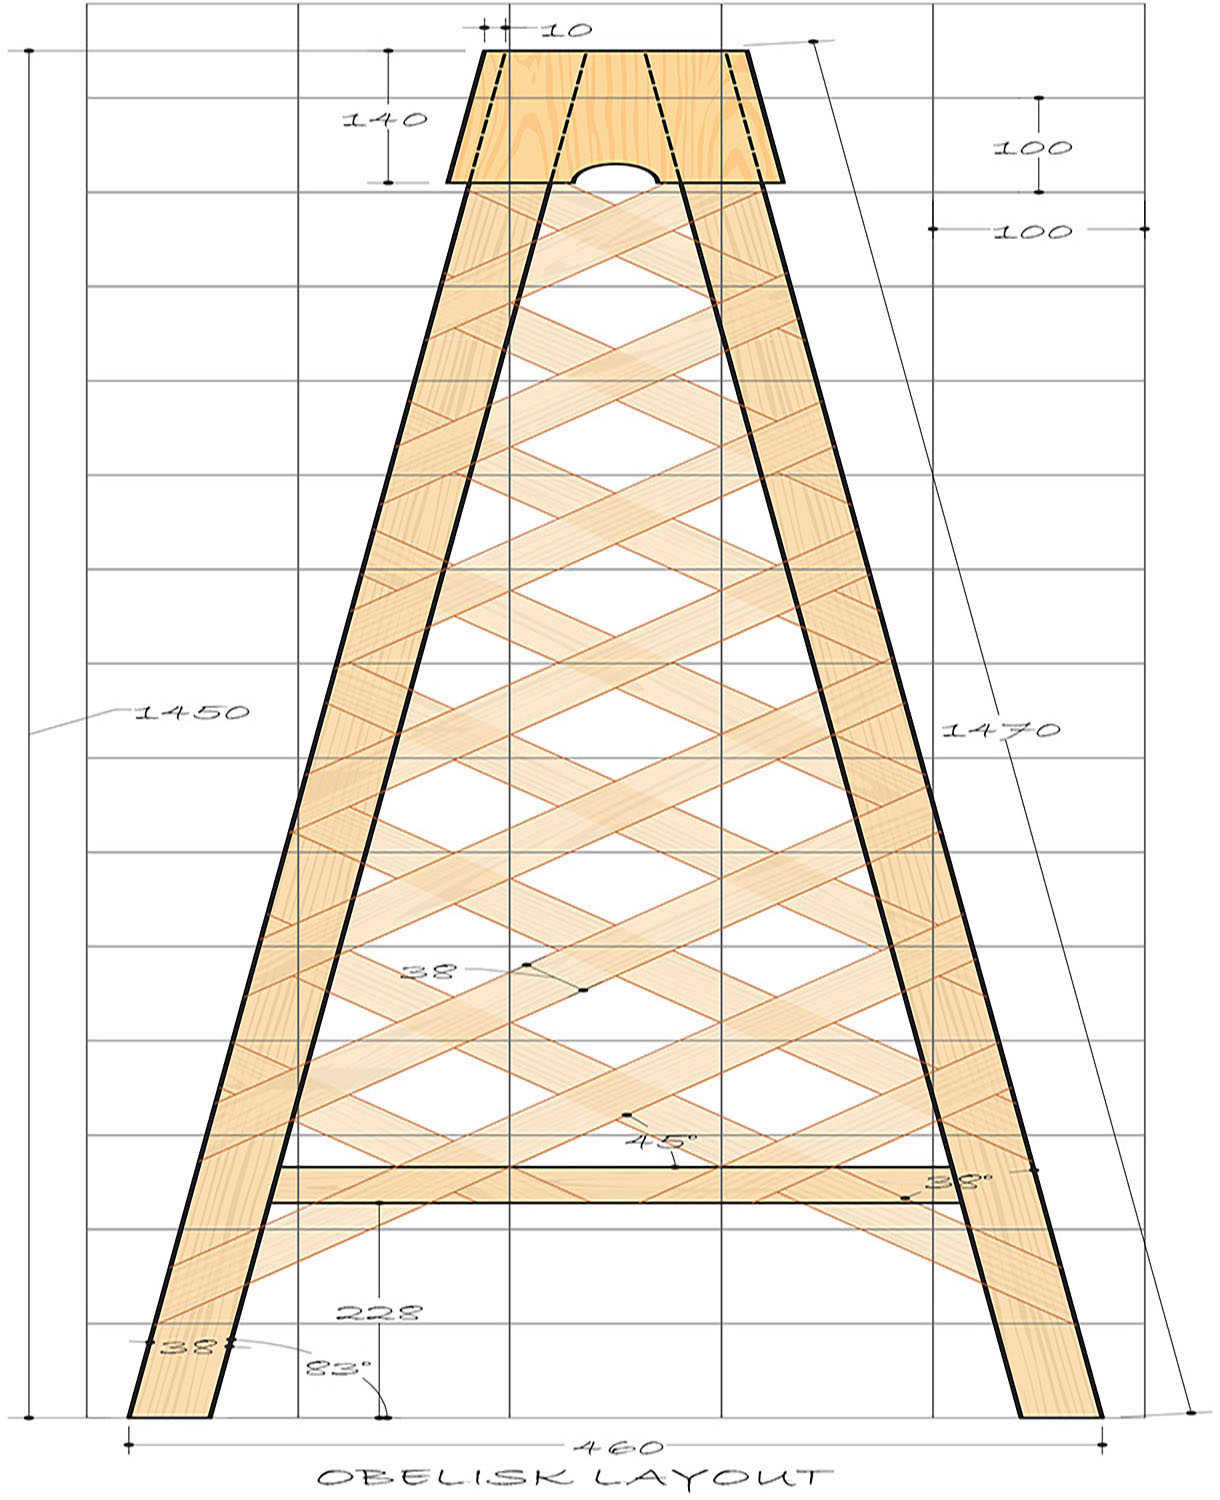
Overall height (excl. finial) 1,450mm
Width across base 460mm
4 legs @ 1,470mm each
4 cross-braces @ 330mm each
64 pieces of lath totalling around 24m (cut 10 strips @ 2.4m) all at 6 x 38mm
Angle of legs 83° to the vertical
Angle of trellis 45° to the horizontal
Angles at end of laths 38° and 52°
Finial 120 x 120 x 215mm
 Making the obelisk
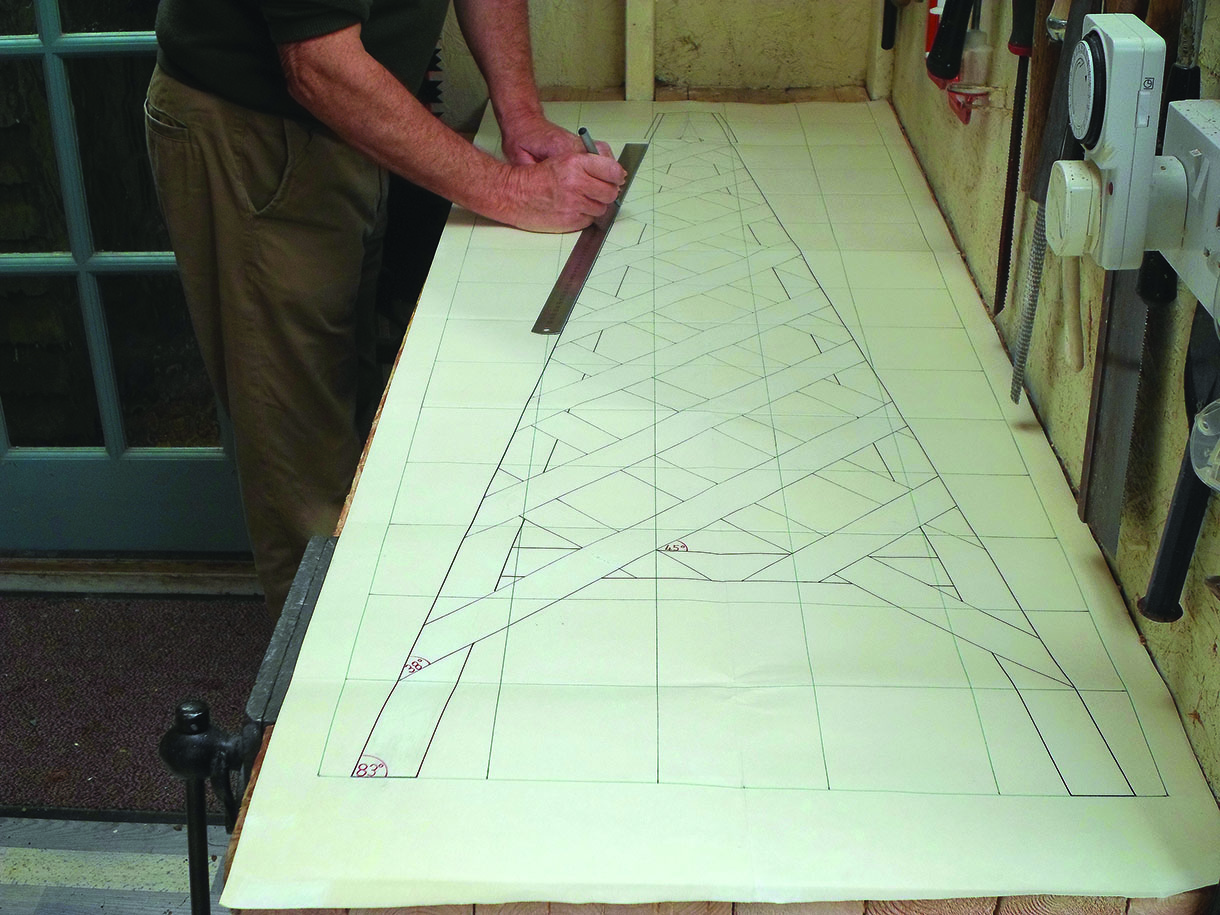
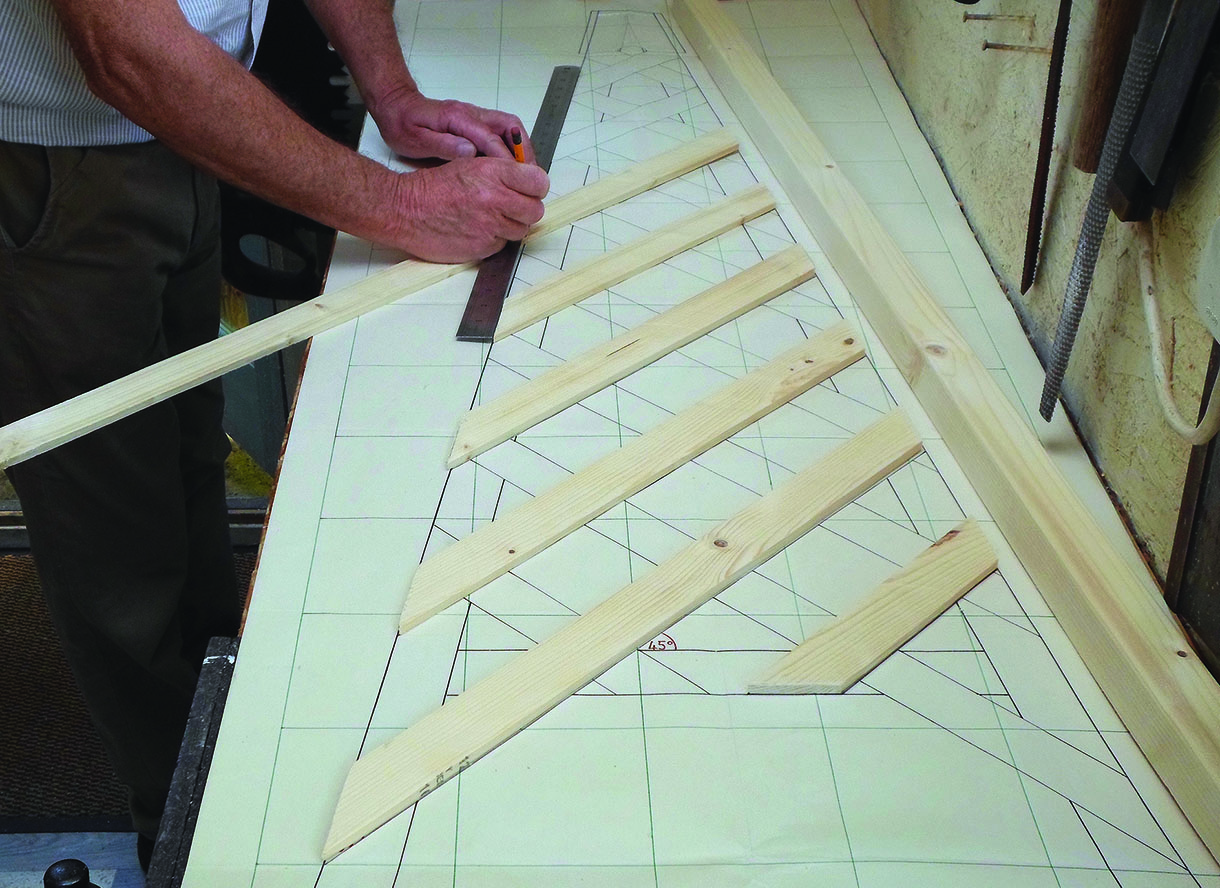
1. It is best to make a full-size drawing on a piece of lining paper to help you sort out the geometry of the many different-sized pieces. There are few square angles – the sides slope inwards at an angle of 83°, the trellis laths are 45° to the horizontal and their ends are cut at 38° and 52° angles where the 83°and 45° angles meet. Each lath gets shorter as you progress up the obelisk, and it is easier to lay the wood on the drawing than scratch your head trying to work out each measurement. The squares on the pattern provided equate to 100mm when scaled up to full size, so you can use this as a guide to create your drawing
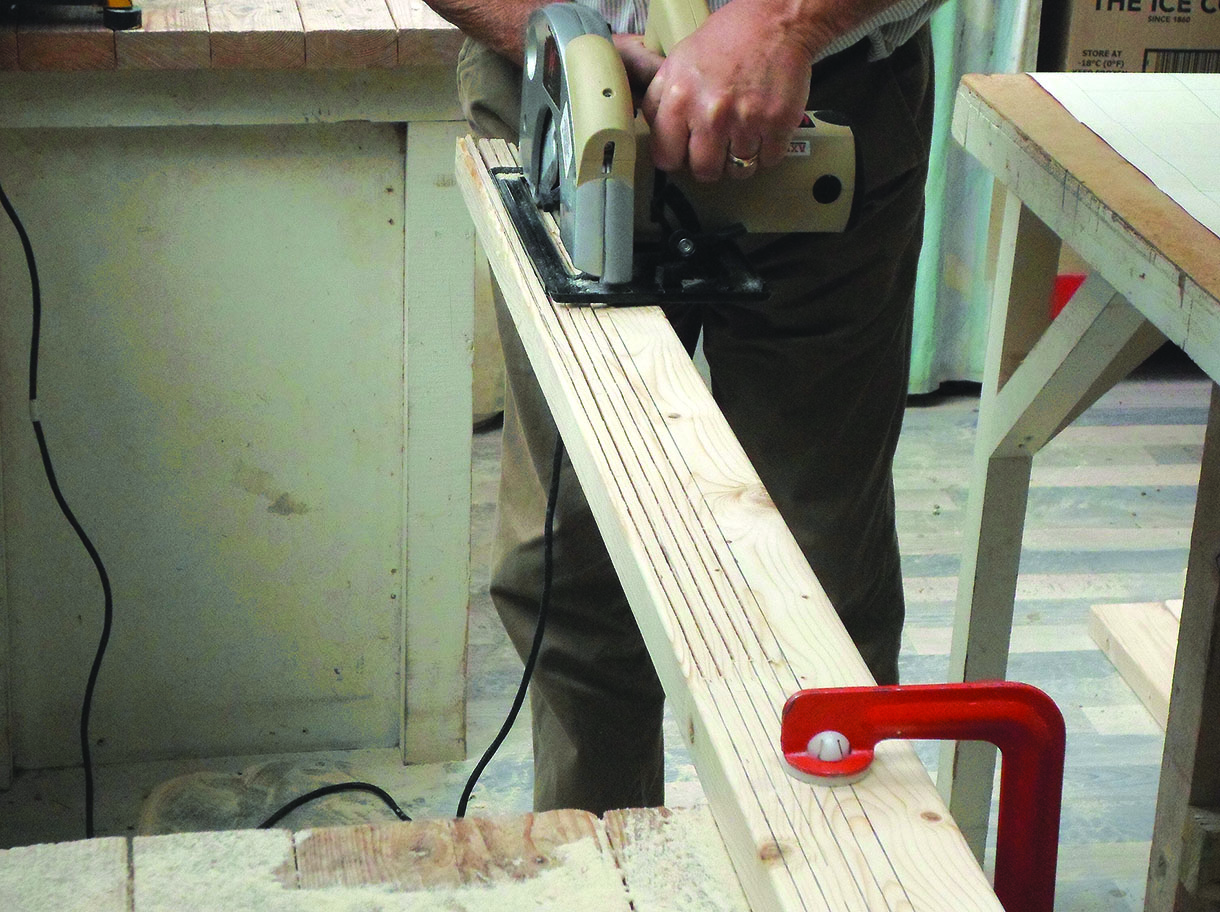
2. The cheapest way to make the laths for the trellis is to cut them from studwork timbers 38 x 89 x 2,400mm. Mark up parallel lines 8mm apart and cut the laths with a circular saw. Allowing for the width of the saw cut, each lath should be about 6mm thick. You will need to clamp one end of the timber to the bench while you cut halfway from the overhanging end, then turn it round to finish it from the other way. Leave 38mm thickness on one side of the timber to use for the leg. Make at least 10 laths, four legs and the four cross-braces from three 2.4m lengths of studwork timber
3. Use the full-size drawing to mark out the lengths and angles for the four legs, four cross-braces and all the laths. Note that there are eight identical pieces for each of the eight sizes of lath – the crossover pairs on each of the four sides are identical and reversible
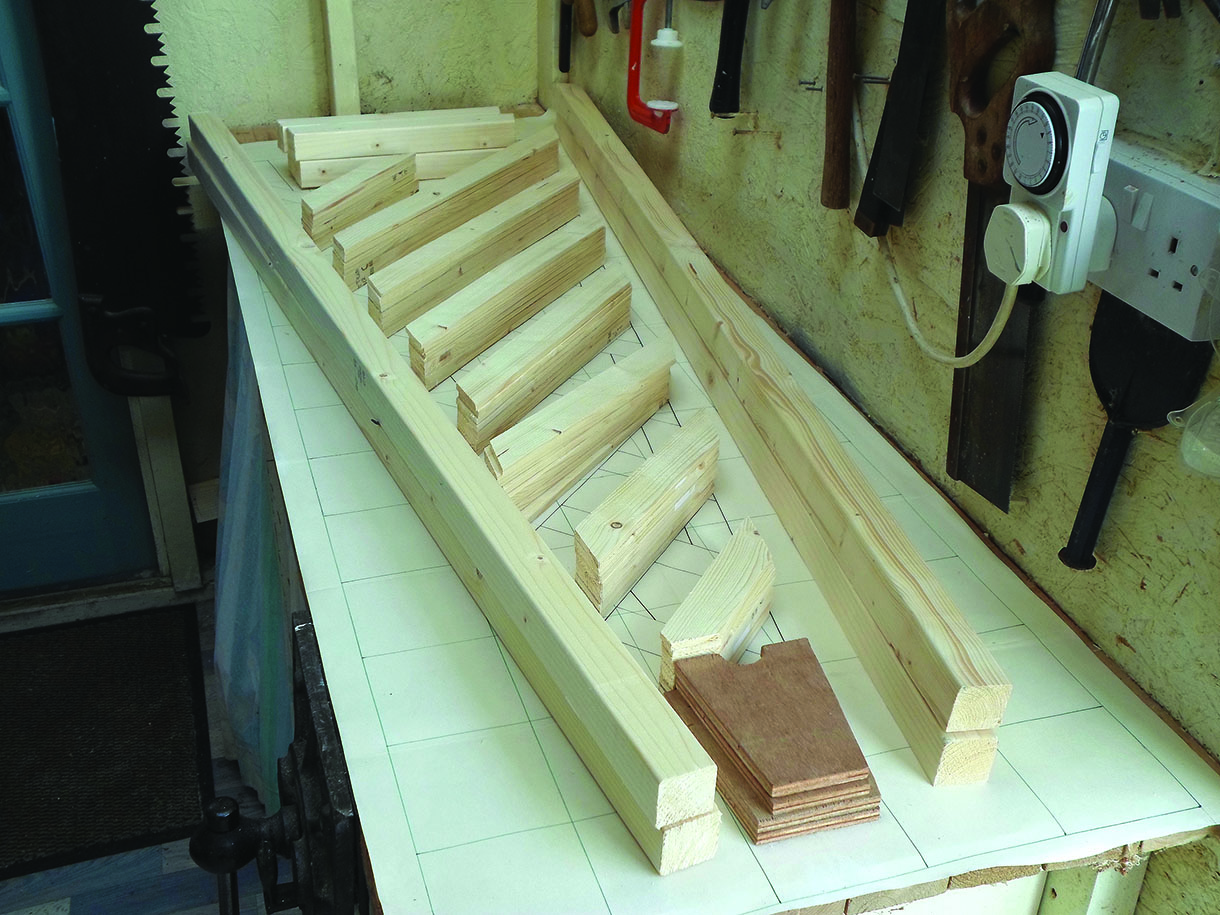
4. Use some 10mm exterior plywood to cut out the top braces that hold the tops of the legs together. They are all 140mm deep, and two sides are 20mm wider than the other two as they cover their edges when assembled. In total there are 76 individual pieces in the obelisk!

5. Give all the pieces one coat of paint on both sides before assembly. Lay two legs on the drawing, put their tops together, and fix the plywood top brace (the narrower one) to hold them together. Fix the bottom cross-brace where shown on the drawing. Then take one set of laths and nail them in place using the drawing to position them, making sure they are equally spaced and parallel. Repeat the process with the second set of laths that crosses over the first
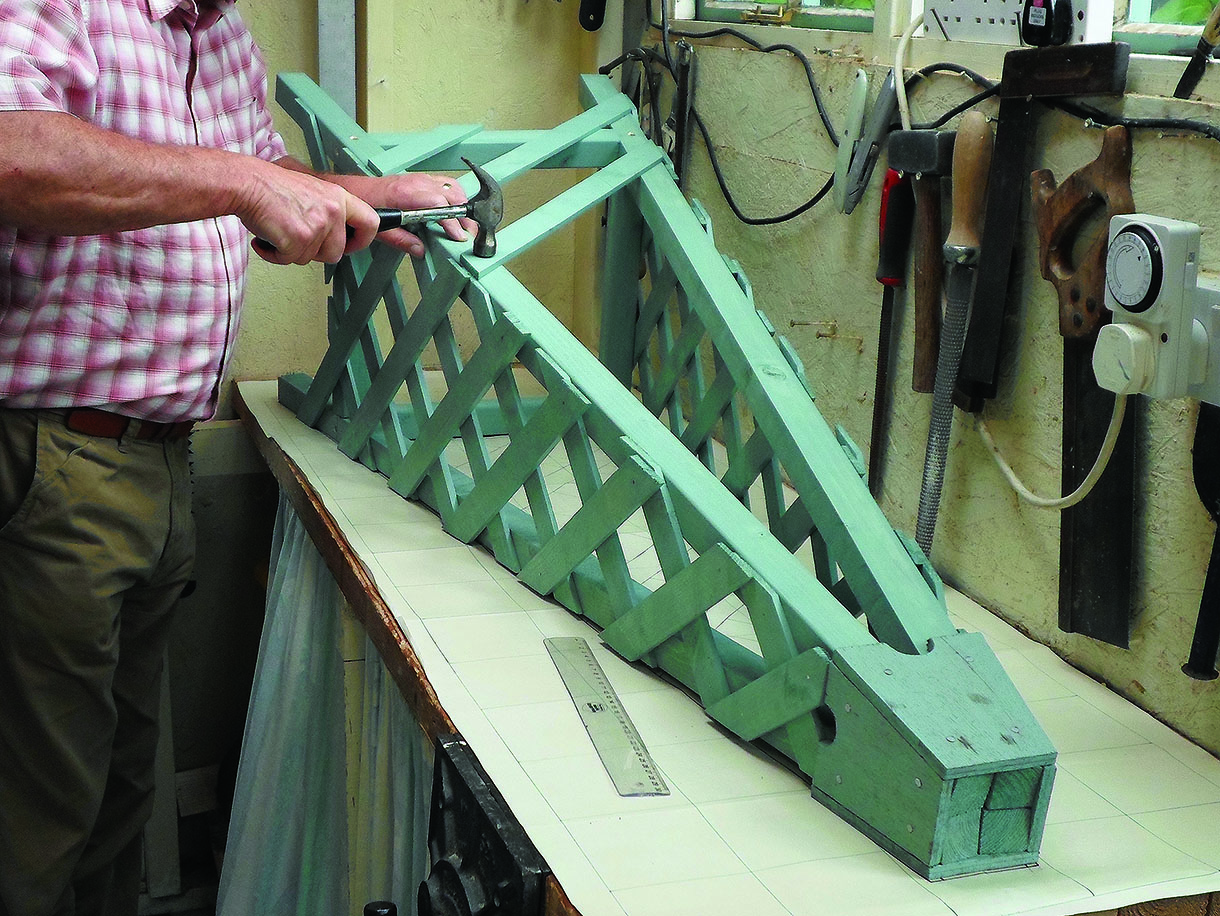
6. Fix two finished sides together with their top and bottom braces, then fix the laths onto the last two sides by lining them up with those on the finished sides. The structure is now complete and ready for its final coat of paint
Making the finial
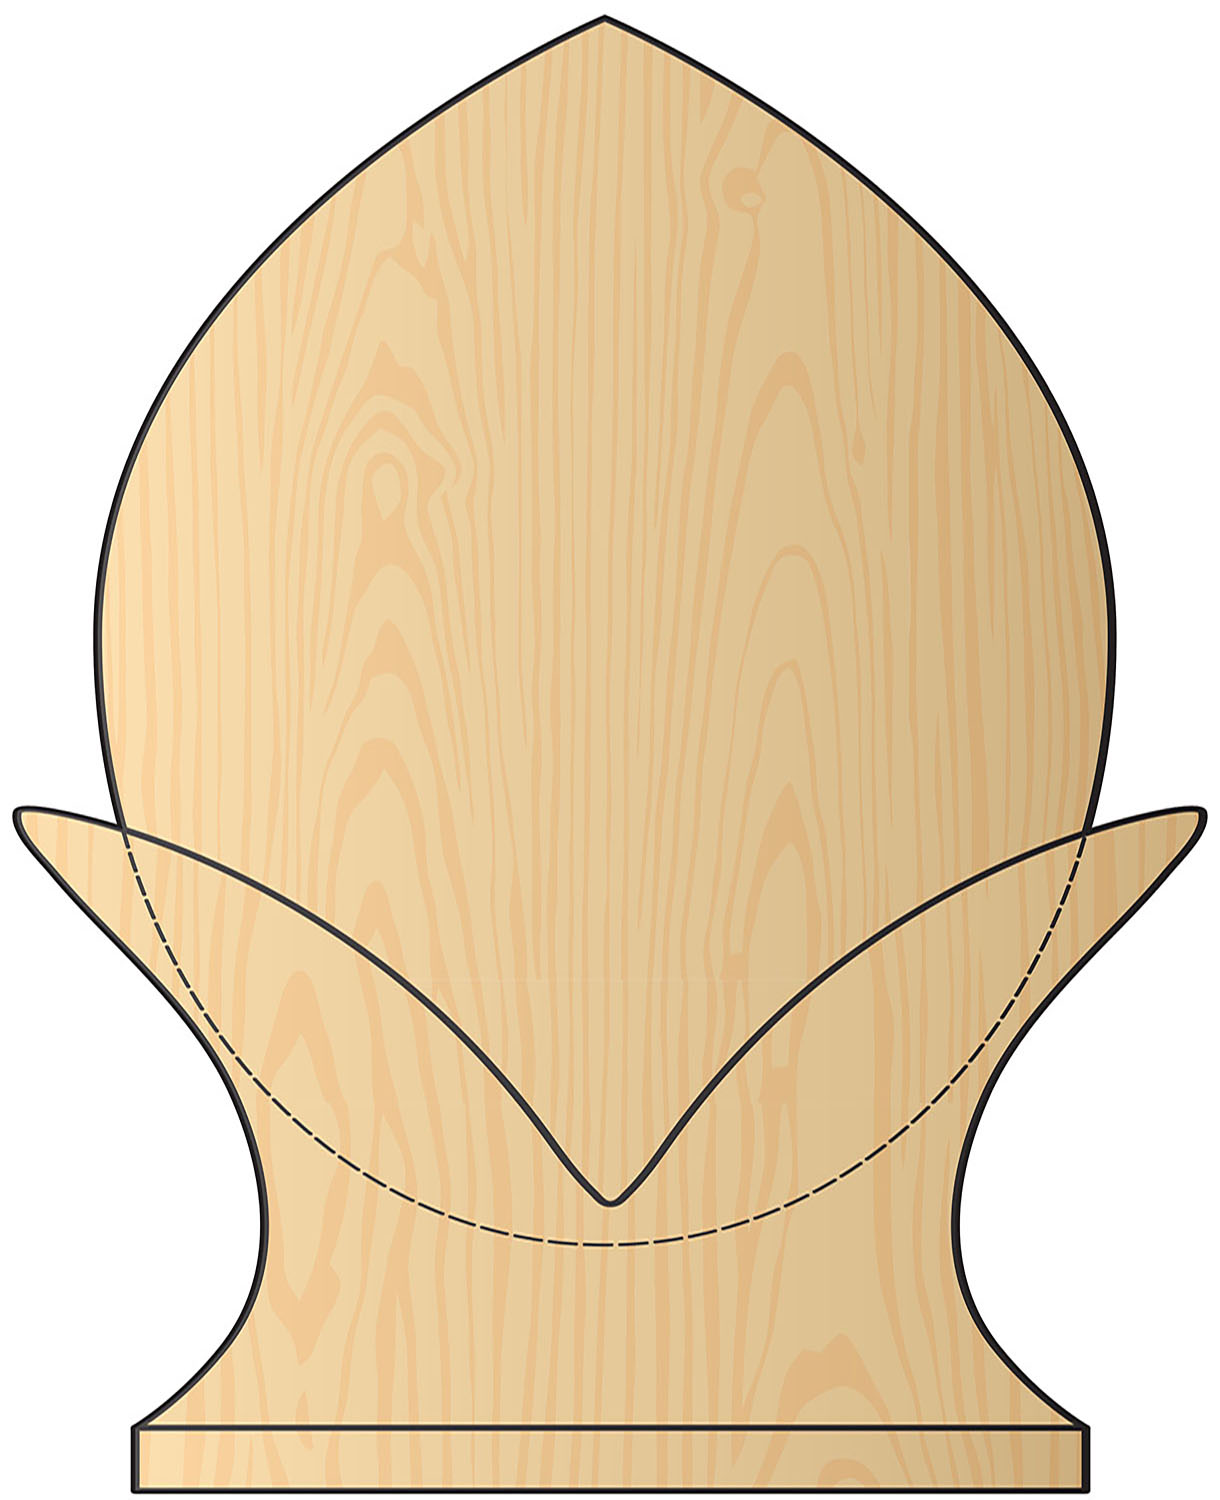
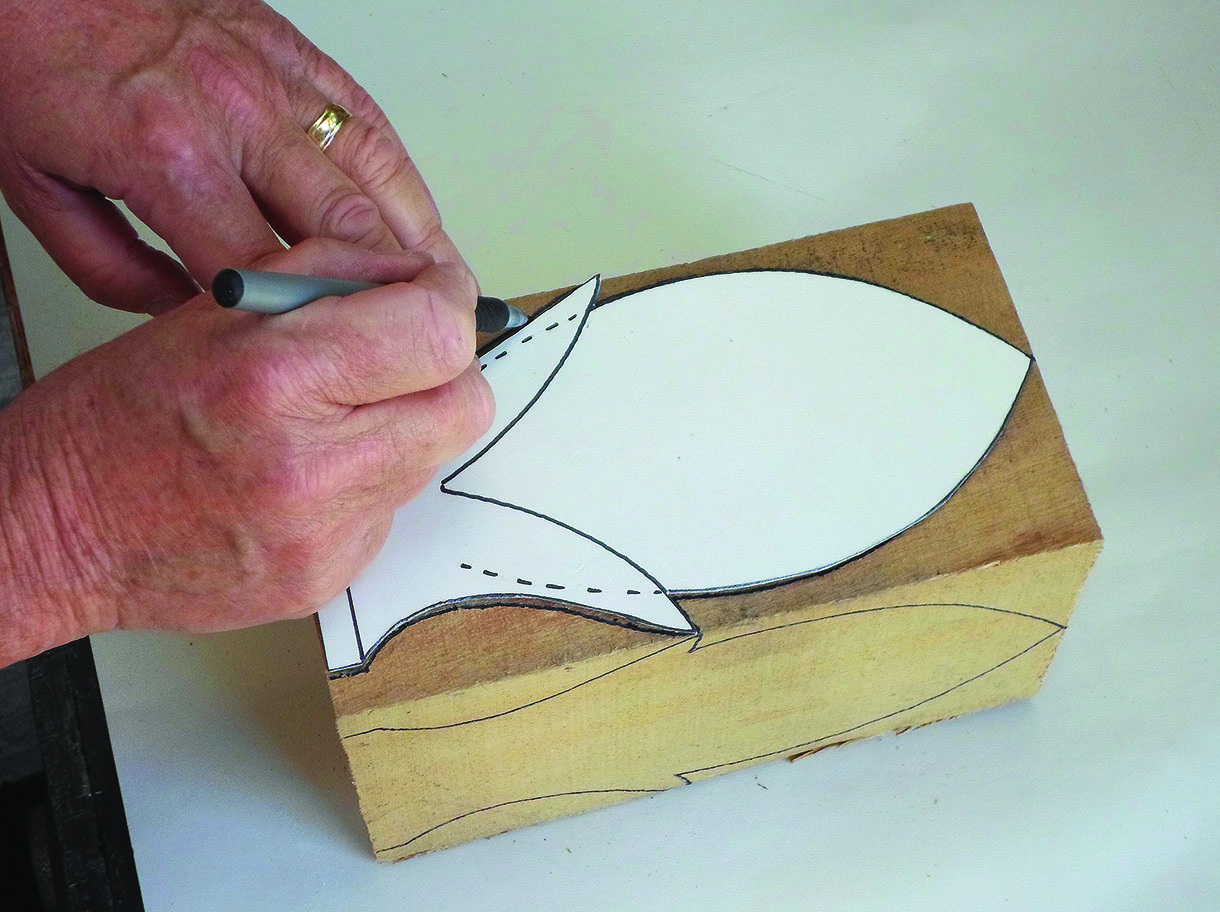
7. Make a full-size drawing of the finial on a piece of card (see finial pattern) and cut it out to make a template. Use this to mark up four sides of a block of any suitable wood. I have used a piece of oak (Quercus robur) 120 x 120 x 215mm tall, but if you can’t get a block this thick you can make a slimmer version with 100 x 100mm timber
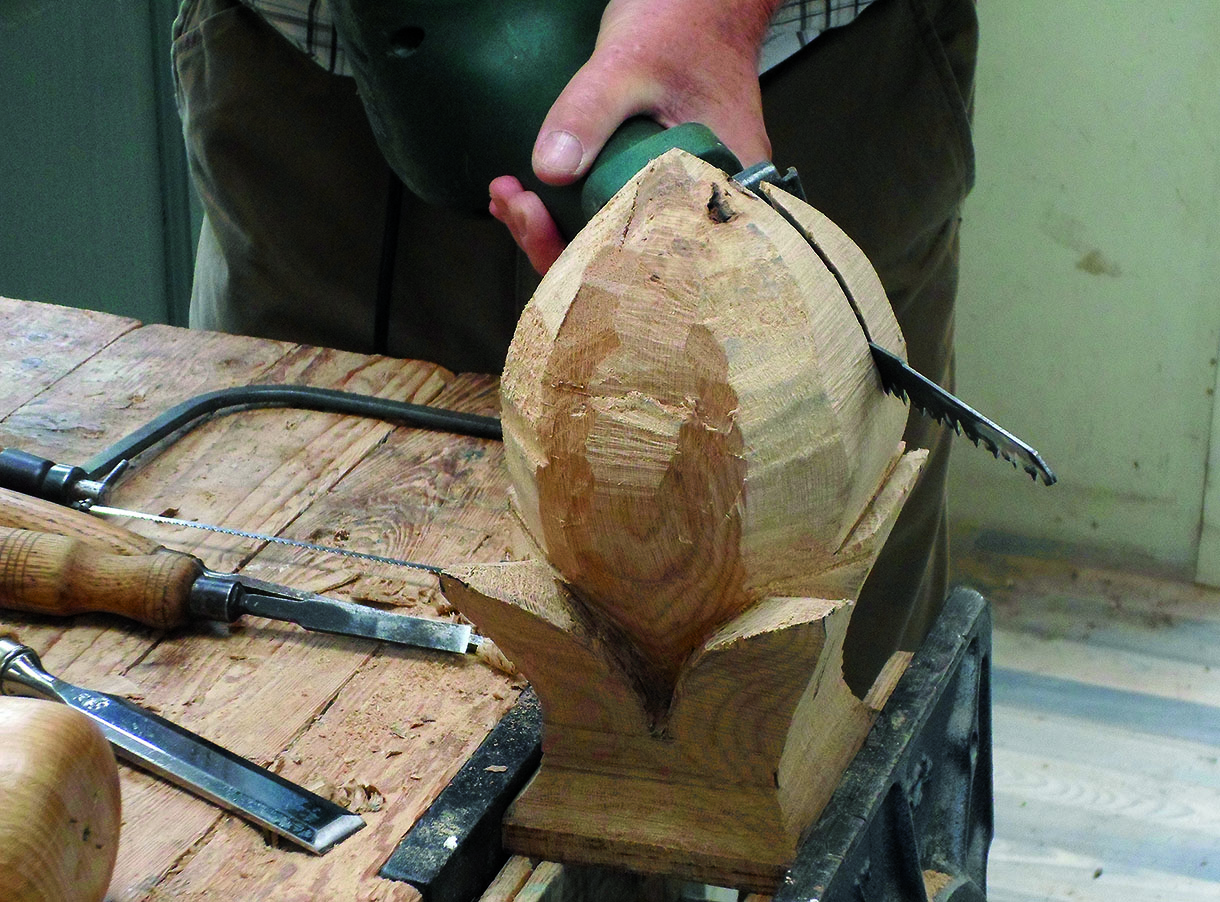
8. Cut out the profiles of all four sides of the block with whatever saws you have. The base needs to fit the top of the obelisk. Use saws and chisels to separate the four corner leaves and round off the pineapple. Be careful not to break off the points of the leaves. You can use a rasp and abrasives to work the leaves to their final finish and form the rounded shape of the pineapple
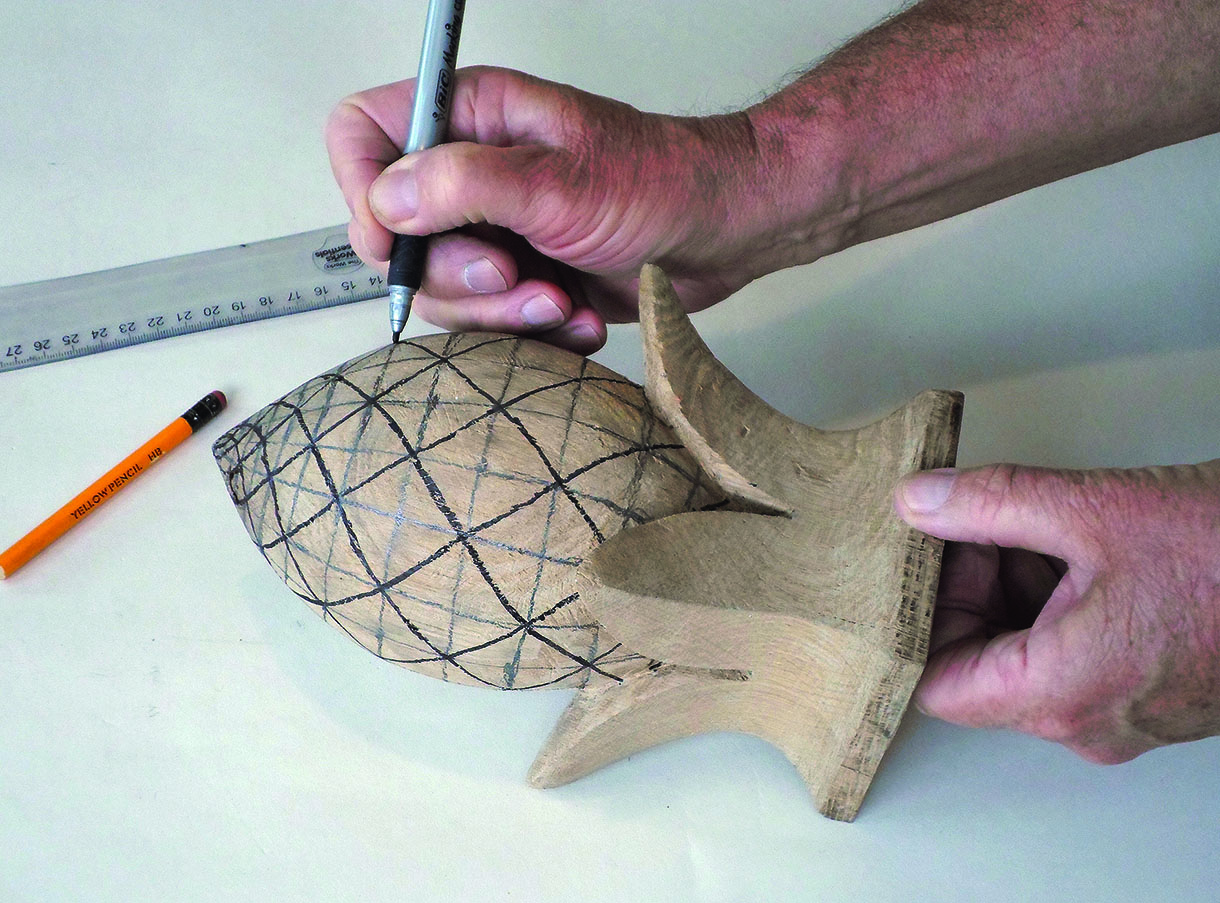
9. Draw 16 vertical lines equally spaced around the sides of the pineapple running up to the point. Then, draw horizontal lines spaced at the same distance as the vertical lines to form rough squares, widest in the middle and getting progressively closer as the vertical lines get narrower. Now ‘join the dots’ by drawing diagonal lines across the ‘squares’ to form a series of contra-rotating spirals converging at the top point. This is how nature arranges the segments of the pineapple
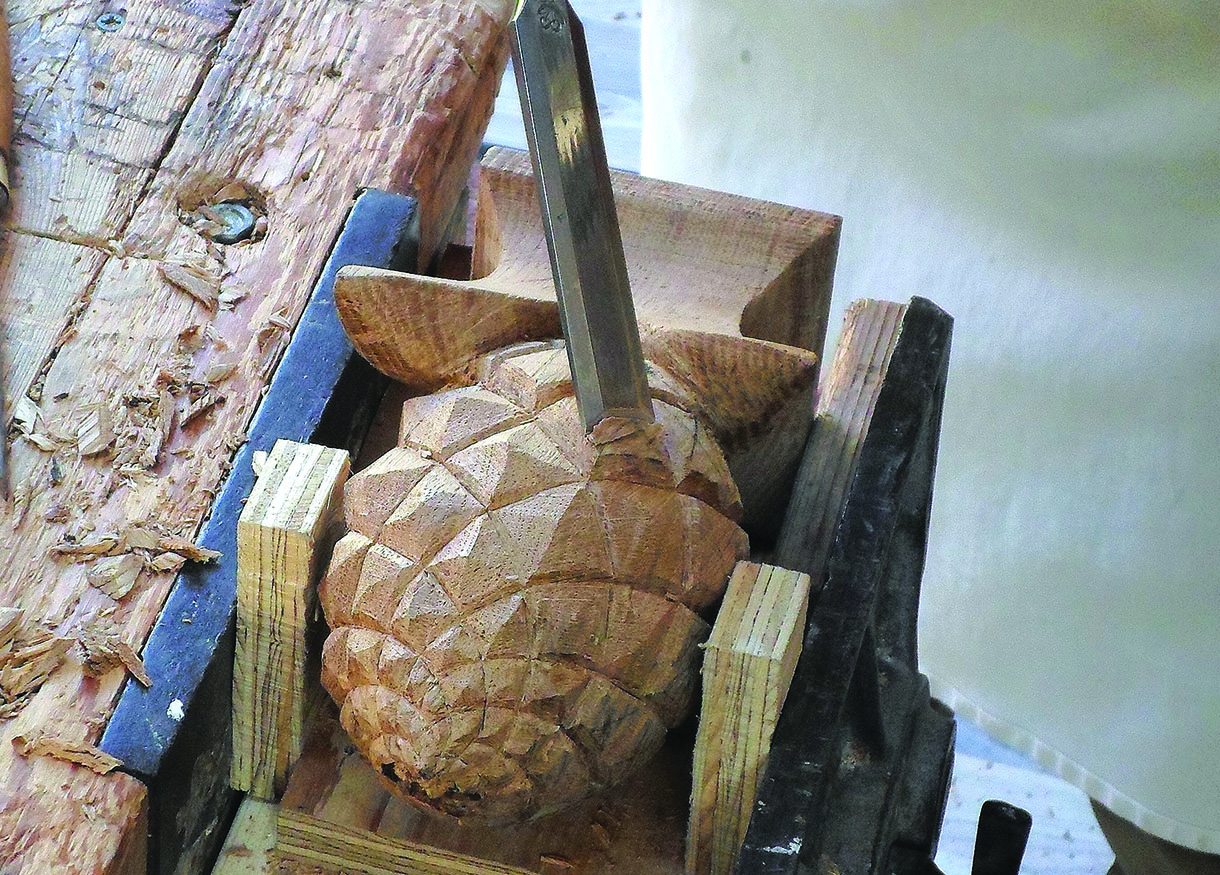
10. Secure the finial in a vice, with packing pieces to ensure the leaf tips don’t get crushed. Use flat chisels to cut a V-groove about 5mm deep along each of the spiral lines, Then cut a slight chamfer on each side of each segment to form it into a shallow pyramid. The segments get progressively smaller towards the top point
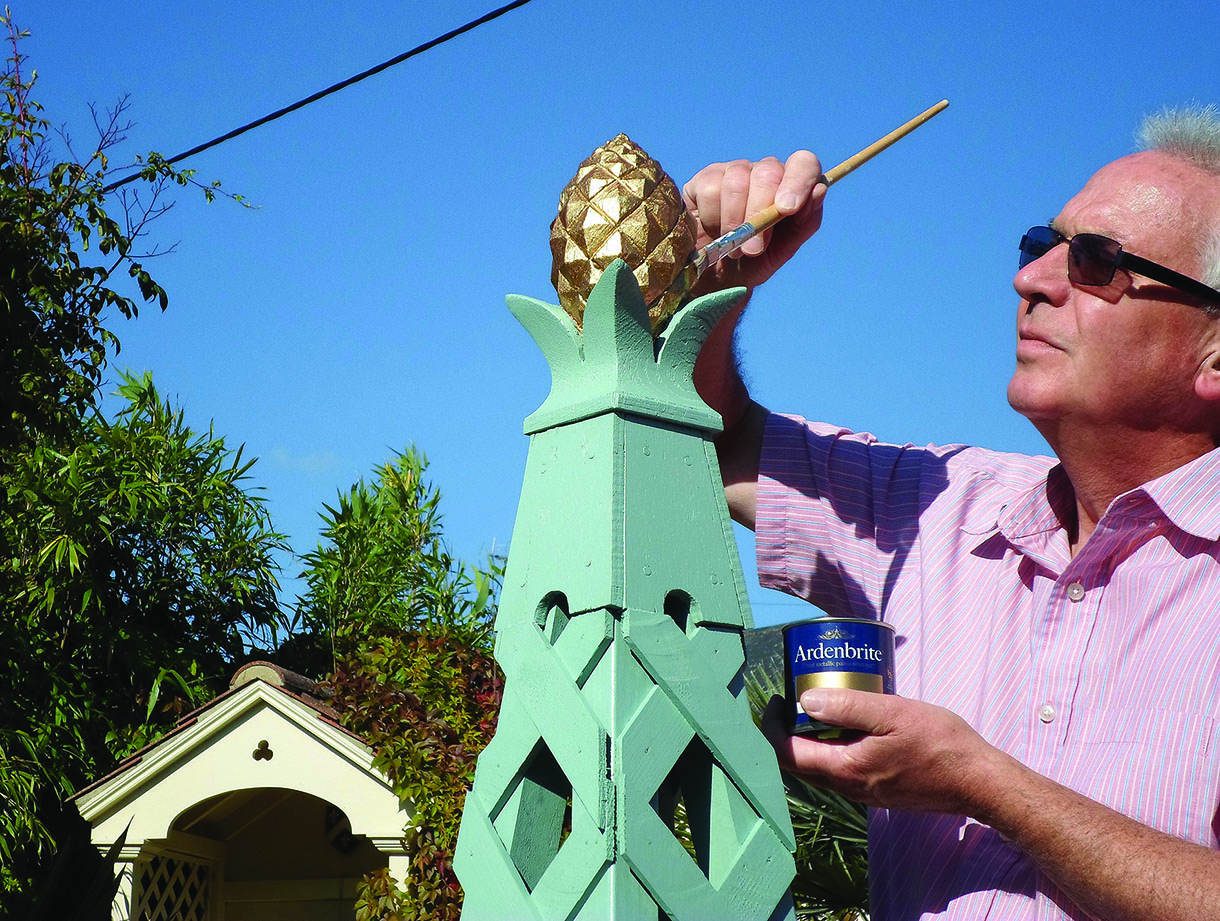
11. Paint the leaves, and fix the finial to the obelisk with a double-ended screw dowel. Paint the pineapple with a good-quality exterior metallic gold lacquer so the sunlight will glint off its faceted surfaces. The obelisk is now ready to stand in your garden and show off!


1 Comment
What color did you use to paint this ?