Slick on the Drawer
David Barron tapers his technique to achieve a perfect walnut cabinet
Back in 1997 Alan Peters wrote an article for Fine Woodworking titled simply ‘Fitting a Drawer’. It was a fascinating piece, detailing the processes involved on a beautiful small chest of drawers. This is my version of that chest made, appropriately, with wood that I bought from Alan’s widow after he sadly died in 2009. All the wood for the chest was quarter-sawn to minimise seasonal movement and it was trimmed oversize before being left for a few weeks to settle down. To achieve a piston-fit drawer the opening must be parallel from side to side, any inwards taper from front to back would make it impossible to get a good fit. Alan used to check all his openings and trim them as necessary with a shoulder plane and sanding blocks, a potentially laborious job and not one that would be easy on this small cabinet. In David Charlesworth’s excellent book, Furniture Making Techniques Volume 2, he talks about building in a slight outward taper to the carcass which overcomes the need to adjust it after assembly. I decided to use this in the building of my carcass.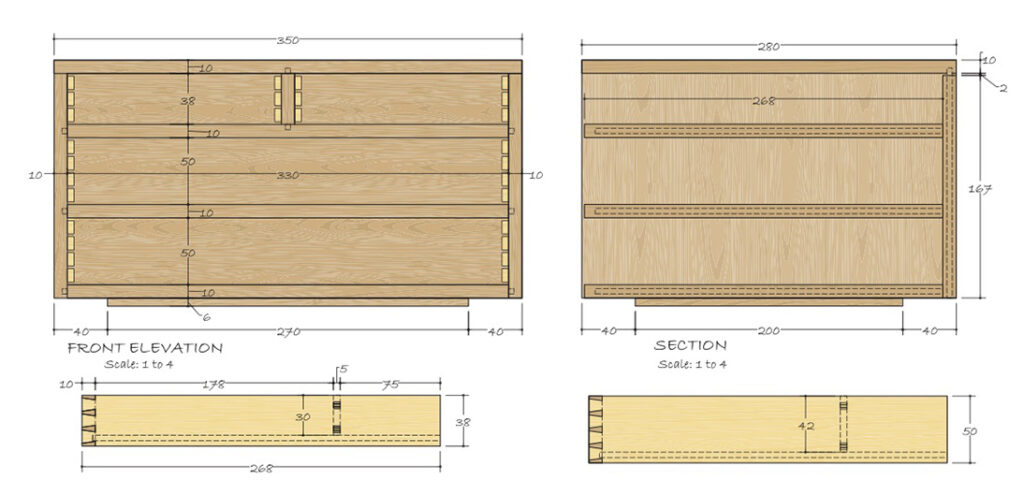
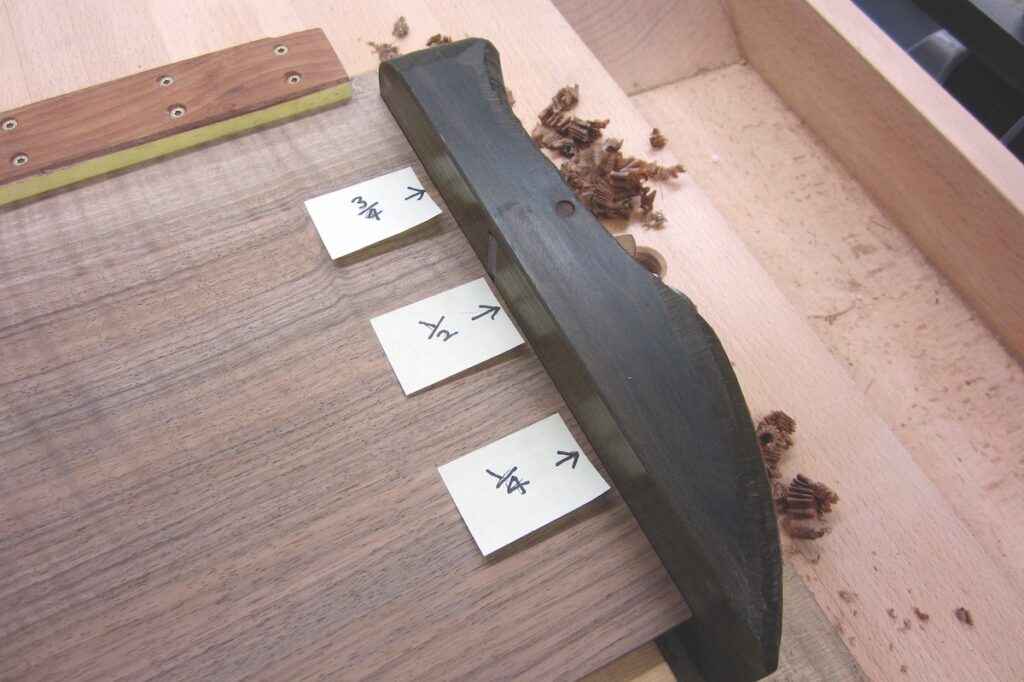
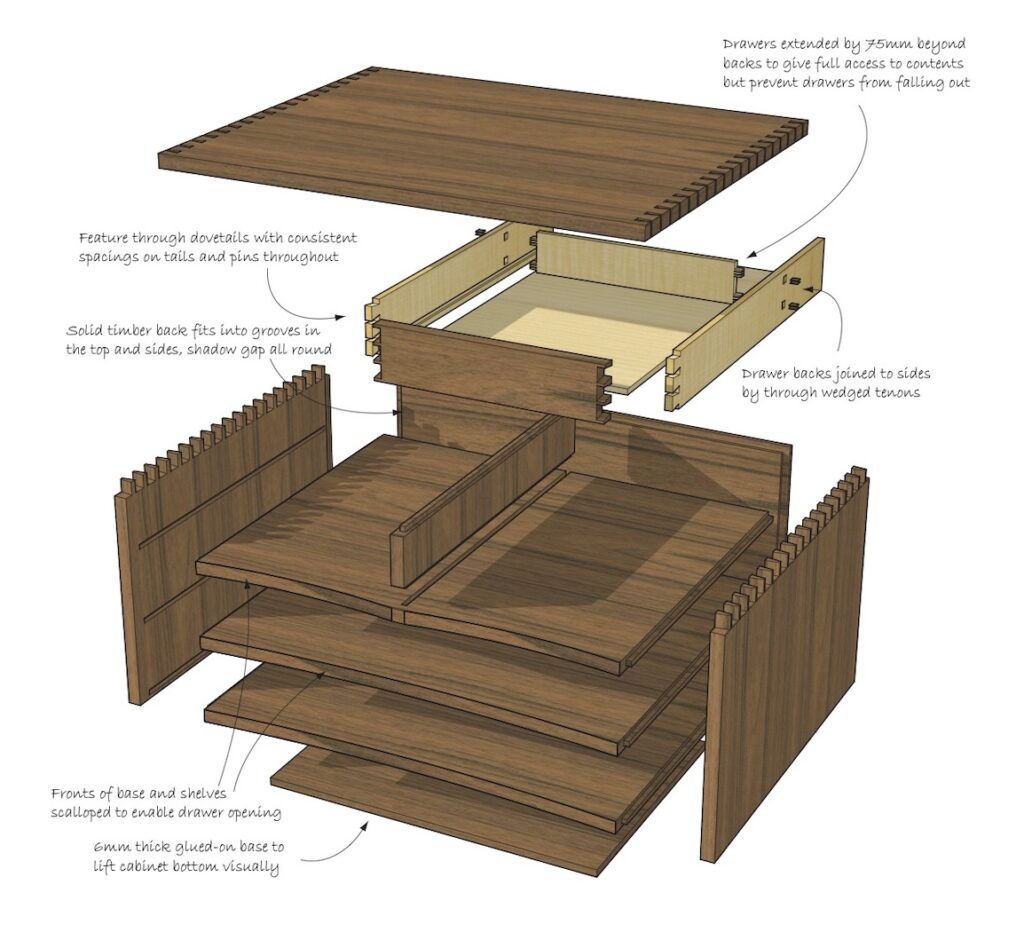 Building the carcass Instead of using a traditional frame for the drawers I used solid wood with the grain oriented in the same direction as the carcass so that any seasonal movement was in harmony. This also meant I could introduce an identical taper into all the horizontal parts. With all the wood trimmed to final thickness I cut the top, shelves and base dead square and to identical size, doing the same with the sides. All the internal grooves were cut at this stage, it’s important to do this before tapering the parts. I carefully marked each part with a coloured dot to indicate the front, the upward face and its position. I then took three progressively longer stop shavings, from each side of the horizontal parts, on the shooting board. This was followed by one through shaving to clean the edge. I verified the taper by setting two stops to the rear edge and checking a gap existed at the front, it came out at 0.25mm which was about right. Although the top with its through dovetails would be wider than the two shelves and base, I kept them identical at this stage so the baselines for the dovetails and tenons could be marked identically. After the tenons were cut I trimmed them back in width to fit the grooves in the sides. This technique is also useful when making a panelled lid. A tiny taper can also be introduced to the height of each drawer opening which helps reduce the top to bottom wobble when the drawer is close to fully open. This is done by planing the underside of each shelf, removing more from the rear. The top two openings are tapered by removing material progressively from the fronts of the sides and divider and this needs to be done before the baselines for the dovetails and tenons are marked on these parts. At this stage the dovetails for the top corners can be cut and fitted. It’s very important to make sure that the bottoms of the tails and pins are cleaned out properly as the two parts must go together with no gaps at the baselines. Undercutting the waste is a good idea to prevent this happening. The base and both shelves are scalloped allowing the drawers to be opened with a delicate fingertip, this feature is typical of many of Alan’s chests. Before gluing up, the inside surfaces must be sanded smooth and I like to finish them with two seal coats of melamine lacquer or shellac followed by a hard carnauba wax blend, to promote smooth running.

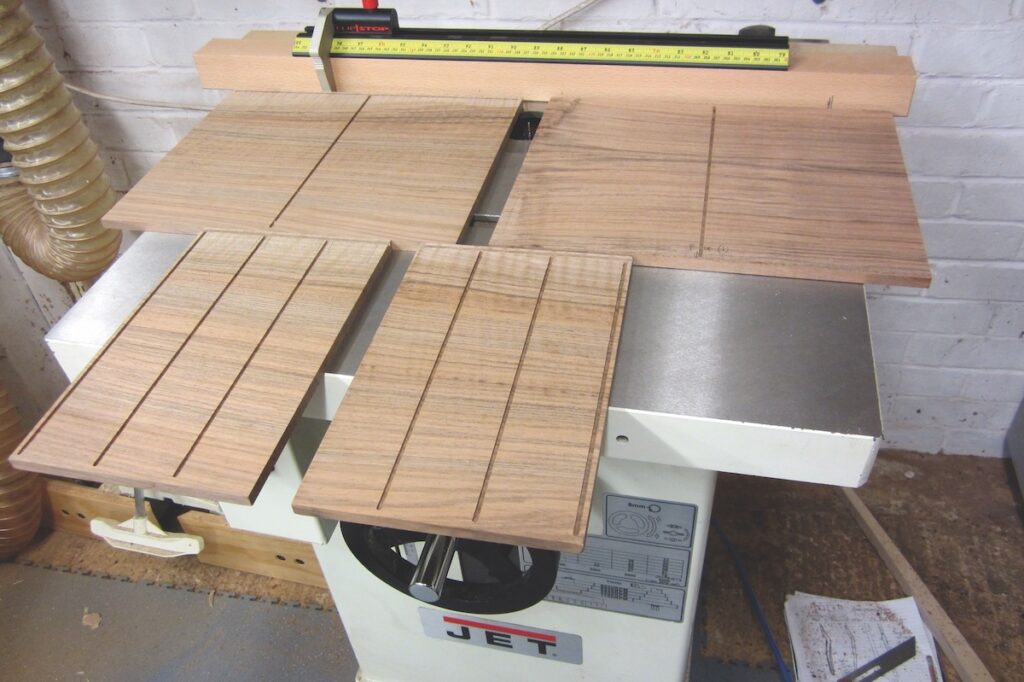
Re-sawn walnut (Juglans nigra) boards left on their edges to settle for a few weeks
The stopped grooves being cut on the shaper with a 3.25mm bit
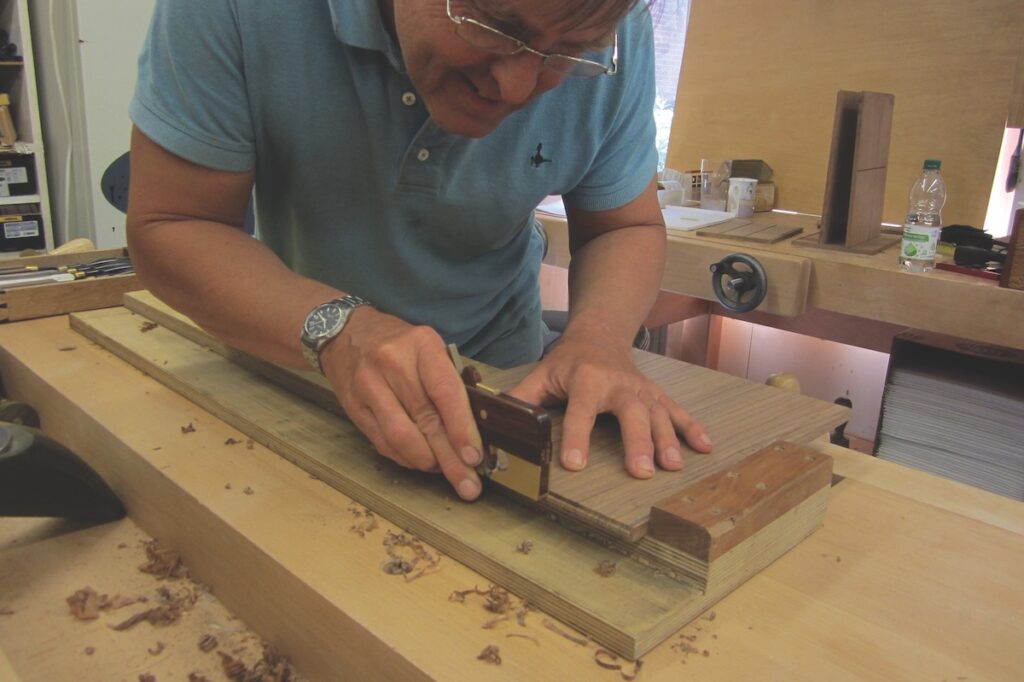
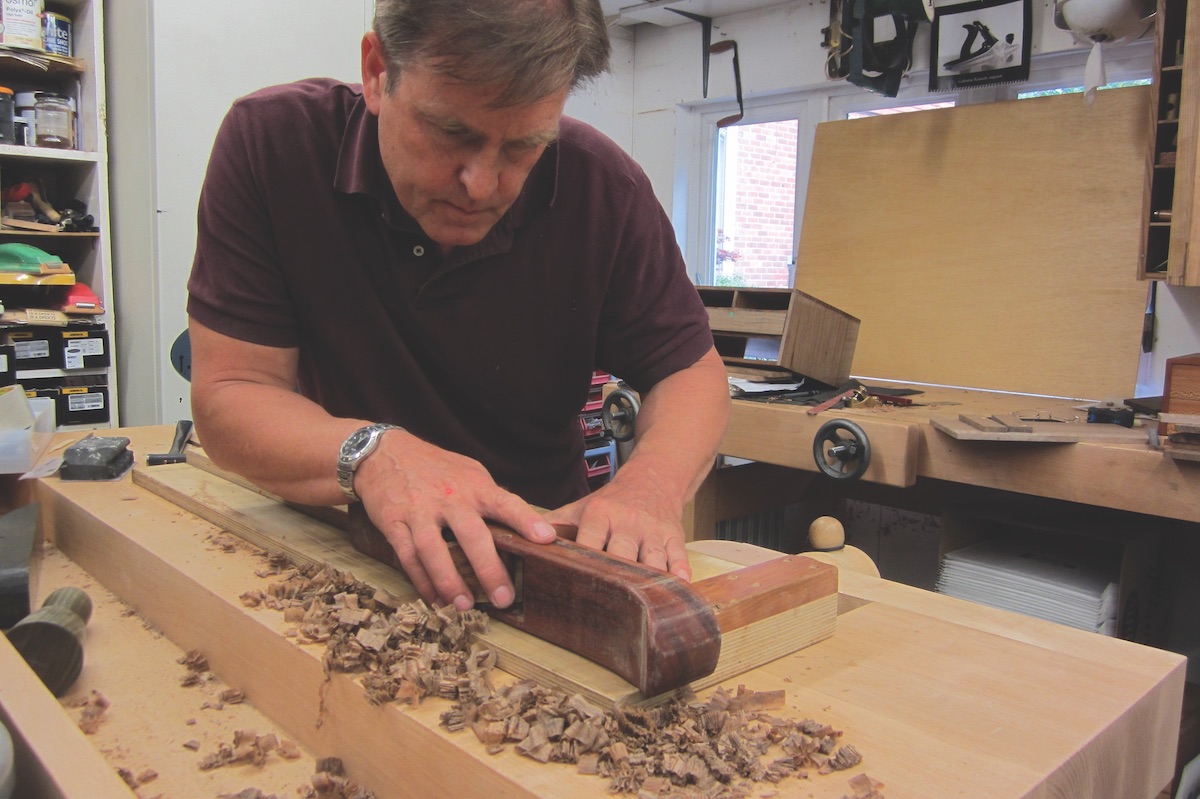
Progressive shavings being taken from each sideon the shooting board to create a minute taper
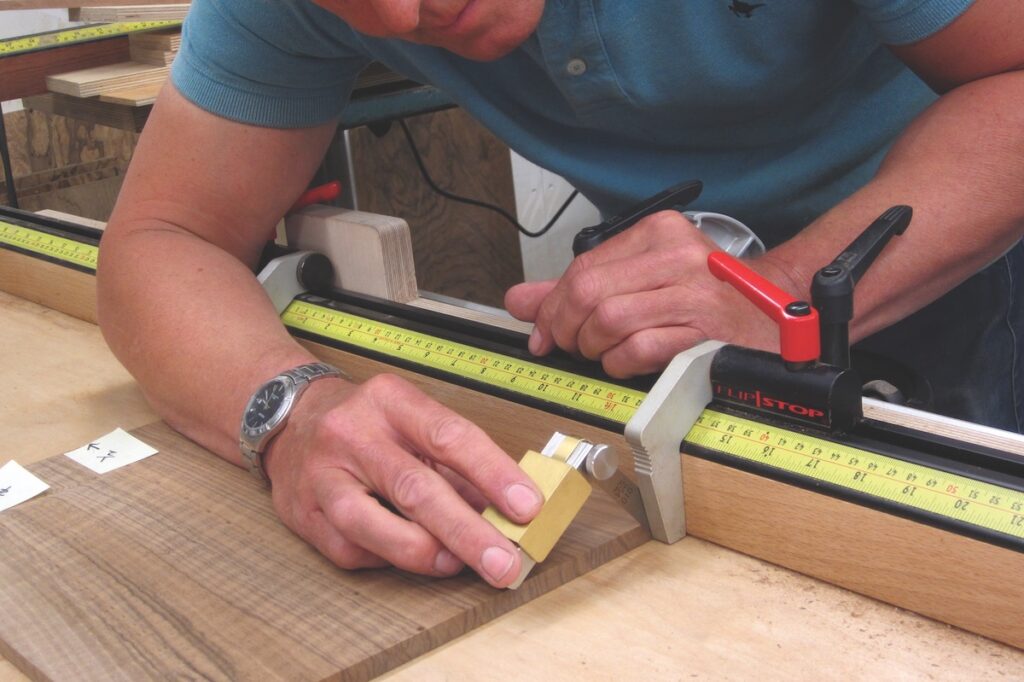
Verifying the taper between two fixed stops
The same setting was used on the marking gauge for the shoulders of both the shelves and the dovetails
The stub tenons were trimmed to a tight fit in the grooves
The stub tenons were trimmed to a tight fit in the grooves
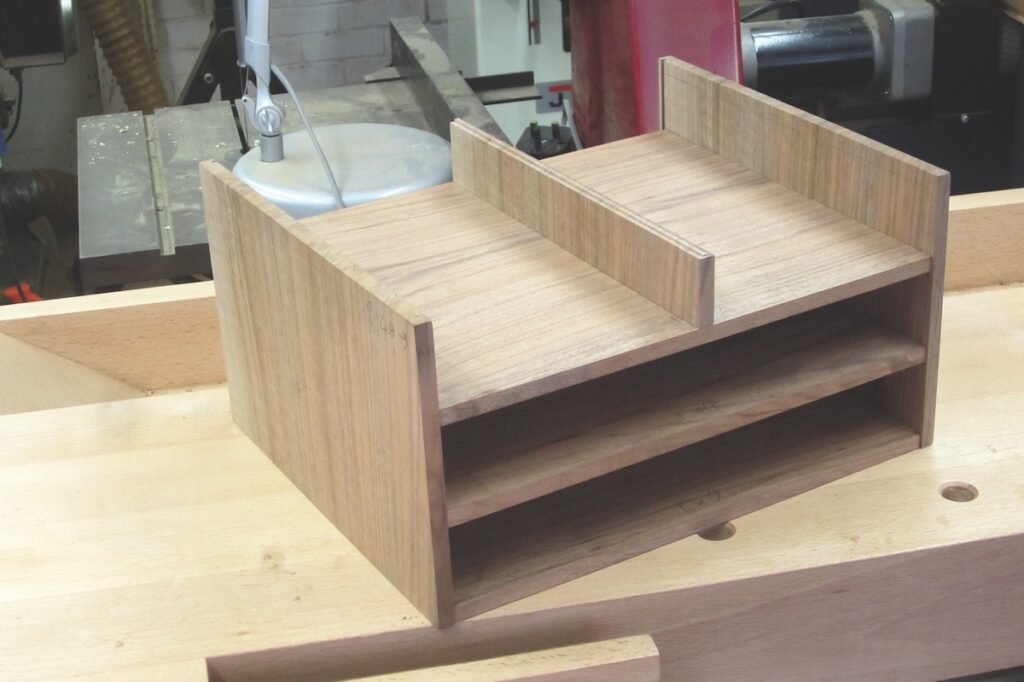
Dry fitting the carcass parts, tapers can be checked at this stage
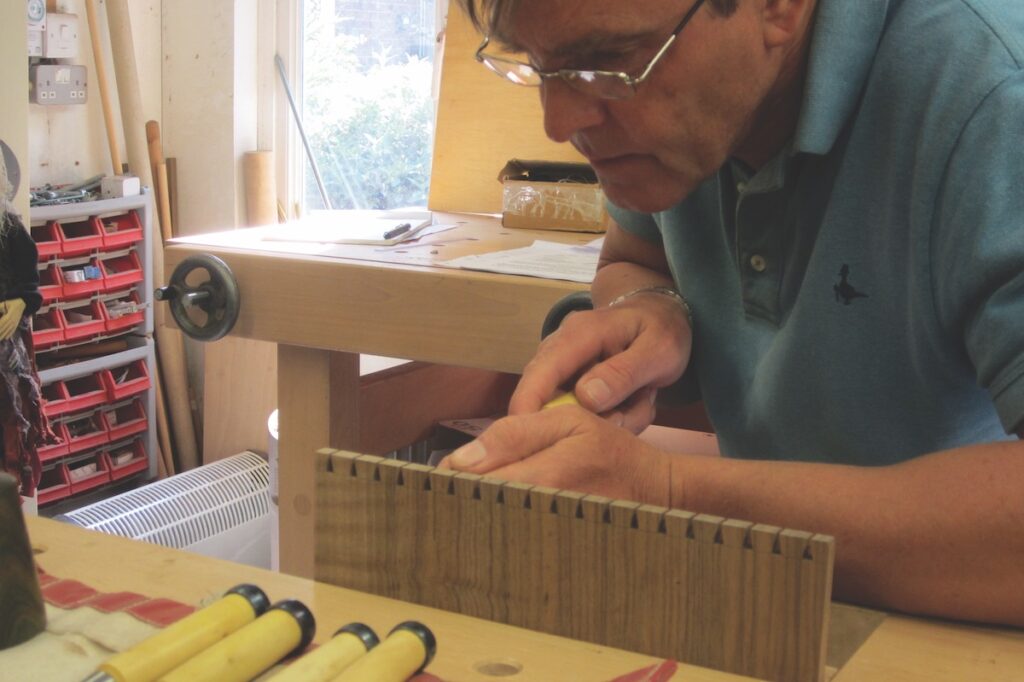
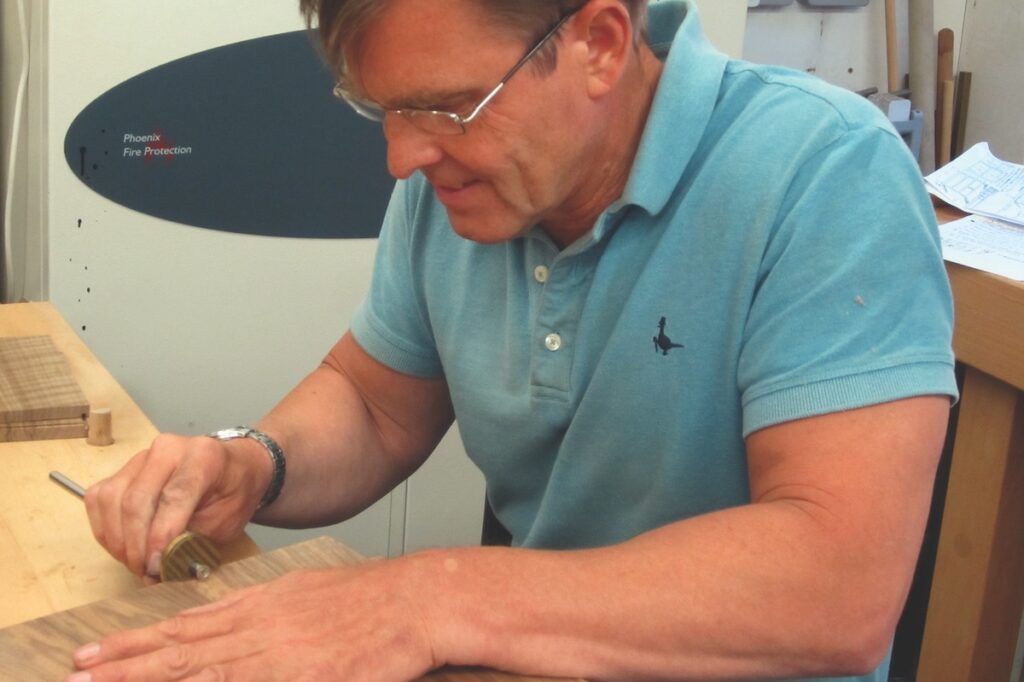
Cleaning out the dovetails
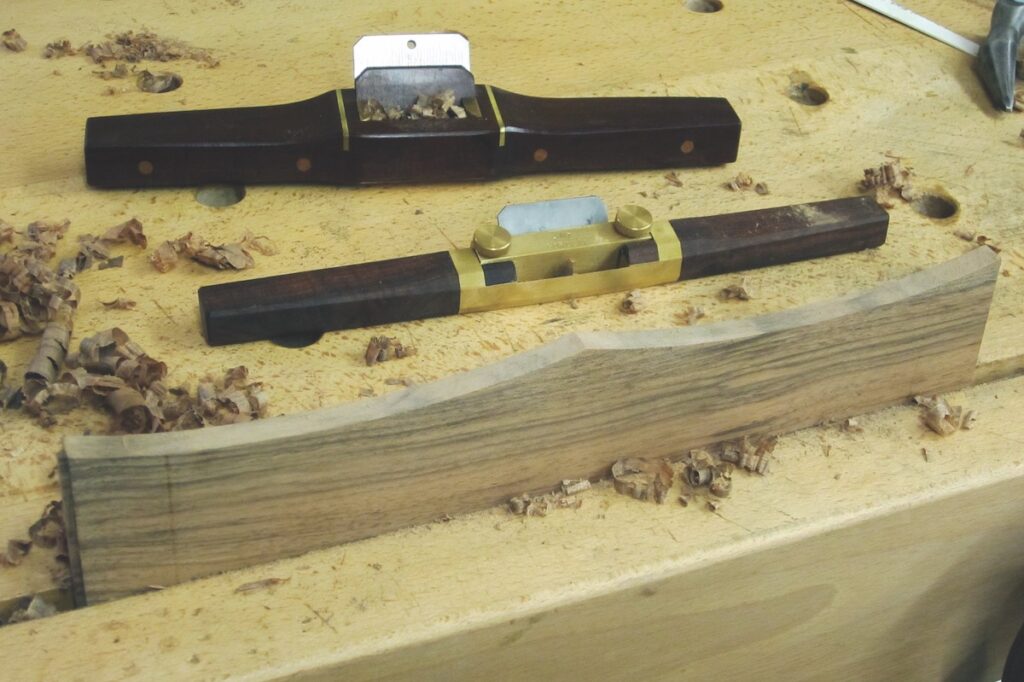
The curved fronts to the rails were shaped with flat and curved HNT Gordon spokeshaves
Making the drawers
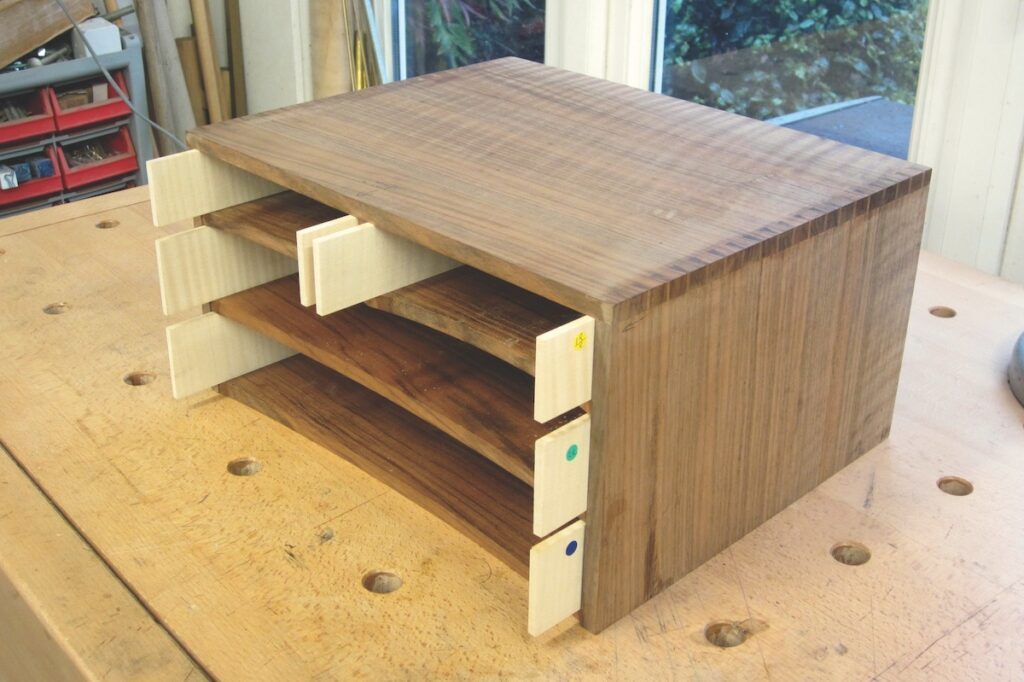
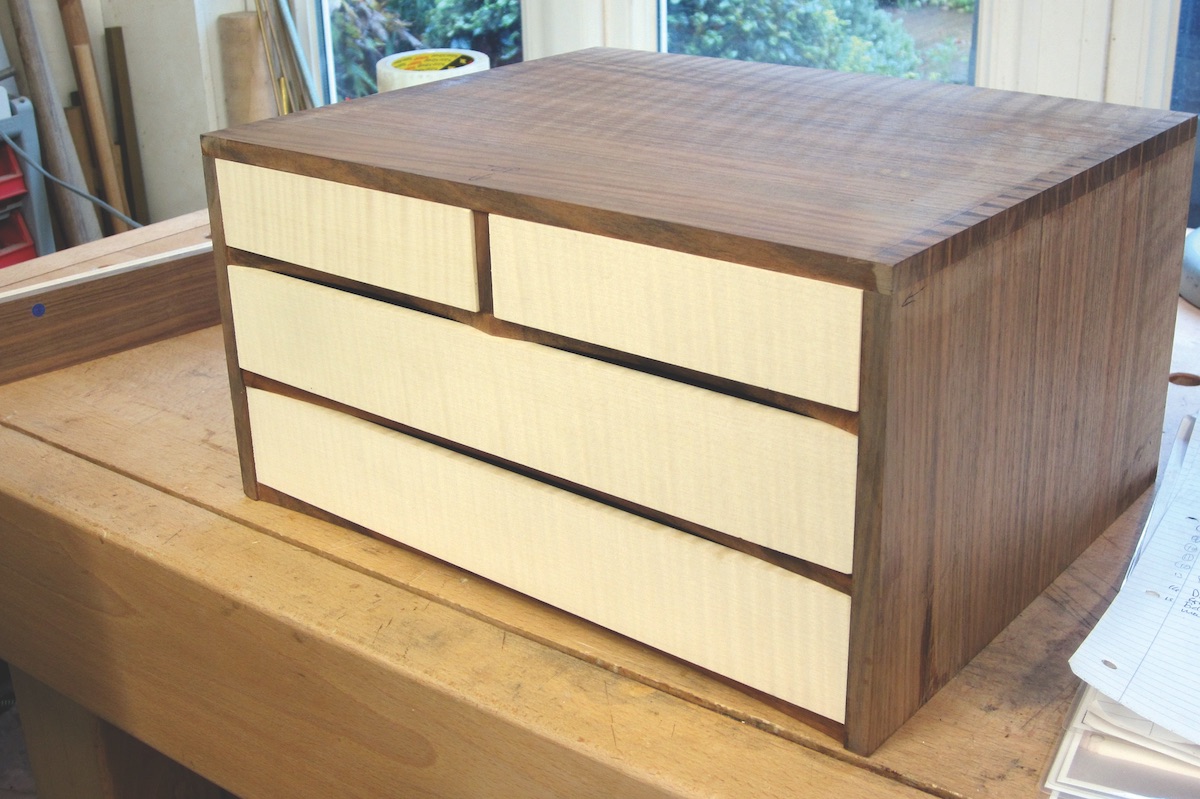
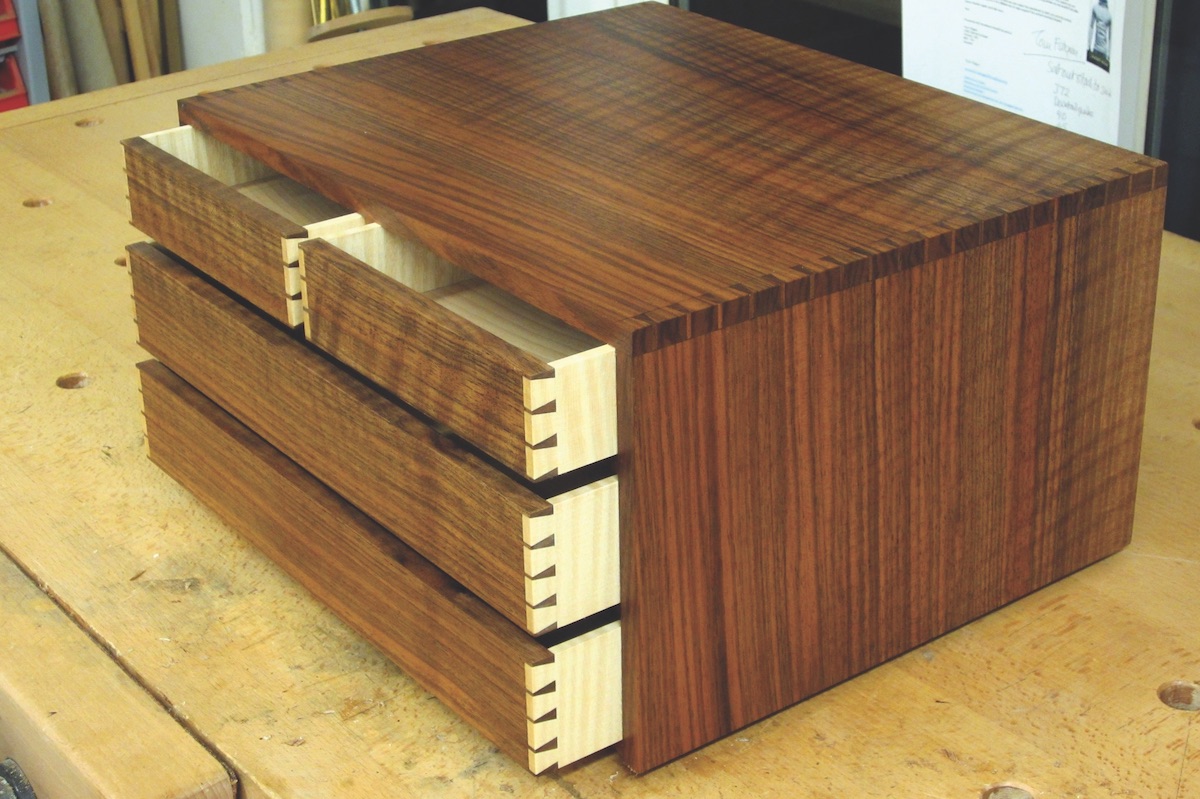
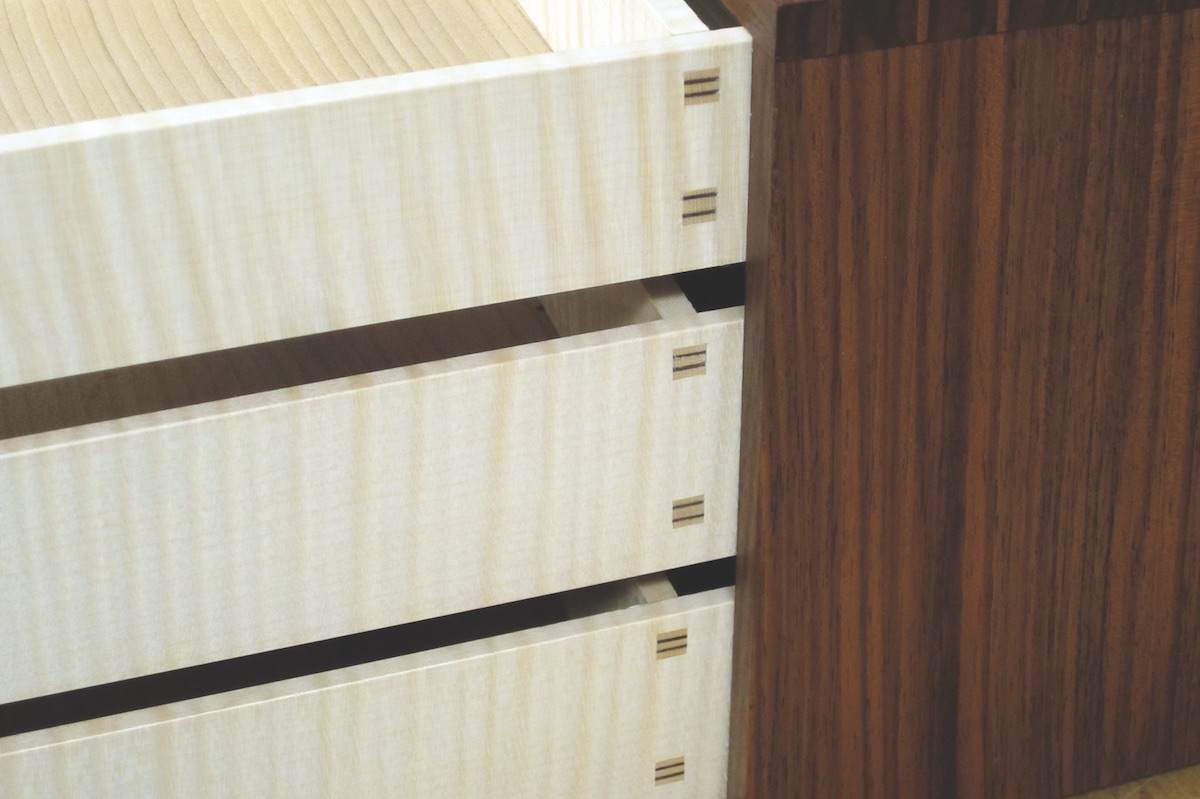
With the carcass glued up it’s time to look at fitting the drawers. The first job is to shoot each of the sides into its corresponding opening, having carefully marked them with coloured dots. The fit needs to be smooth running but without wobble, again this is done on the shooting board. A slight tapering in the height of the opening certainly helps here. The back of the carcass can be slid into place and the sides marked and cut to final length. The next stage is to fit the backs into the front openings, the height is done first followed by the sides of each part. With these fitted and marked up the inside of the fronts can be marked directly from the backs and these can be shot back to the lines with a slight outward taper – some folded paper under the part on the shooting board makes this taper easy. This taper will be planed out when the drawers are finally fitted. The inside of the drawer parts are planed and sanded smooth before the joints are marked and cut. The grooves for the base are cut using the bottom edge of each part against the router table fence, which is vital for a good fit. Although the back was to be lower than the sides, a groove was cut in this too and it was temporarily kept at the same height as the other parts until the marking out for the joints was completed. Interestingly the backs of the drawers on Alan’s cabinet were inset 3in from the end of the sides so that full access could be given to the contents without the risk of the drawer falling out. I decided to do the same on my version which meant using mortise and tenon joints instead of dovetails on the rear. Both the mortises and tenons were marked out from the bottom edge using the same settings on the wheel-marking gauges, light marks were made so the bevel of the wheel didn’t give an inaccurate line. The marking gauge is then reset to mark the dovetail depth allowing the sides to protrude very slightly in the finished drawer so that material is removed from here when fitting and not from the front and back which would give a sloppy fit. This same setting on the gauge is used to identify the tenon shoulders to keep things in line. With the dovetails forming a decorative feature on the front of the cabinet, the spacing as well as the drawer depth had been worked out carefully at the design stage. This allowed for four dovetails on the top two drawers and five on the bottom two, while maintaining the same spacing on all of them. With these carefully marked and cut out, the pins were marked from the tails, referencing off that bottom edge again. My dovetail alignment board comes in very useful here – readers wishing to make one should see my YouTube video. With all the joints cut, the back can be reduced in height. I cut down the groove with a hand saw and cleaned back to the edge with a hand plane. This should now be a perfect fit, allowing the base to pass under without leaving any gap. The wedges for the tenons were cut identically using a notched board on the bandsaw. The thin feathery ends were trimmed back until it was thick enough to just enter the cuts made in the tenon, this way the wedge would be able to do its job in these very short small tenons. Keeping the wedges all identical also meant the end result would be nice, evenly-matched wedges. After all, if the joints are on show they have to look good.
With the carcass glued up each drawer side could be shot into its opening and marked with a coloured dot
The back was fitted enabling the drawer sides to be cut to length
The sycamore (Acer pseudoplatanus) backs to each drawer were shot to a tight fit in the front
The walnut drawer fronts were marked from the backs and trimmed to fit with a slight outward taper on the shooting board
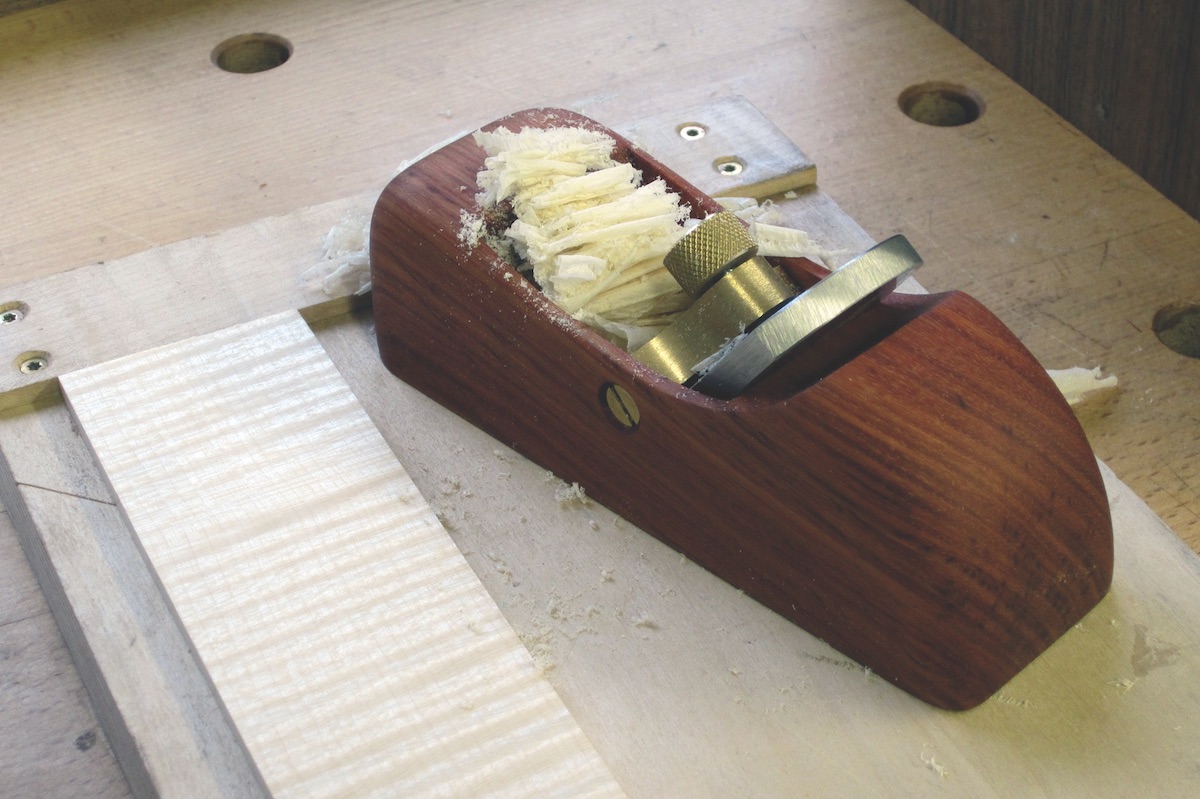
Bringing the inside of the drawer parts to a finish with a high angle smoother
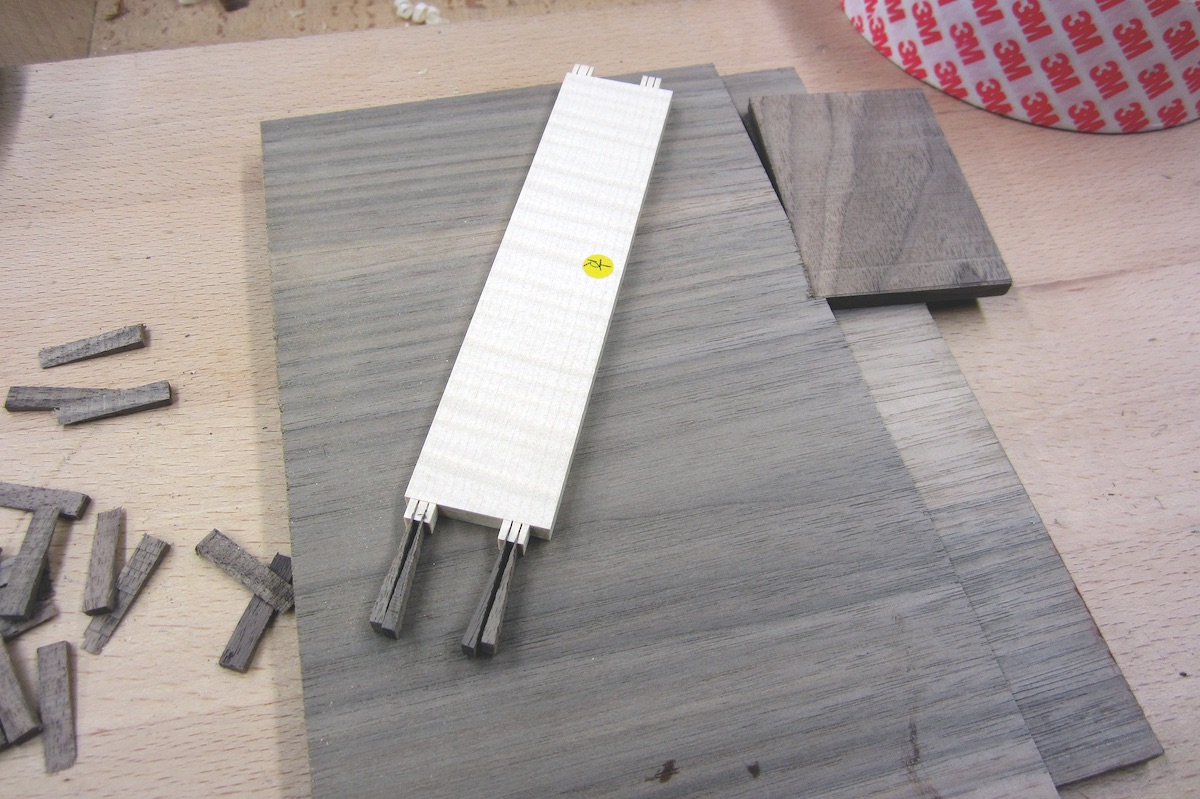
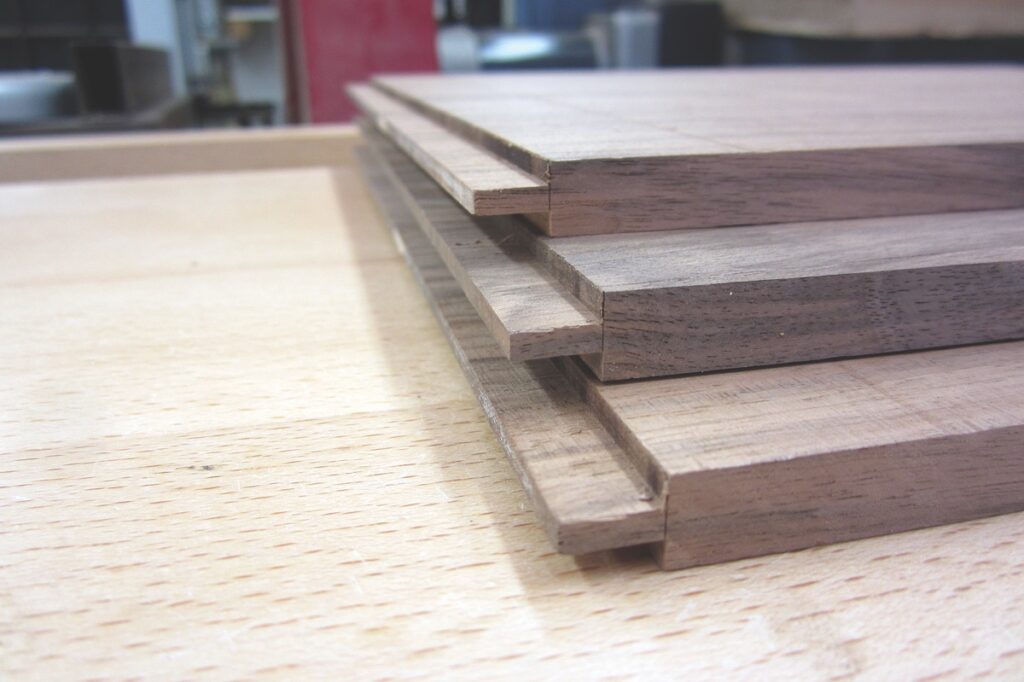
Identical tapering wedges cut for the through tenons
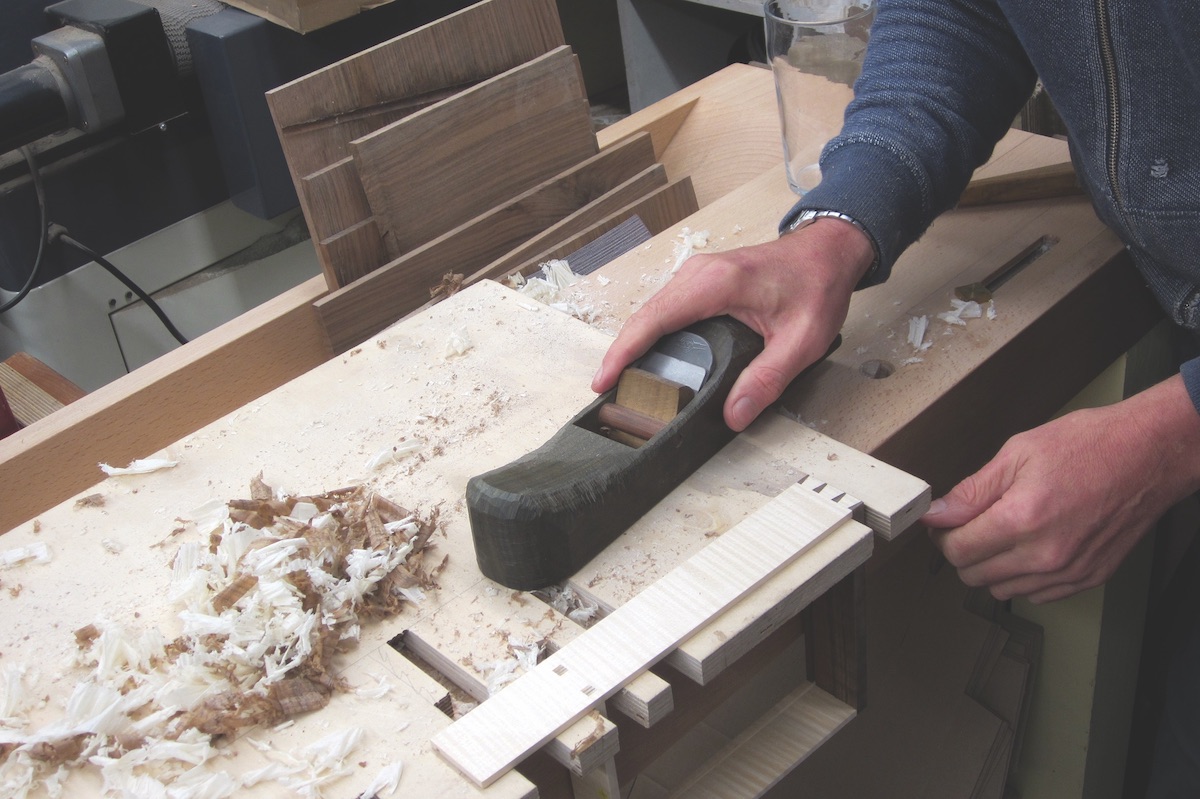
The drawers being carefully trimmed to fit
Fitting the drawers
With everything glued up it was time to fit the drawers. The thin sides were supported on a drawer board and they were planed until both the dovetails and tenons were just cleaned up. At this stage the drawers will require very little more material removed but it’s vital it comes off in the right places. Sanding the sides lightly with 240 and then waxing them leaves a dull surface – pushing the drawer briskly in and out of its opening will leave shiny spots which reveals where materials need to be carefully planed off. This process is repeated until a silky fit is achieved. David Charlesworth describes in his book how the rear of the drawers can be left a little tight so that as the drawer approaches full extension it tightens up in the carcass. This is a nice little feature and, of course, can only be accomplished if the opening is tapering slightly in width from front to back. With the base fitted into its groove the fit can be checked again and the whole process repeated for each drawer. The underside of each front has a V groove cut on the router table to give a little finger recess and the outside of the chest can be cleaned up ready for a finish. I like to seal the sides of my drawers in the same way as I did the inside, with two coats of melamine lacquer or shellac followed by wax. This keeps things running very smoothly without adding any unpleasant aromas to the inside of the chest. I finished the outside with three rubbed coats of Devon Wood Oil, which soaked deep into the wood and left a nice sheen to this beautiful timber.
Lightly sand and then wax the drawer sides. Pushing the drawer in and out of its slot creates shiny spots which can be trimmed until a perfect fit is achieved
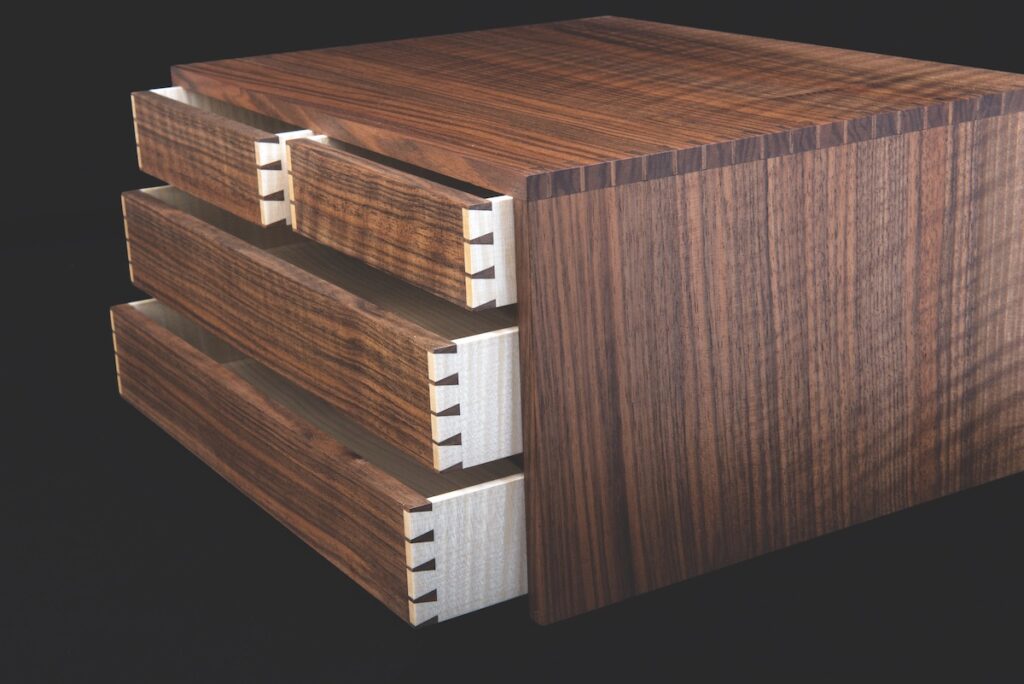
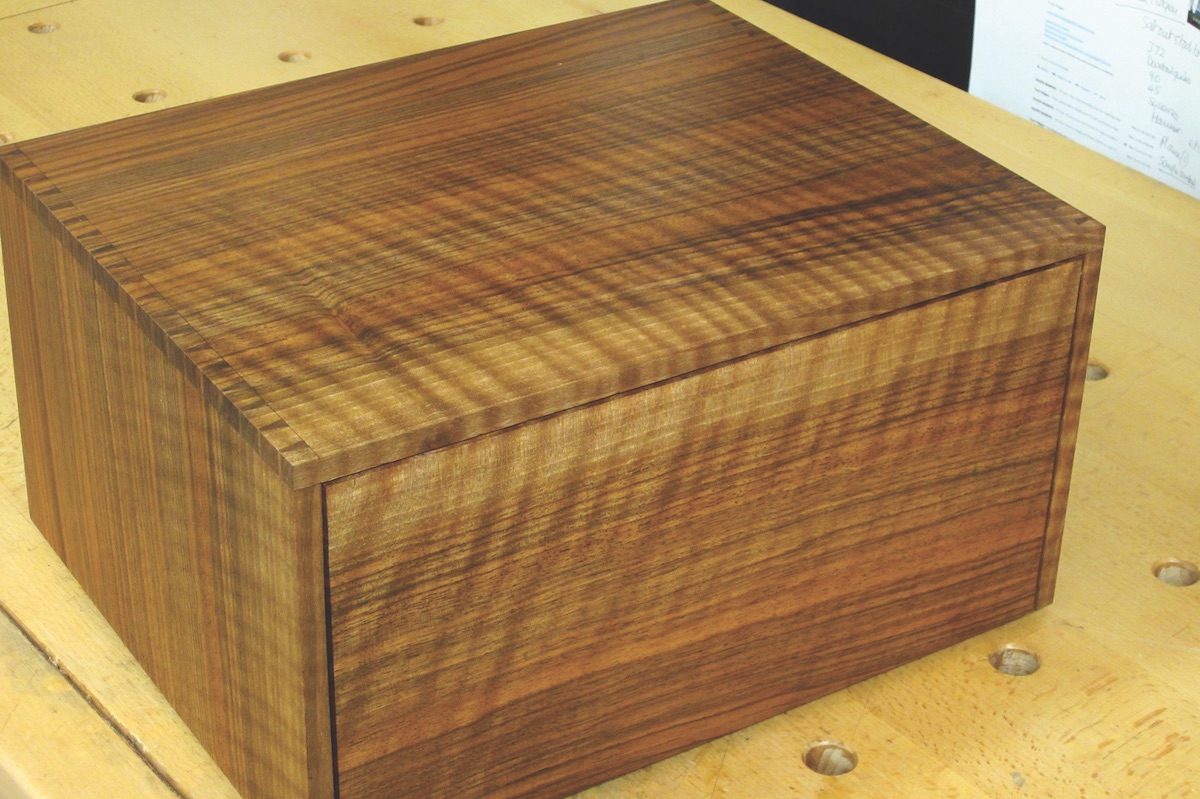
The finished cabinet with its first coat of oil applied
A close-up of the tiny wedged tenons
The book-matched rear panel
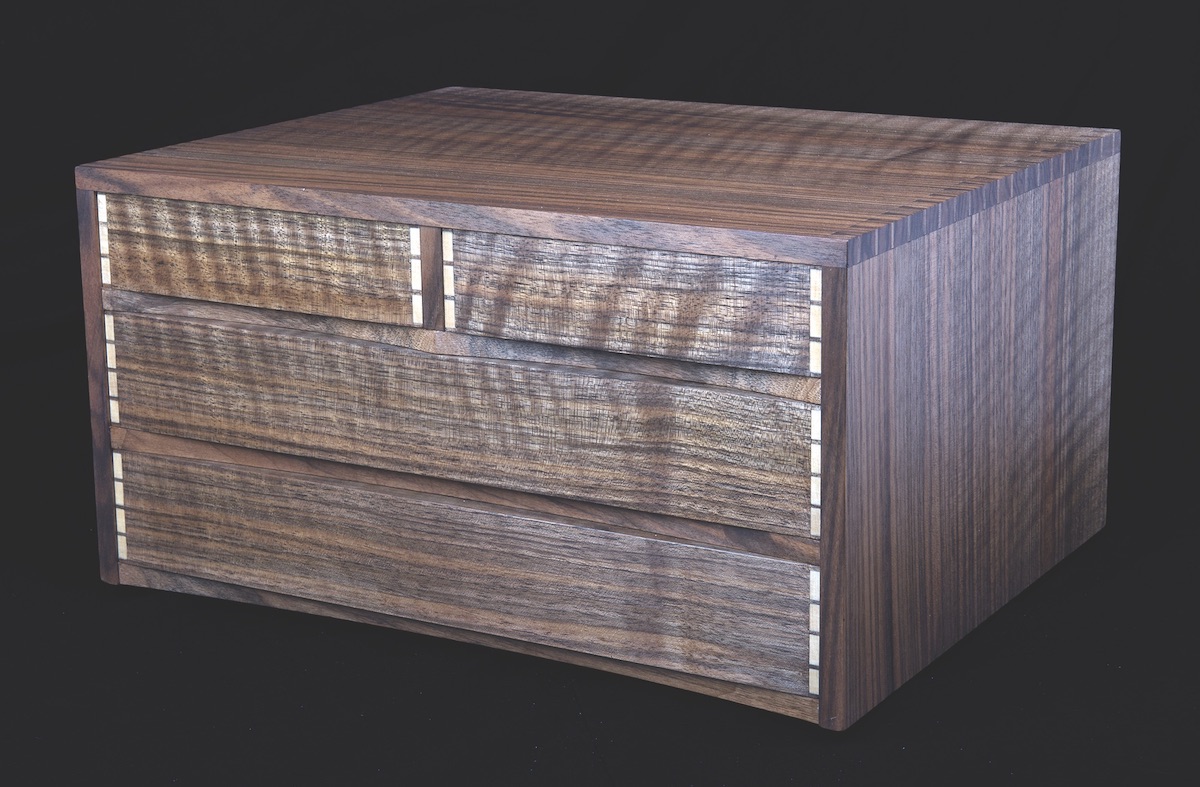
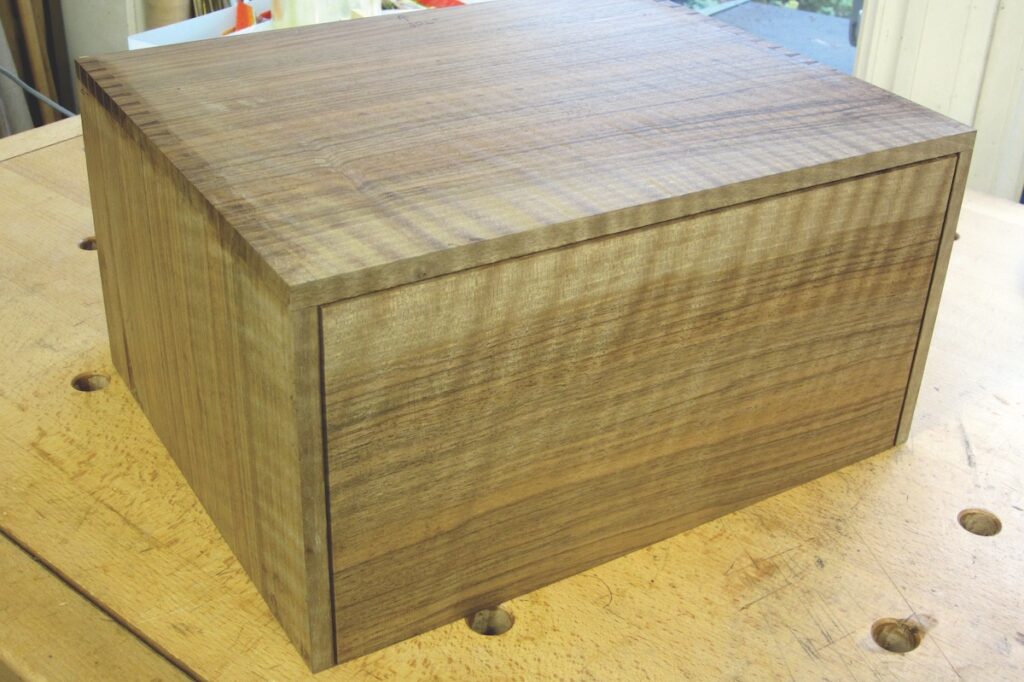
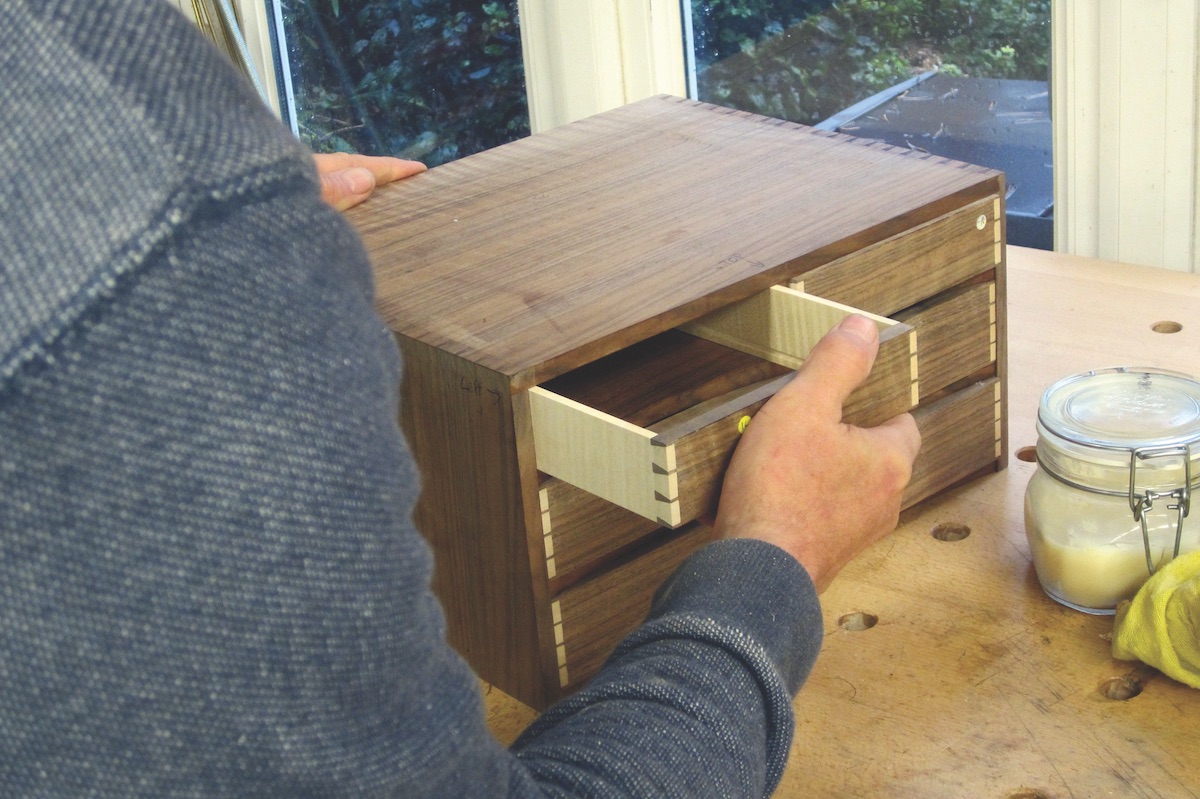
The finished cabinet


