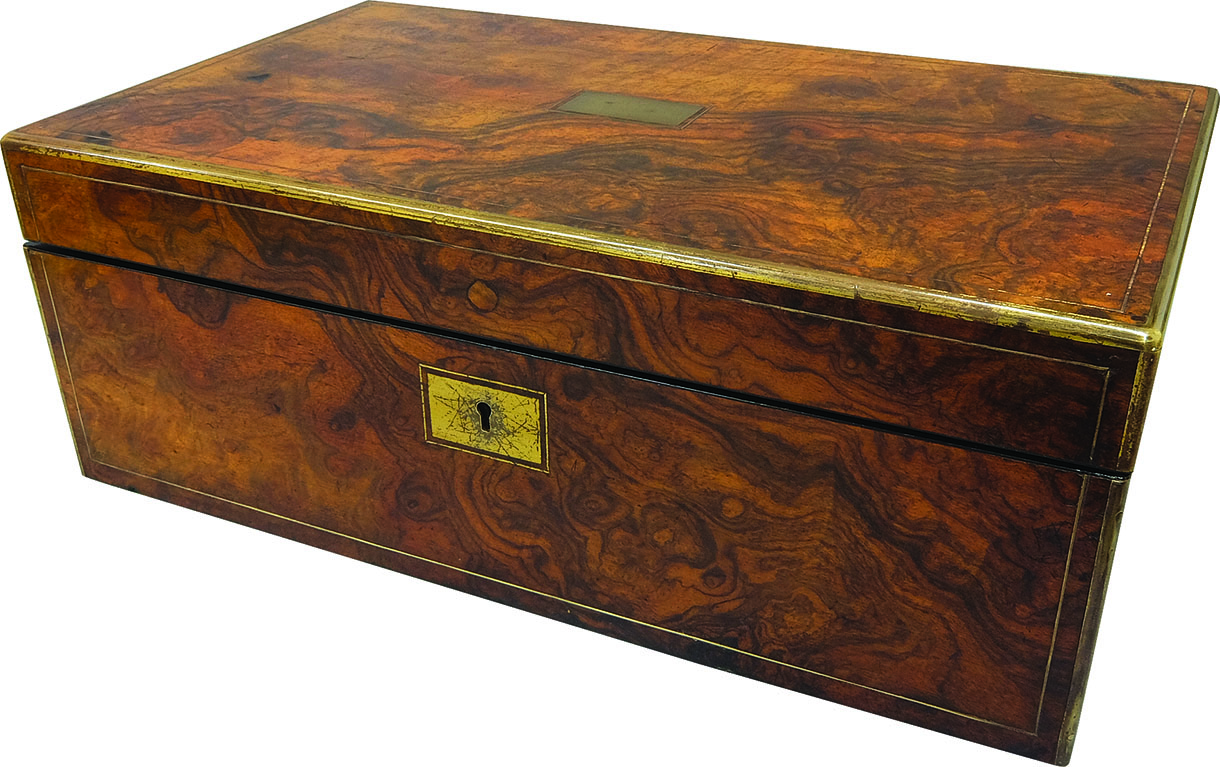
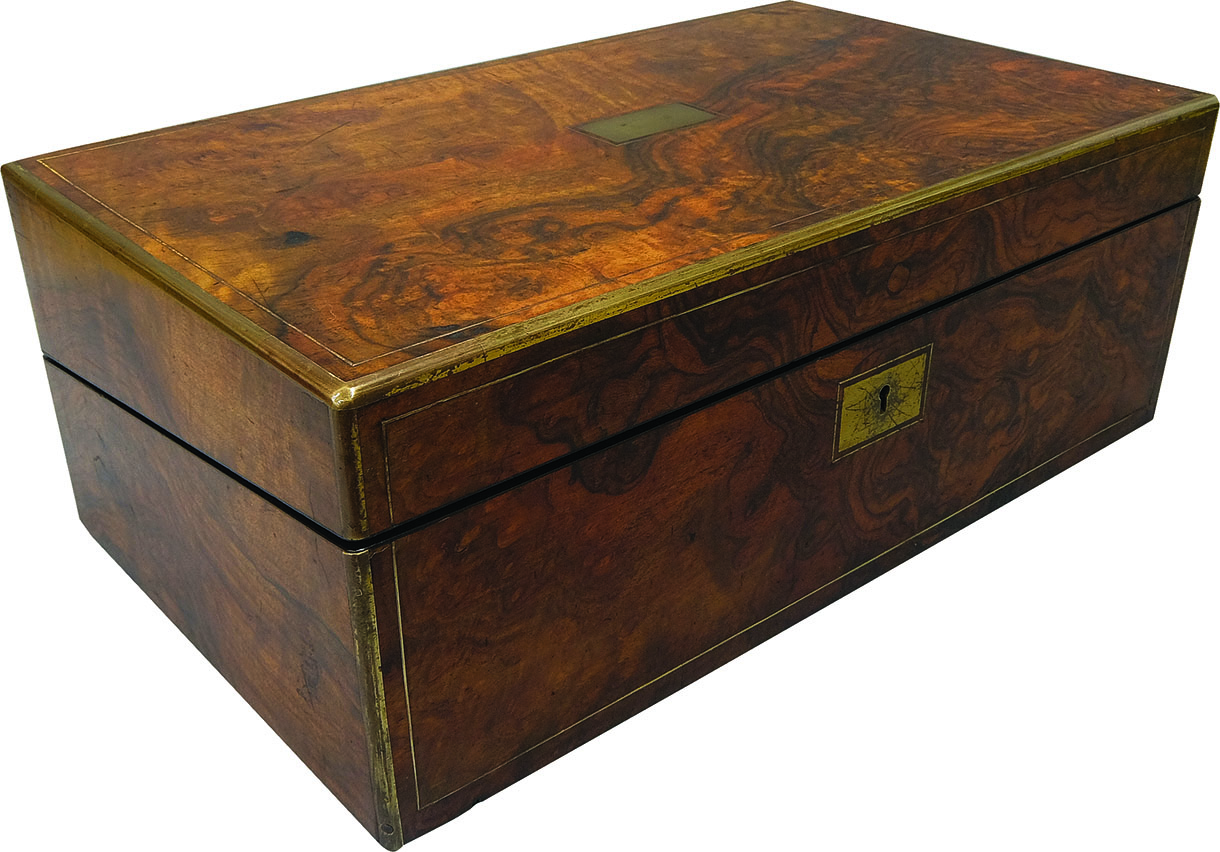
Walnut Writing Slope
Louise Biggs makes some much-needed repairs to a family heirloom
Louise Biggs makes some much-needed repairs to a family heirloom
Assessment
• Brass line missing and loose on the front.
• Quadrant brass strip on the front corners had been pinned through the front but was lifting.
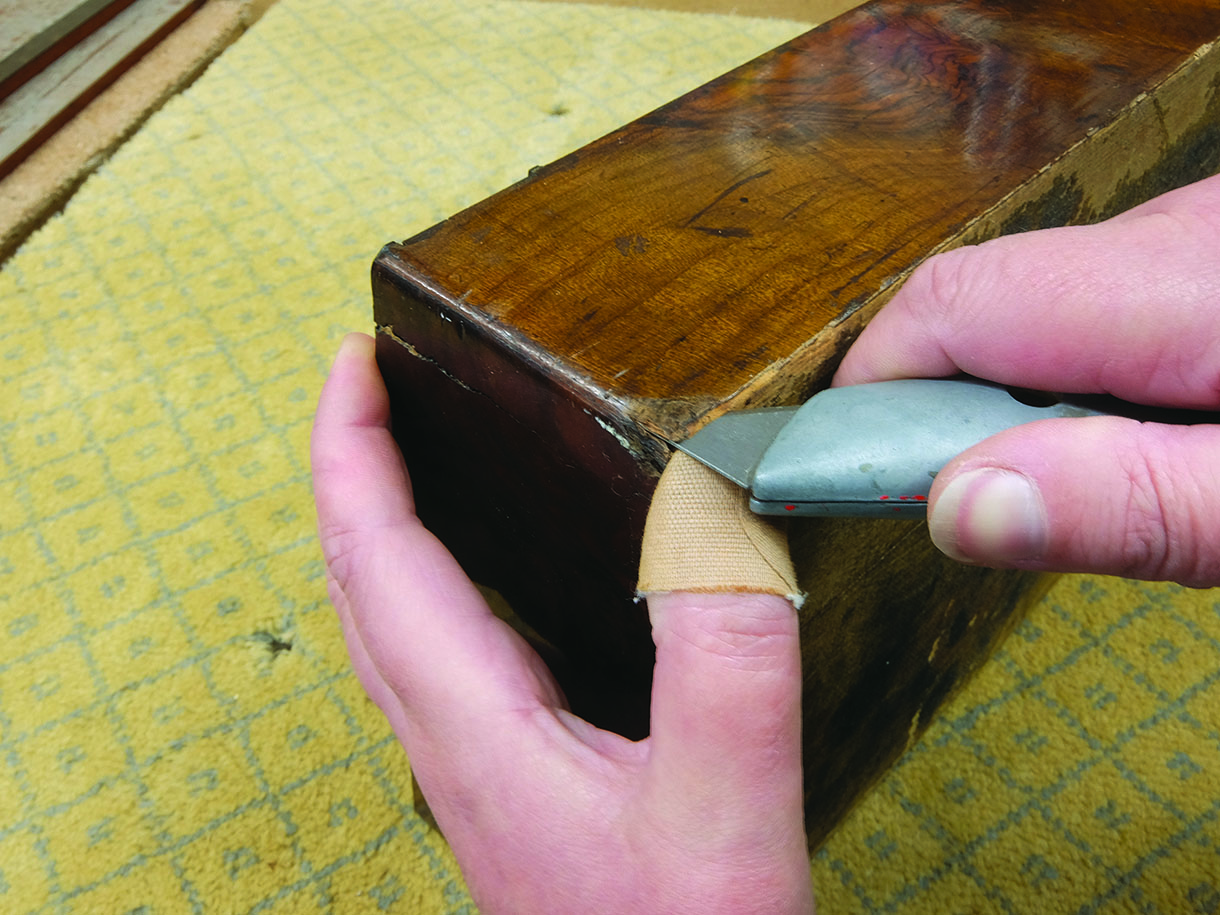
• Minor veneer damage to the bottom edge of the base.
• Joint at the back right-hand corner of the box bottom was split open.
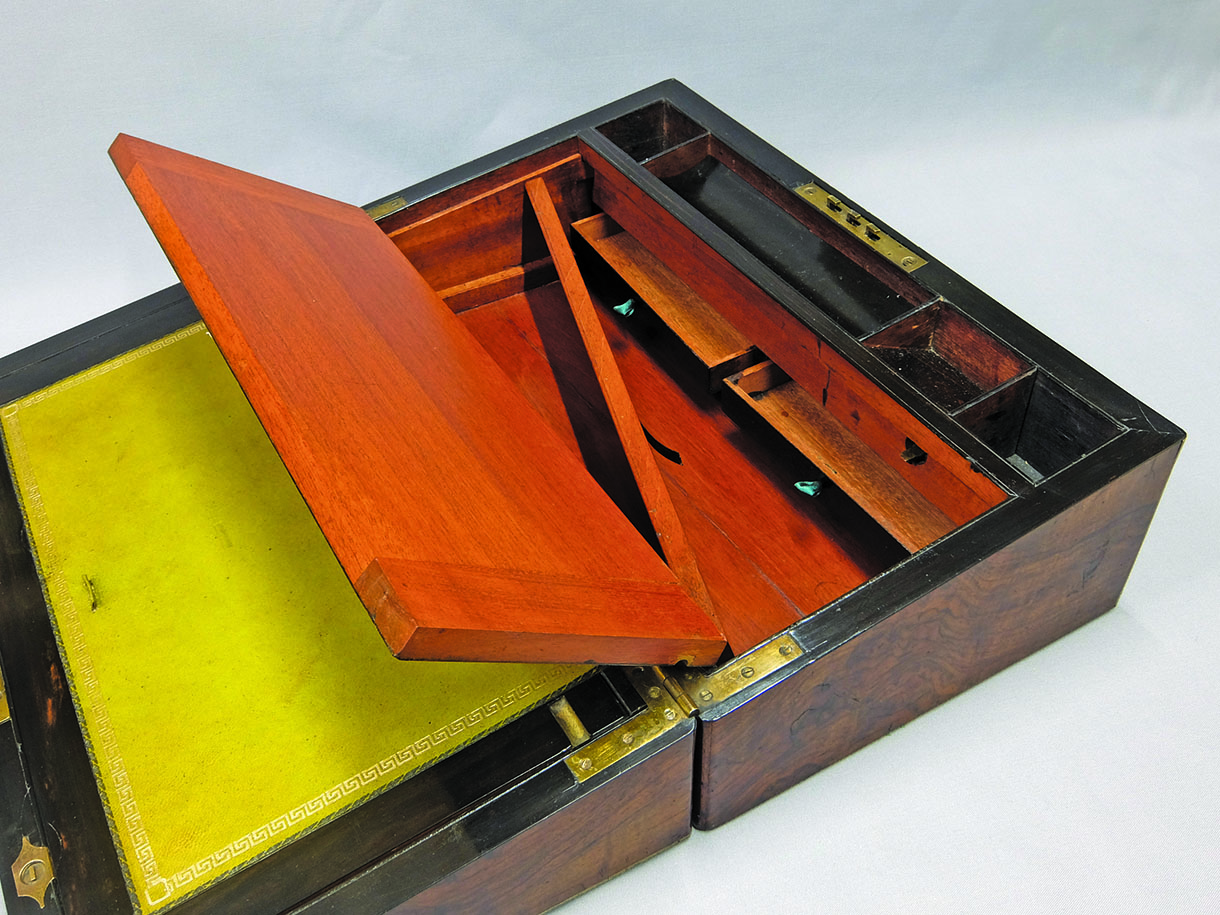
• The leathered slopes would not lie flat due to shrinkage and the hinge formed by the faux leather not leaving enough clearance.
• The faux leather needs to be removed and replaced with a leather skiver and new tabs.
• Damage to the ebony edging around the interior, especially in the area around the clips which kept the flap in place.
• Cover piece over the mechanism for the secret drawer cover was damaged and loose.
• Centre division between the two secret drawers was loose.
• Sticky-back plastic inside the secret drawers needs to be removed as does the replacement self-adhesive baize on the bottom.
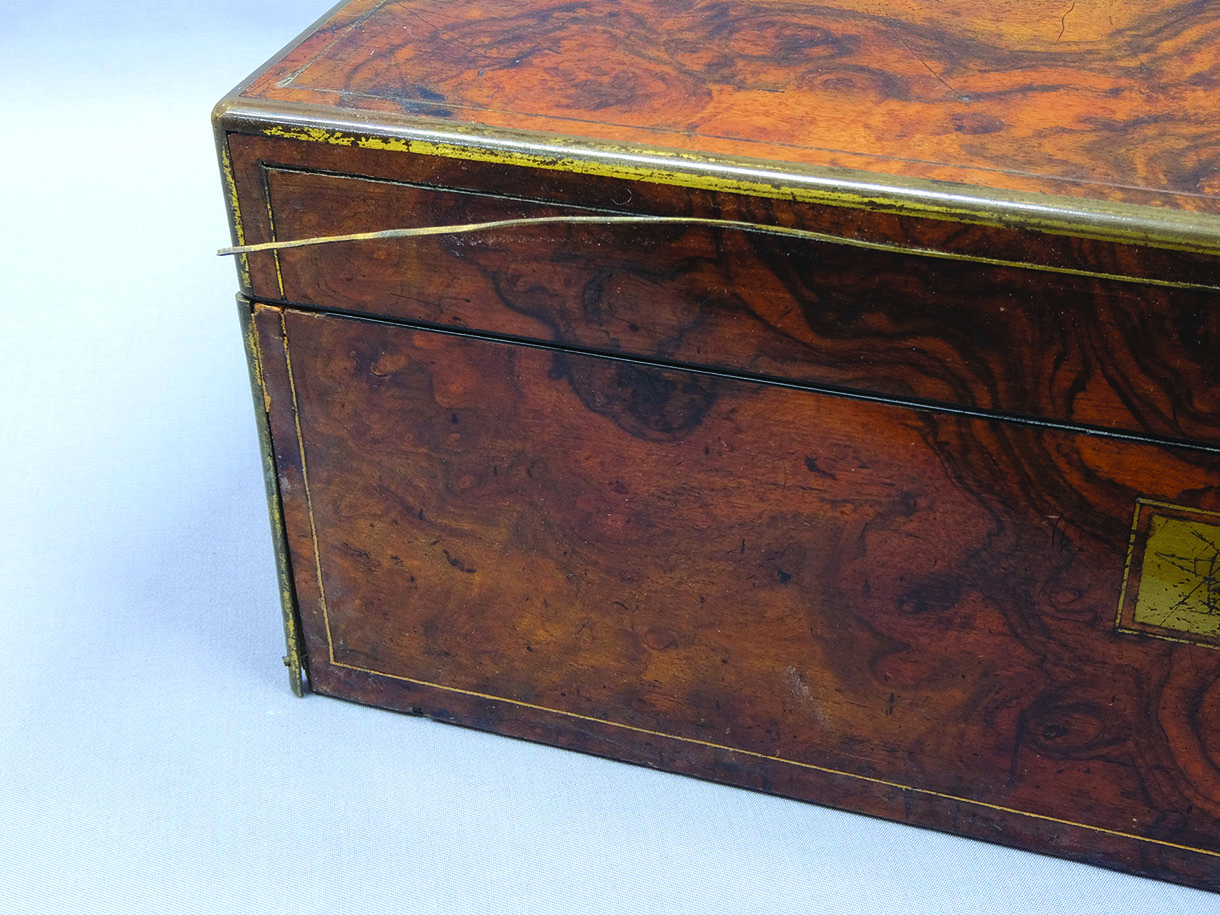
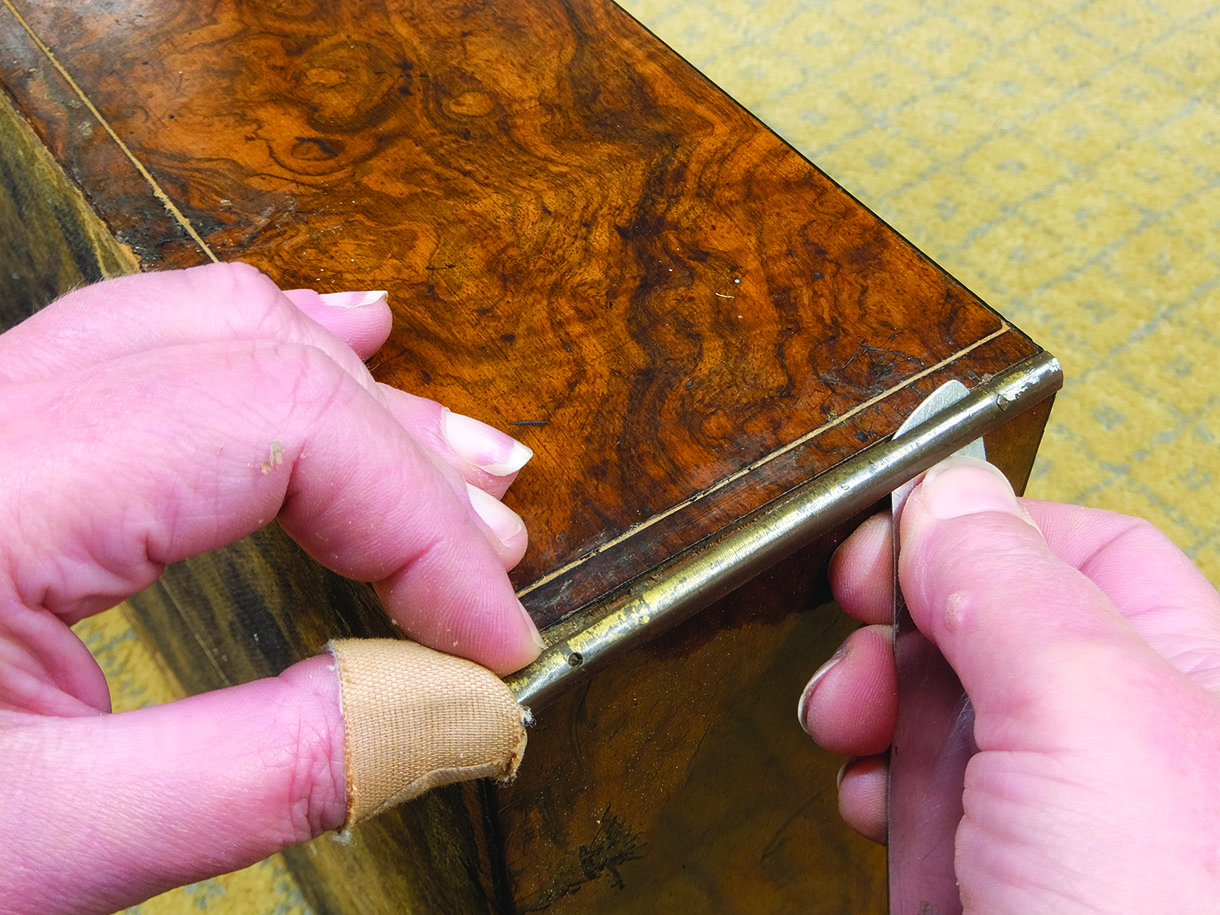
Front corner with loose brass line and quadrant corner
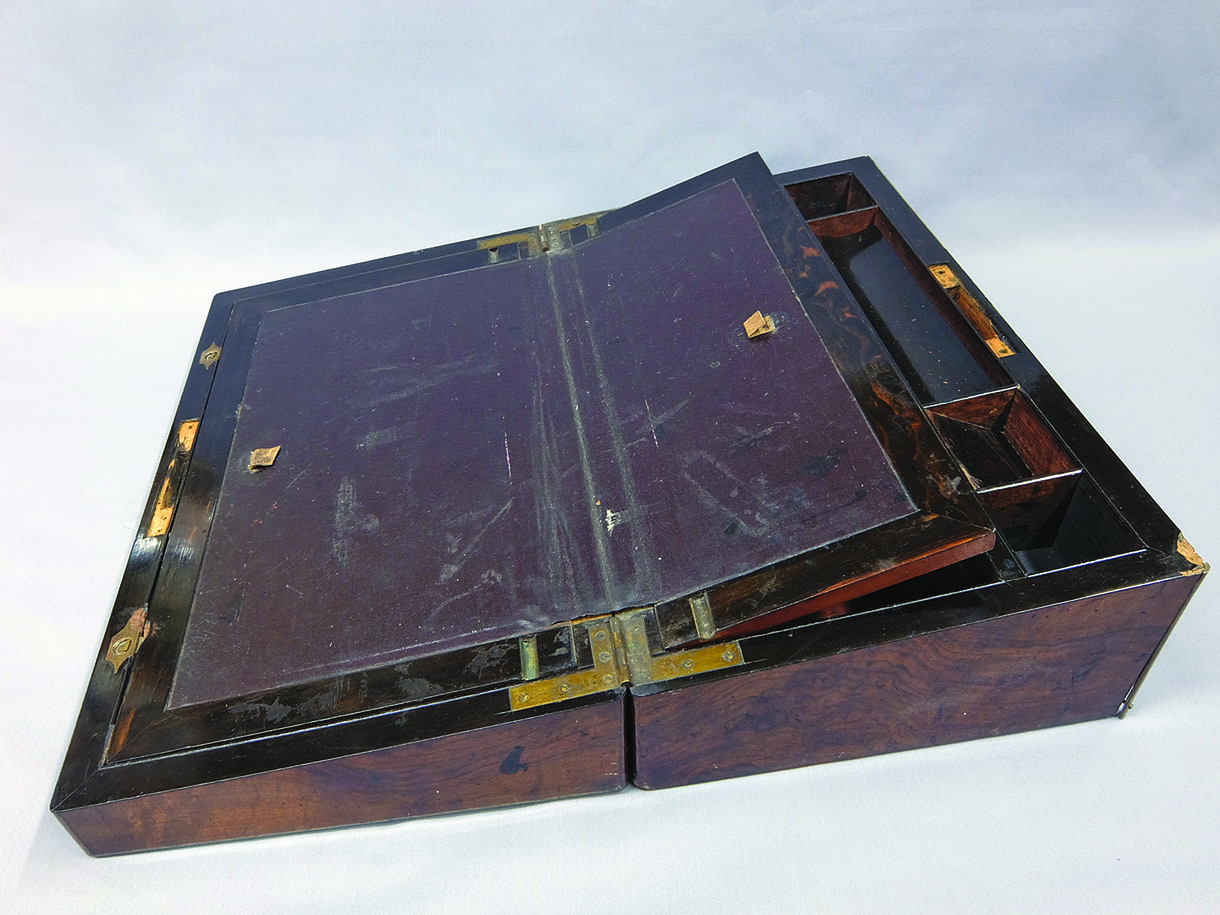
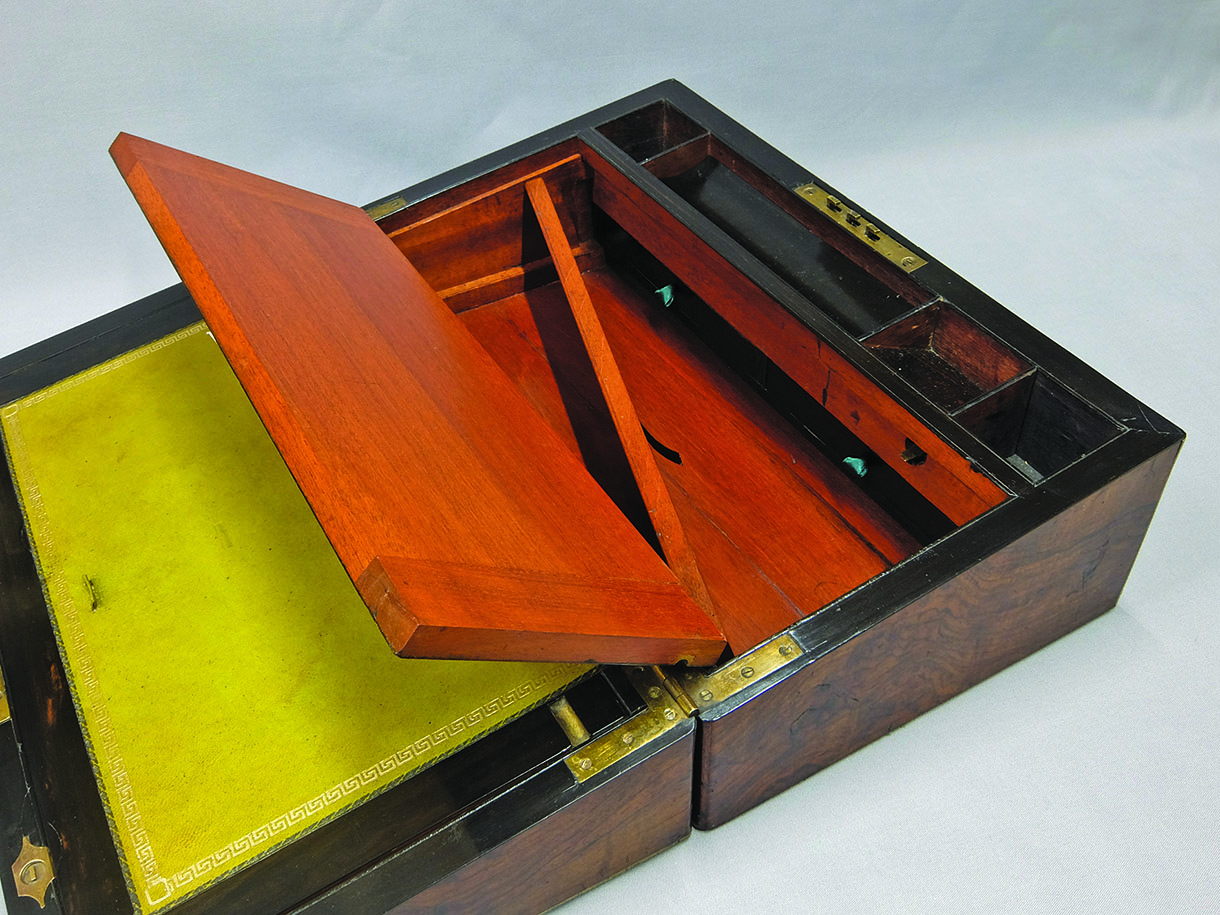
The interior slopes did not lie flat due to shrinkage and the faux leather hinge
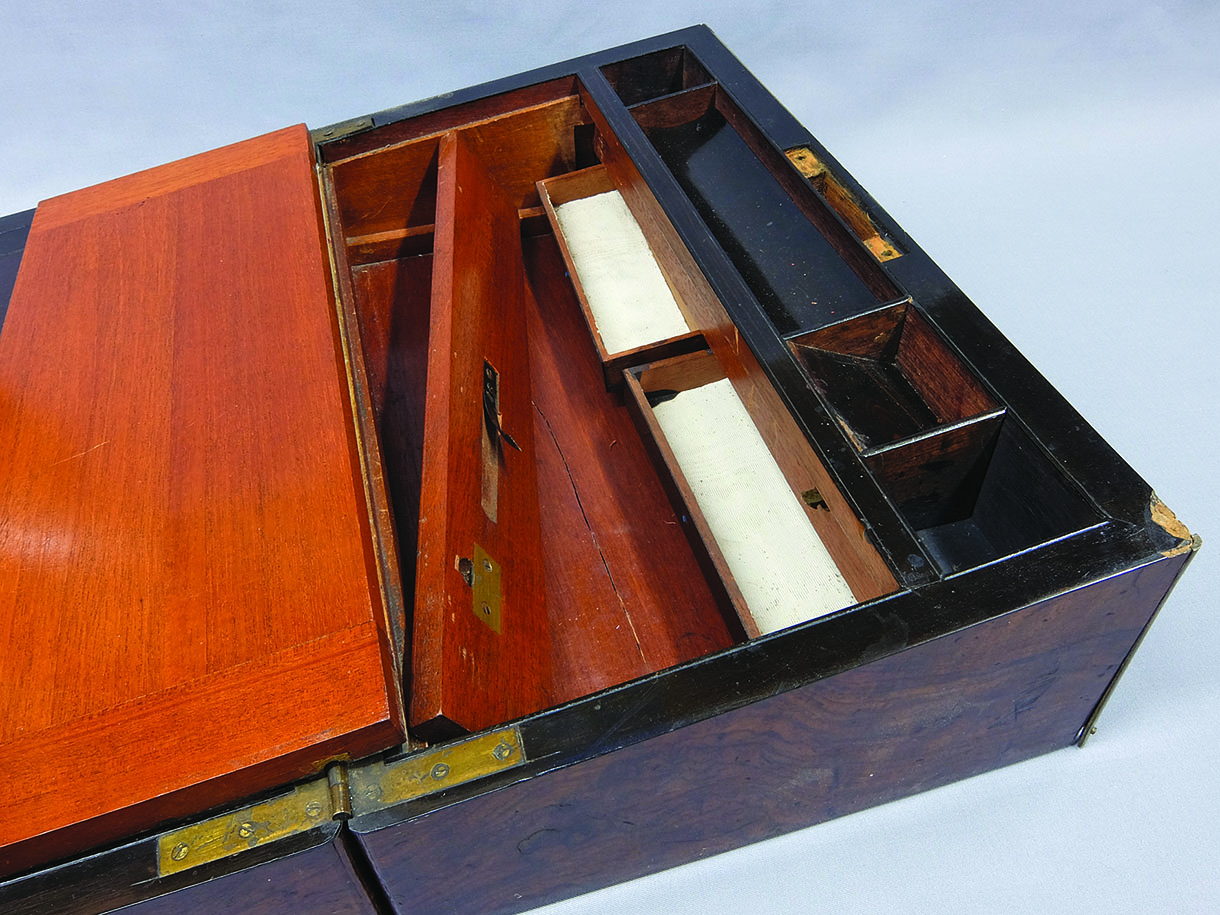
The secret drawers with the sticky-back plastic
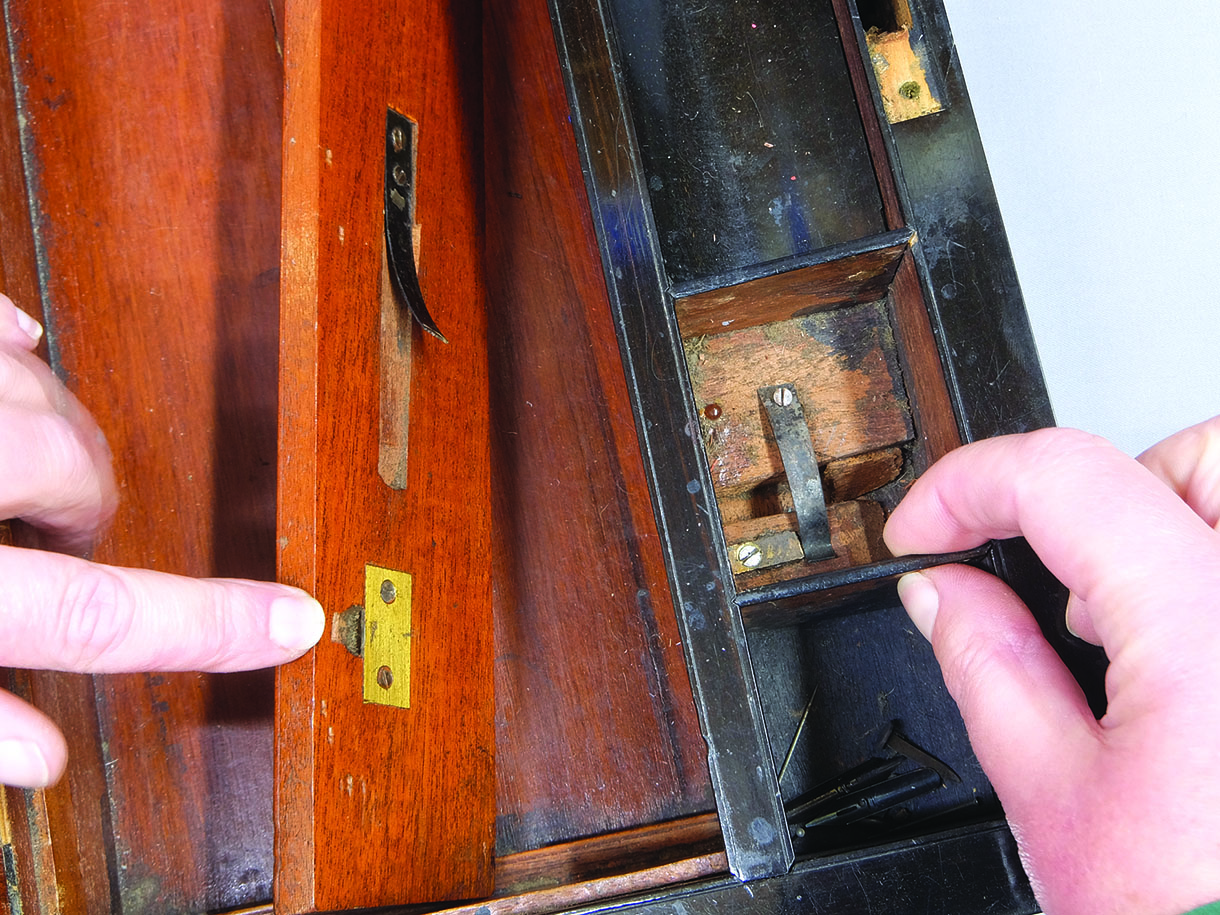
With the cover piece removed, the mechanism for the secret drawer cover can be clearly seen
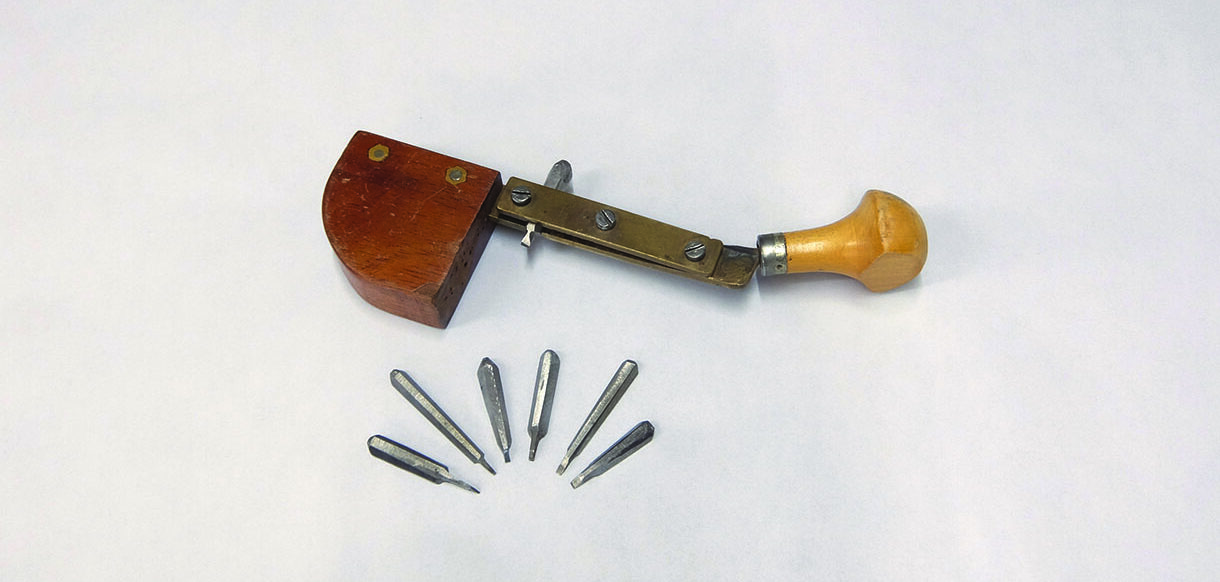
What you will need
• Glue pot and animal/hide glue
• Sash and ‘G’ clamp
• Dovetail saw
• Screwdriver
• Knife
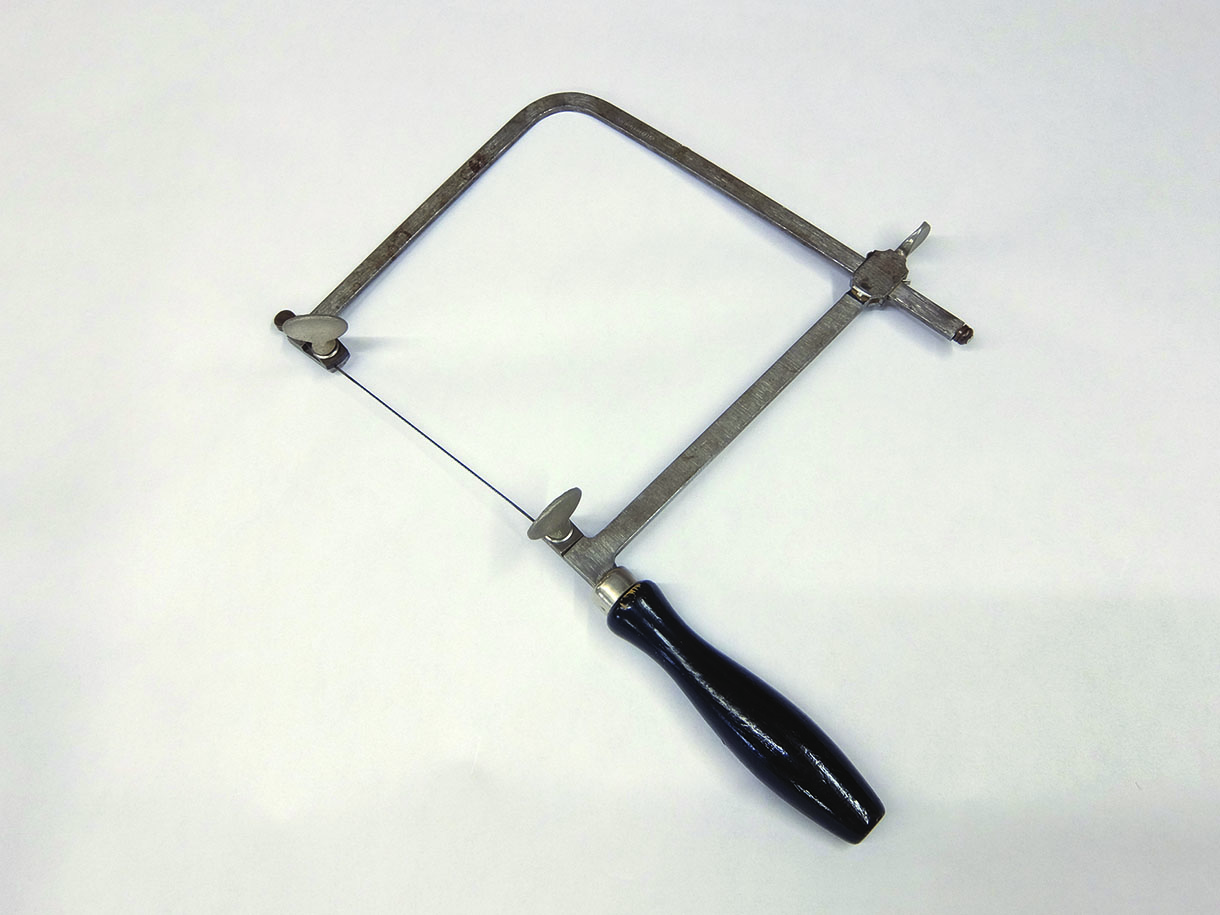
• Jeweller’s piercing saw
• Chisels – various sizes
• Pliers
• Needle files
• Cabinet scraper
• Abrasives
• Polishing equipment
• Personal protection equipment – breathing protection and gloves
Removing the old materials
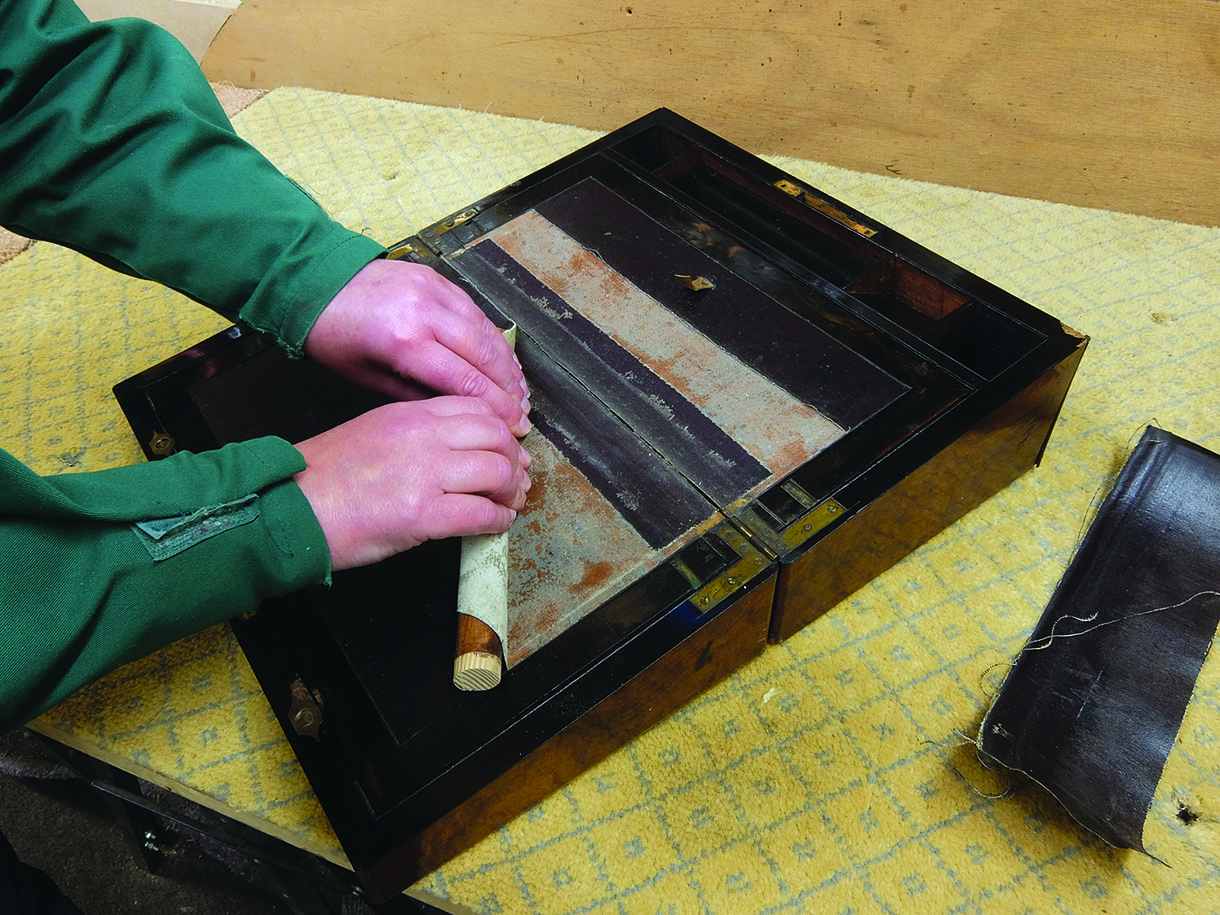
1. To start with I removed the self-adhesive baize on the bottom and the sticky-back plastic within the secret drawers. On the interior writing surfaces the faux leather was well stuck except through the hinge area. I started by carefully cutting through with a knife to separate the sections. With one loose corner the faux leather was then rolled off using a piece of large diameter dowel. By rolling diagonally and with some pressure the leather was eased off without tearing
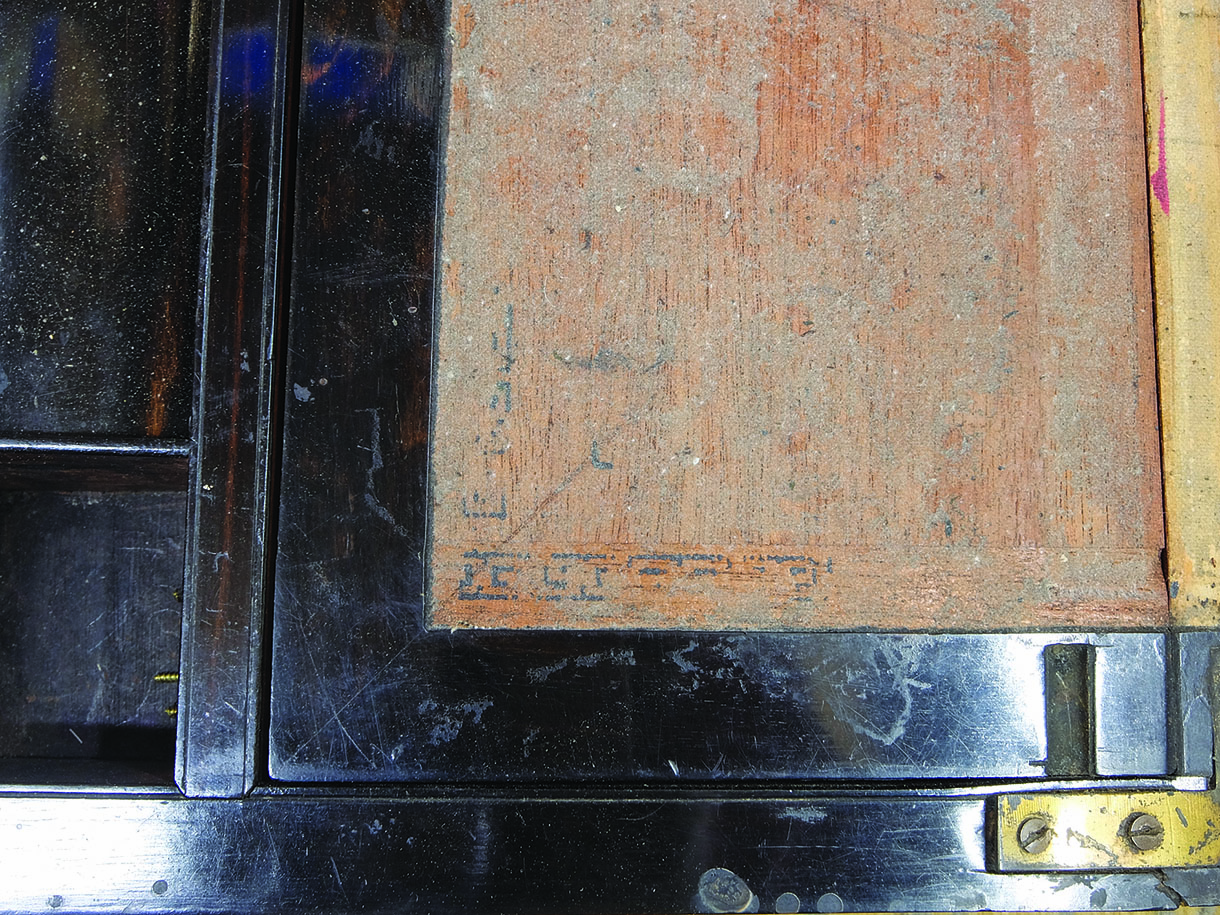
2. Once the faux leather was removed it revealed an impression of the tooling that would have been
on the original leather. This was photographed to see whether it could be matched on the new leather
3. With the materials removed the surfaces were carefully cleaned up with hot water and an old scraper. The inside of the secret drawers and the bottom were cleaned with white spirit to remove any adhesive residue and all were left to dry. The front brass corners on the bottom of the box and the loose brass line were carefully removed to prevent further damage to the line and to enable the veneer repairs to be carried out
Construction and veneer repairs
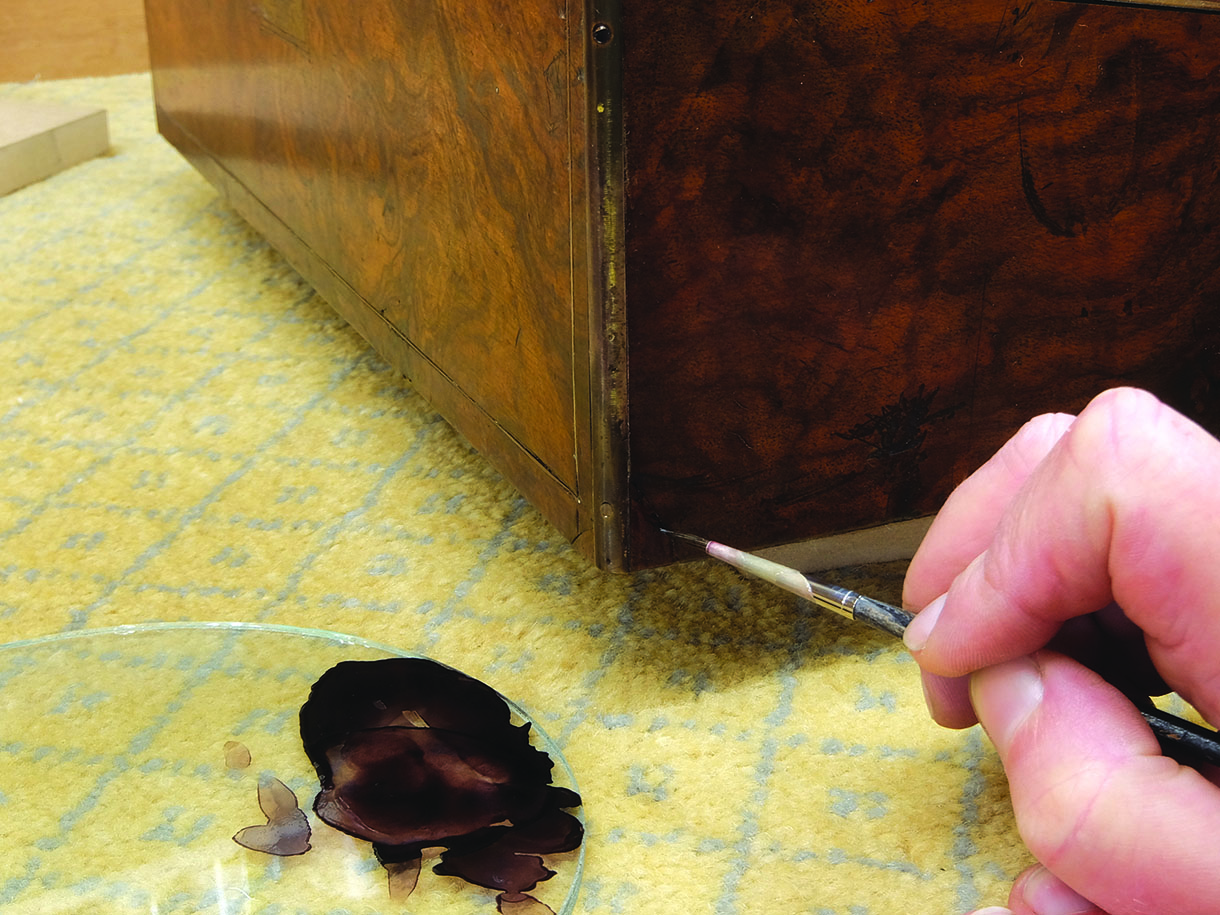
4. With the hinges removed the joint at the back corner could be repaired. Although having taken a hefty knock the veneer was still intact so a utility knife was used to ease the corner up until it was level and a fine wedge of old softwood timber inserted in the resulting gap before the veneer on the adjacent corner was repaired
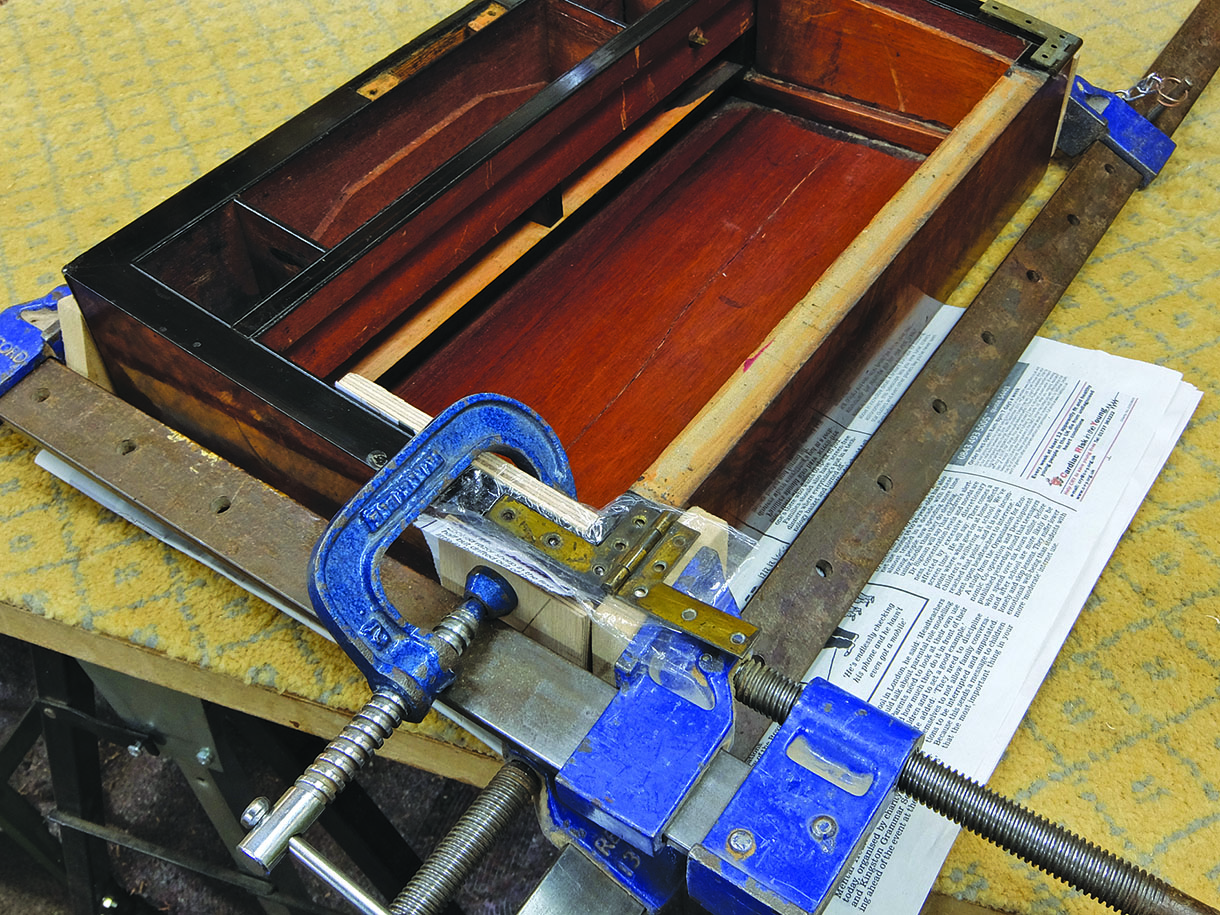
5. With the corner lifted the joint was levered open as much as possible and the old glue, dust and grime cleaned out before animal/hide glue was brushed into the joint and the corner clamped back into position. Once dry the existing screw holes were plugged with timber ready for the hinges to be remounted
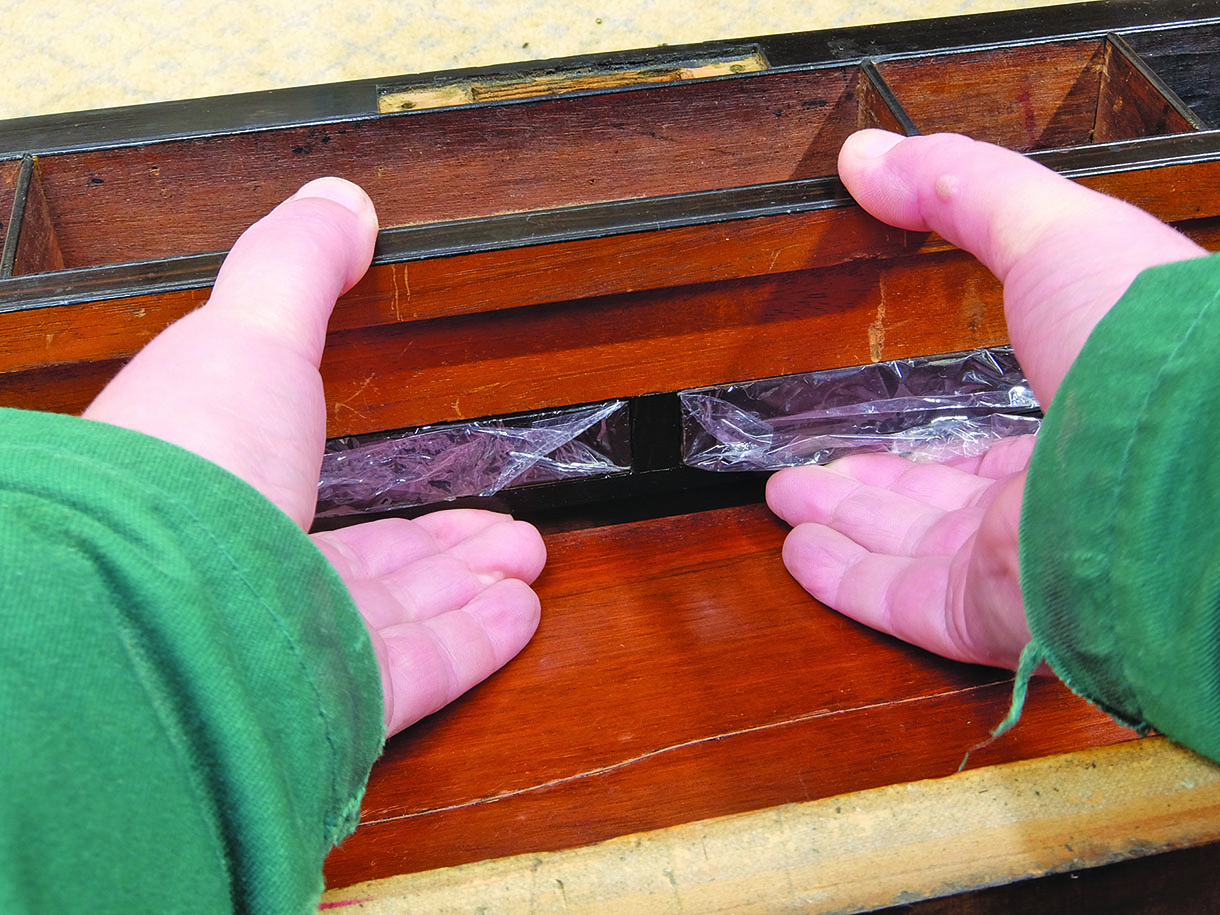
6. Pieces of old walnut veneer and thin ebony were cut in around the bottom edges of the box and the inner edges keeping as much of the original as possible. As ebony tends to be brittle the infill pieces were cut to shape using a jeweller’s piercing saw. The broken corner on the slope that covered the mechanism was repaired with a small section of ebony. Once dry the veneer repairs were, where necessary, levelled off using a cabinet scraper and abrasives taking care not to touch the original surfaces. The partition between the two secret drawers was cleaned up and glued back in place. Wrapping the sides of the drawers in cling film, the drawers were pushed into place and the correct position of the partition achieved avoiding it sticking to the drawers
Jeweller’s piercing saw
Readily available from tool and jewellery making suppliers. Traditionally used by jewellery makers for cutting metals, they are ideal for cutting veneers, bone, mother-of-pearl, etc. They use a fine-toothed blade that is held under tension. Saws start from £3.50 and blades start from £2.90 per pack of 12 depending on supplier.
Brass corners and lines
7. With the veneer repairs completed my attention turned to the brass work. The veneers and ground wood had shrunk over the years but the brass remains the same length causing the brass lines to pop out of their grooves, so each individual piece needed to be checked for length. The lines in the bottom front had at some stage been filled with some kind of filler, which had to be removed. The replacement brass was obtained from a specialist supplier so that the correct width of brass was used. Years ago when I carried out a lot of brass inlay restoration I made up some small chisel points that could be used by hand or inserted into a homemade scratch stock, these can then be altered in width as required
8. Very carefully, I ran a knife point down either side of the channel, then using the chisel point I eased the old filler out of the groove. They were also used to clean the grooves for the loose pieces of brass
9. The principle of fitting the brass is the same whether fitting replacement brass, as in the bottom front, or refitting the loose brass as in the top front. Starting with the short lengths the square cut ends were pushed tight to the inner veneer edges and checked for length. The mitres were then adjusted to reduce the length using a small needle file
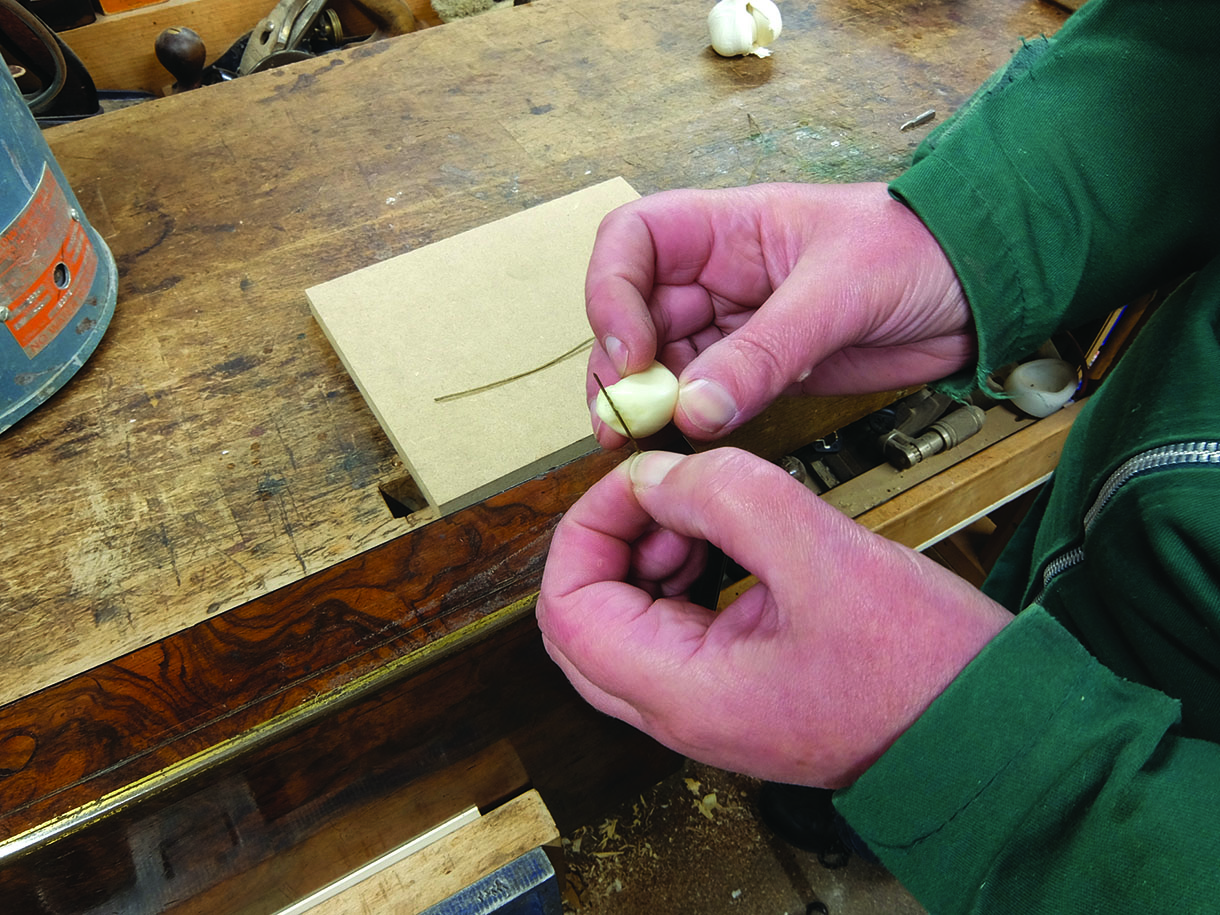
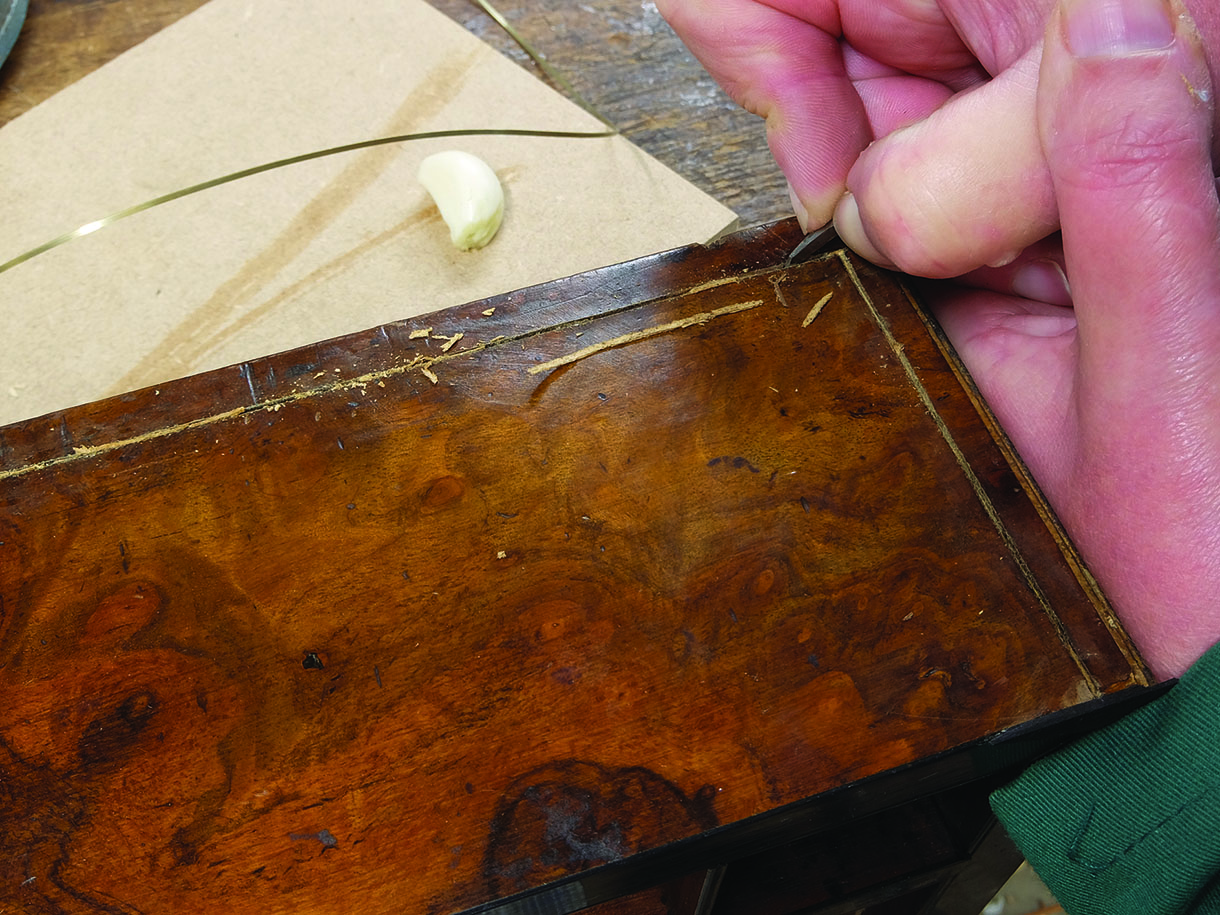
10. The next tip I learnt from an elderly restorer many years ago; don’t ask me why it works because truthfully I can’t answer you, but from much experience it aids fixing the brass. Taking a fresh clove of garlic cut in half I pulled the section of brass through the garlic. I then ran the edge of the garlic along the groove to squeeze the garlic juice into the groove
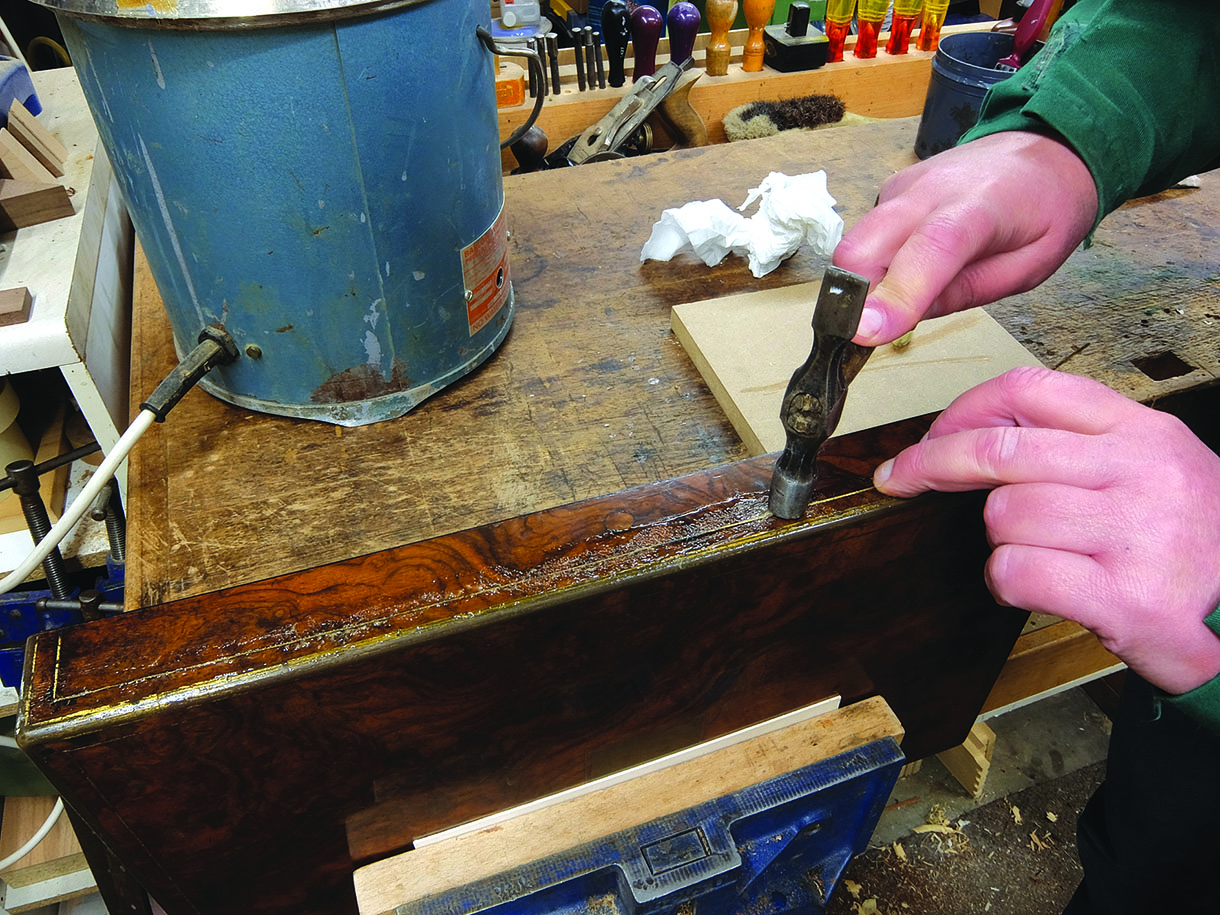
11. With the animal/hide glue applied the brass was pushed into the groove using the head of my small pin hammer. For the long lengths I glued two thirds of the length into place then adjusted the mitre, with the length correct I glued the last third
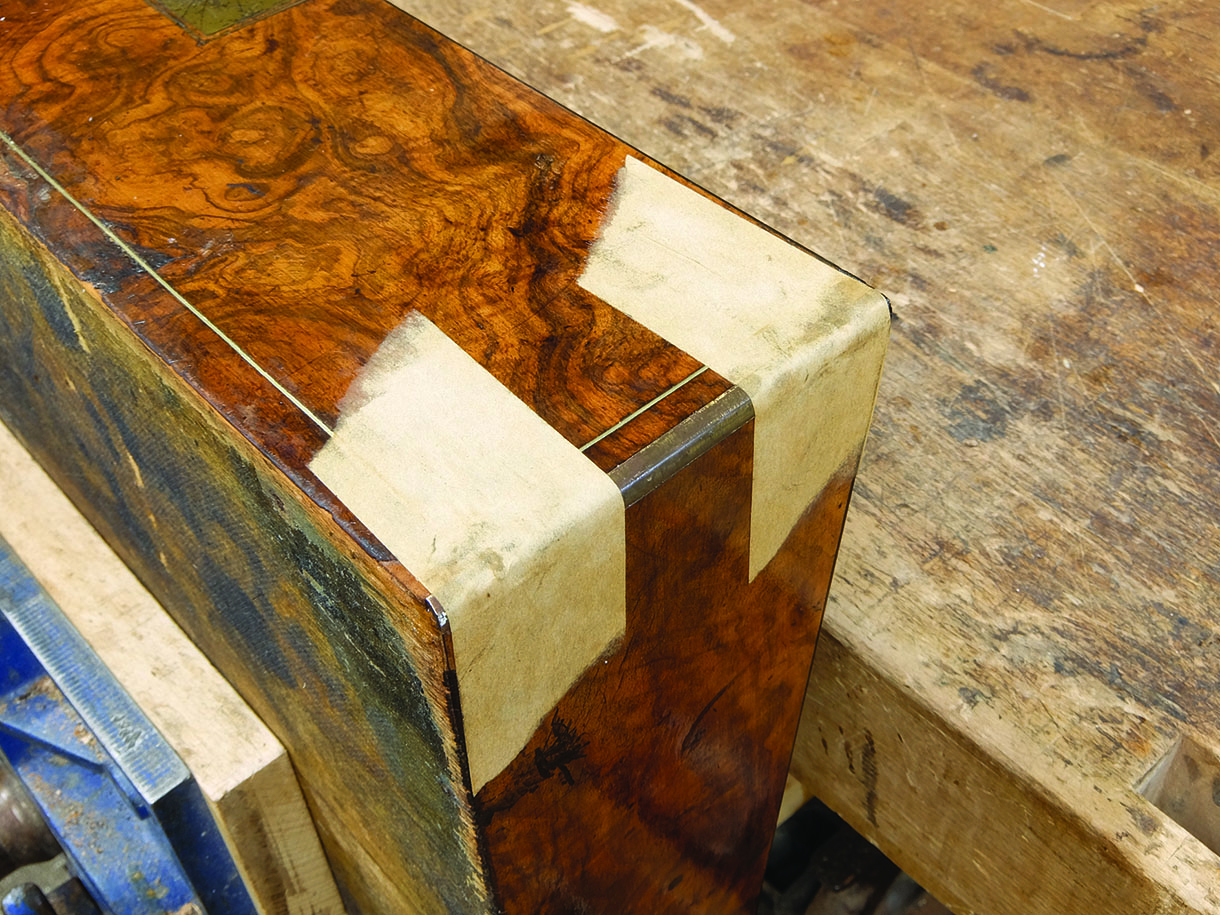
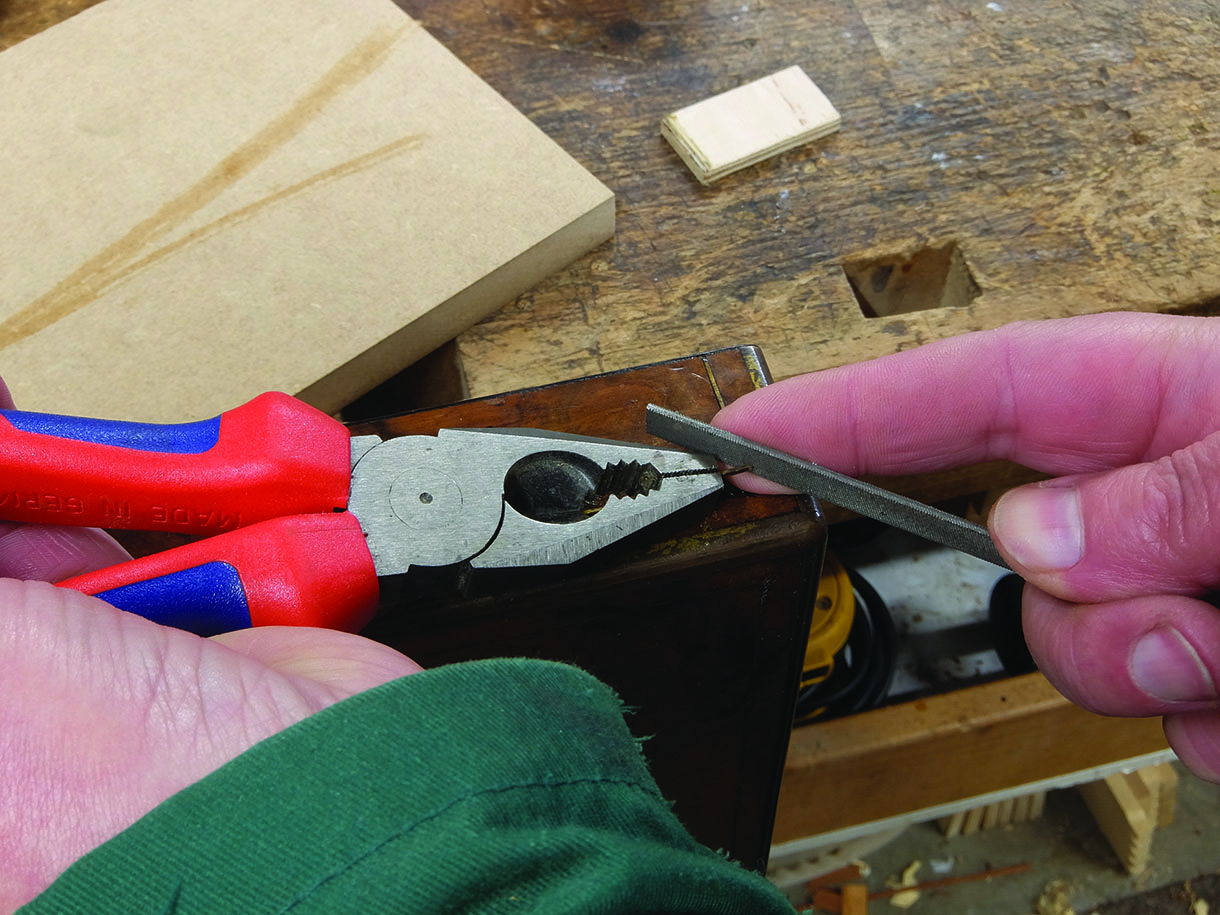
12. The quadrant corners, when originally made, had small pins fitted into the back to enable them to be fitted. As with many pieces, these pins get broken off and instead of being replaced they are drilled for a small pin from the front. In this case the large pin heads were proud of the brass quadrant. In order to refit them I slightly countersunk each hole to level the pin heads as much as possible. The brass quadrants and pins were coated with garlic and glued in place, I then taped each corner to create a bit more pressure until the glue had set
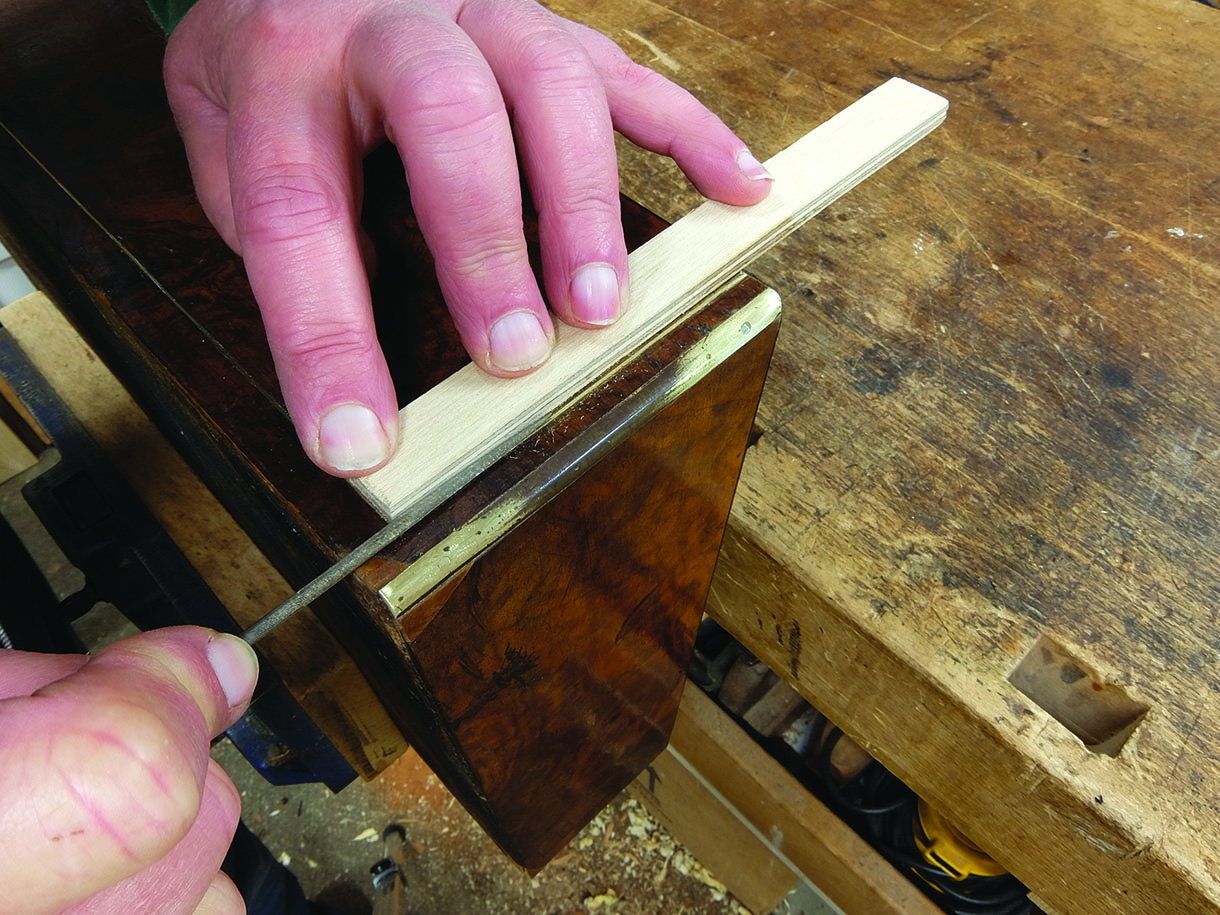
13. The pin heads and any edges that were proud of the veneer were levelled with a needle file before being finished with metal abrasives. Unfortunately this does tend to destroy part of the antique patina. With the quadrant back in place any raised areas of line were eased down with the needle file while protecting the polished surface
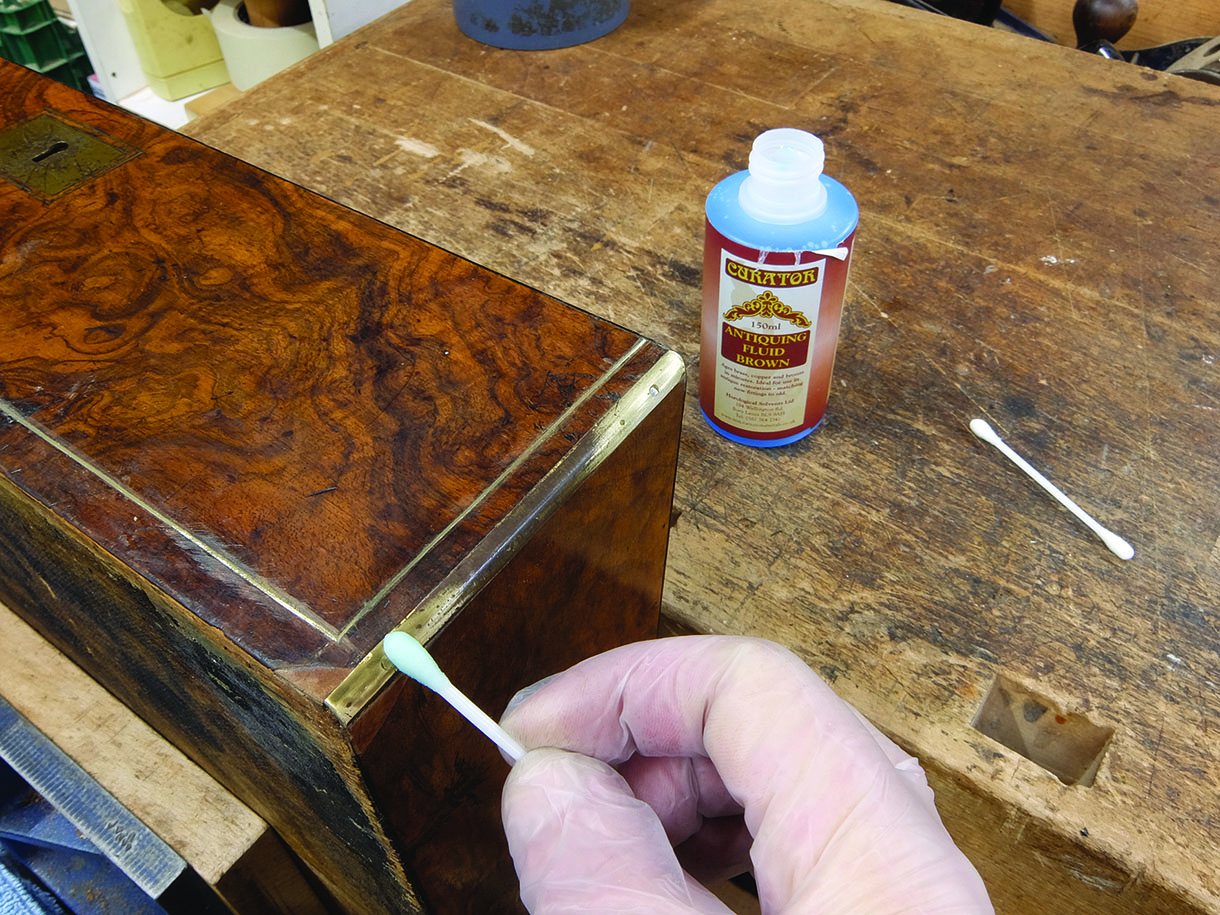
14. The areas of replaced brass line and brass quadrants were then treated with an antiquing fluid to tone the brass down. Applied with a cotton bud it was left to work until the tone was right and then neutralised with cold water on a clean cotton bud
Finishing
15. The veneer repairs were stained before being polished to match. The antiquing fluid on the brass was also sealed with a coat of polish before the whole writing slope inside and out was revived with a coat of ‘Bald’s Balm’. Once dry the repairs were gently wired with 0000 wire wool to finish toning them in before the whole writing slope was waxed
16. The hinges were refitted before the writing slope was sent away to be relined by a specialist who hand-colours the leather to an antique green and lays the fabric hinge before laying the leather and adding the lifting tabs. Once this was dry he tooled the Greek key pattern around the edge with gold leaf
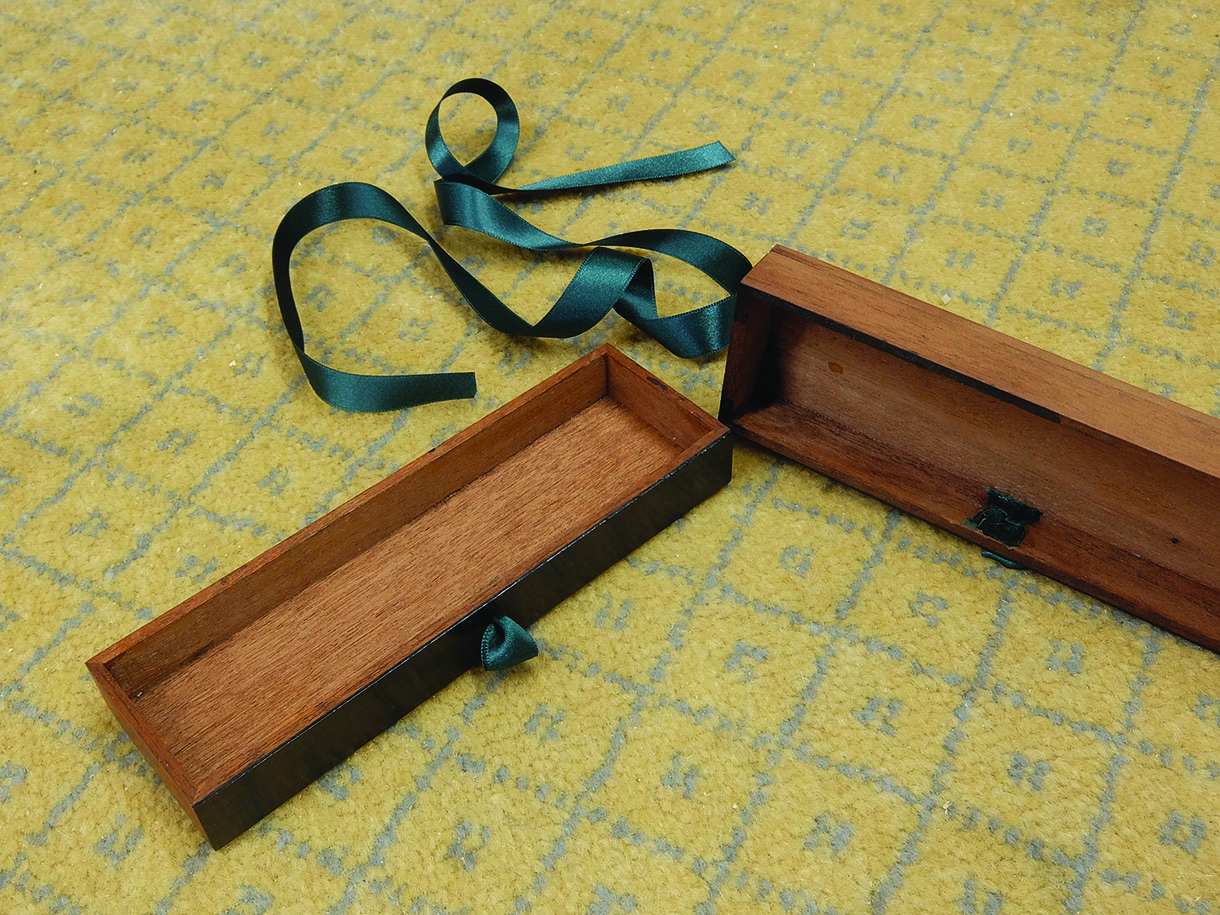
17. Fabric pulls were added to the secret drawers by passing a loop of fabric through the hole and spreading the two ends on the back and gluing them down with a touch of animal/hide glue
18. Once the mechanism for the secret drawer was corrected so that it caught properly the cover piece was glued back in place. Again I placed a small piece of cling film between the partition that lifts the mechanism and the cover to ensure the two pieces did not get stuck together
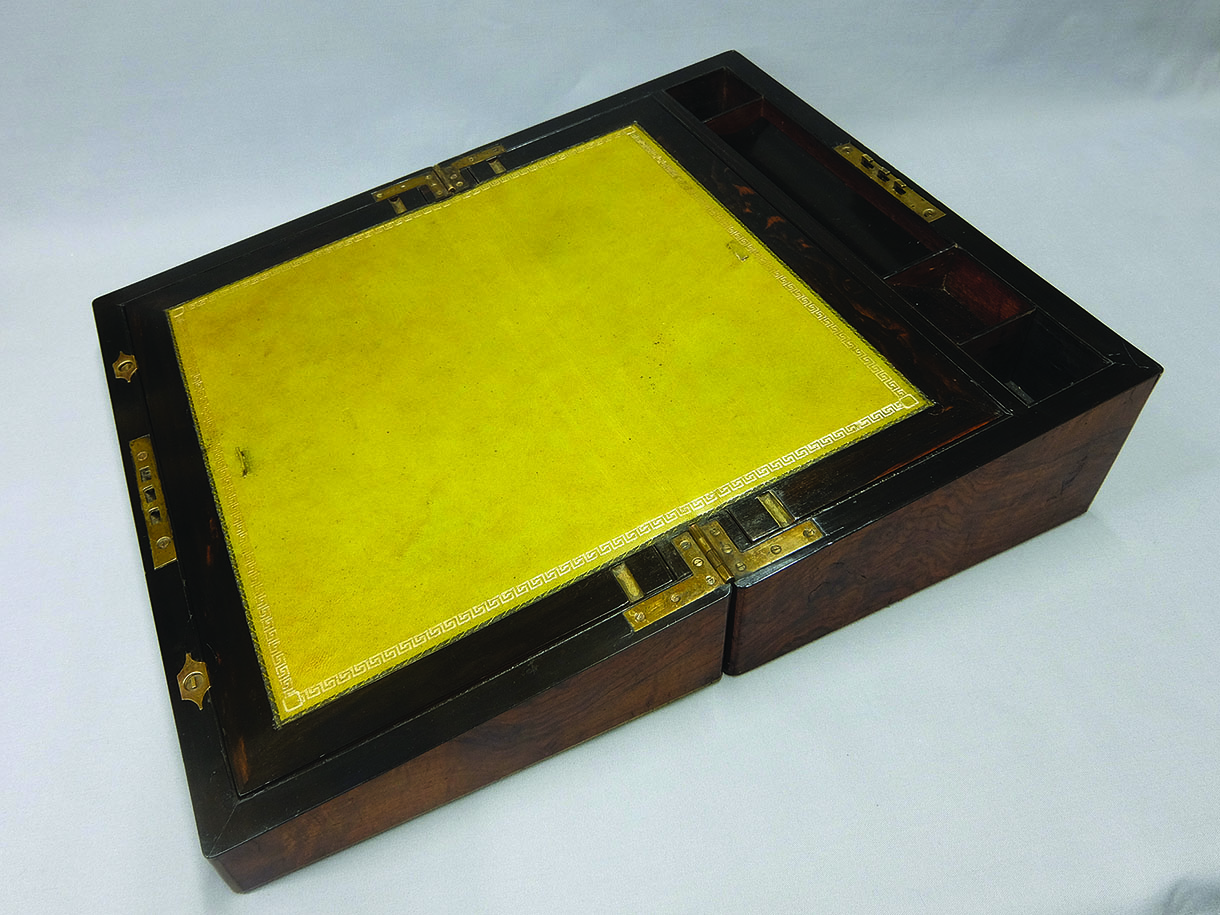
19. New baize was fitted to the bottom and the writing slope was then ready to be returned to the customers


1 Comment
I have read two different theories about the garlic. First is that it etches the brass to allow the glue to bond. I would think that if there was etching going on the appearance of the polished surface might change there being no way to keep the garlic away from the exposed side. The second purpose is supposedly that it causes the glue to remain slightly elastic.